Results 1 to 13 of 13

Thread: Sega CD Model 1 Tray Issues?

  1. #1
    Insert Coin (Level 0) Go-Kyo's Avatar
    Join Date
    Nov 2011
    Location
    Las Vegas
    Posts
    11
    Thanks Thanks Given 
    0
    Thanks Thanks Received 
    0
    Thanked in
    0 Posts
    PSN
    Go-Kyoroji
    3DS Friend
    2277-6640-1747

    Default Sega CD Model 1 Tray Issues?

    Well Oldskool and I is currently trying to get a SCD Model 1 up and running we've been working on this thing for 2 days now. First problem of course was the fuse so we modded that so we can insert fuses externally if it would blow again.

    We fired it up and made it to the BIOS screen tray stayed closed and prompt us to open to insert disc soon as we do so that's where the problem occur we learned that pushing the actual tray to get the laser assembly to drop down is a no go.. you actually have to use the big gear to make the mechanism to work.

    So after hours of adjusting the gears and making the laser assembly drop down manually with the big gear we put it back together hoping it would work like it should with no luck we ruled out that it could be the belt not pulling up the lazer drive when the disc is insert.

    Now I read that some users that's familiar with repairs on these systems use O-rings the belt on the system now is pretty loose and I was going to see if an O-ring will do the job but I want to know which size will do?

    I know if the ring is to tight that it will be heavy on the motor so I would need something that will fit just right.

  2. #2
    Pretzel (Level 4) APE992's Avatar
    Join Date
    Jun 2007
    Location
    Chico, CA
    Posts
    999
    Thanks Thanks Given 
    0
    Thanks Thanks Received 
    0
    Thanked in
    0 Posts
    Xbox LIVE
    APE992

    Default

    IIRC it is a "square" belt rather than a "round" belt if that makes any sense, which can make finding a replacement a bit more difficult on its own.
    I fix things. You name it, I'll work on it. Want something modded? Recapped?

  3. #3
    Insert Coin (Level 0) Go-Kyo's Avatar
    Join Date
    Nov 2011
    Location
    Las Vegas
    Posts
    11
    Thanks Thanks Given 
    0
    Thanks Thanks Received 
    0
    Thanked in
    0 Posts
    PSN
    Go-Kyoroji
    3DS Friend
    2277-6640-1747

    Default

    Yes, I also read that it was an square belt that's originally in the system but since it's hard to find on these very forums I read that some users use O-Rings instead.

  4. #4
    Pretzel (Level 4)
    Join Date
    Sep 2005
    Posts
    819
    Thanks Thanks Given 
    0
    Thanks Thanks Received 
    0
    Thanked in
    0 Posts

    Default

    Quote Originally Posted by APE992 View Post
    IIRC it is a "square" belt rather than a "round" belt if that makes any sense, which can make finding a replacement a bit more difficult on its own.
    A round belt will work too but may be more prone to slipping.

  5. #5
    Captain Caveman (and Son!) Custom rank graphic
    Sunnyvale's Avatar
    Join Date
    Aug 2011
    Location
    Pacific Northwest, USA
    Posts
    1,287
    Thanks Thanks Given 
    0
    Thanks Thanks Received 
    0
    Thanked in
    0 Posts
    Xbox LIVE
    My XBOX is dead, not live.
    PSN
    PSN? PSchah!
    3DS Friend
    Friendless :(

    Default

    I dunno which one would fit exactly, but whenever I need a square belt, I look to the turntable belt sellers. Here's one:

    http://www.turntablebelts.com/york.htm

    Google 'Square Turntable Belts', and that'll get you on the right path, hopefully. If not, look to cassette deck belts next. Plenty of them are square. Or if it's too small in turntable-land, look to reel-to-reel belts.

  6. #6
    Insert Coin (Level 0) Go-Kyo's Avatar
    Join Date
    Nov 2011
    Location
    Las Vegas
    Posts
    11
    Thanks Thanks Given 
    0
    Thanks Thanks Received 
    0
    Thanked in
    0 Posts
    PSN
    Go-Kyoroji
    3DS Friend
    2277-6640-1747

    Default

    Thank you guys for the quick replies we finally fixed the issue Oldskool and I! well Oldskool was hands on and I was shooting suggestions took us a couple of days to figure this out but now we can diagnose and repair these things.

    Also want to thank Yoshi64 for selling me the SCD Model 1 today we actually used the laser out of it, the one originally had a bad laser it seems or the pots were not adjusted correctly and we didn't want to tamper with them.

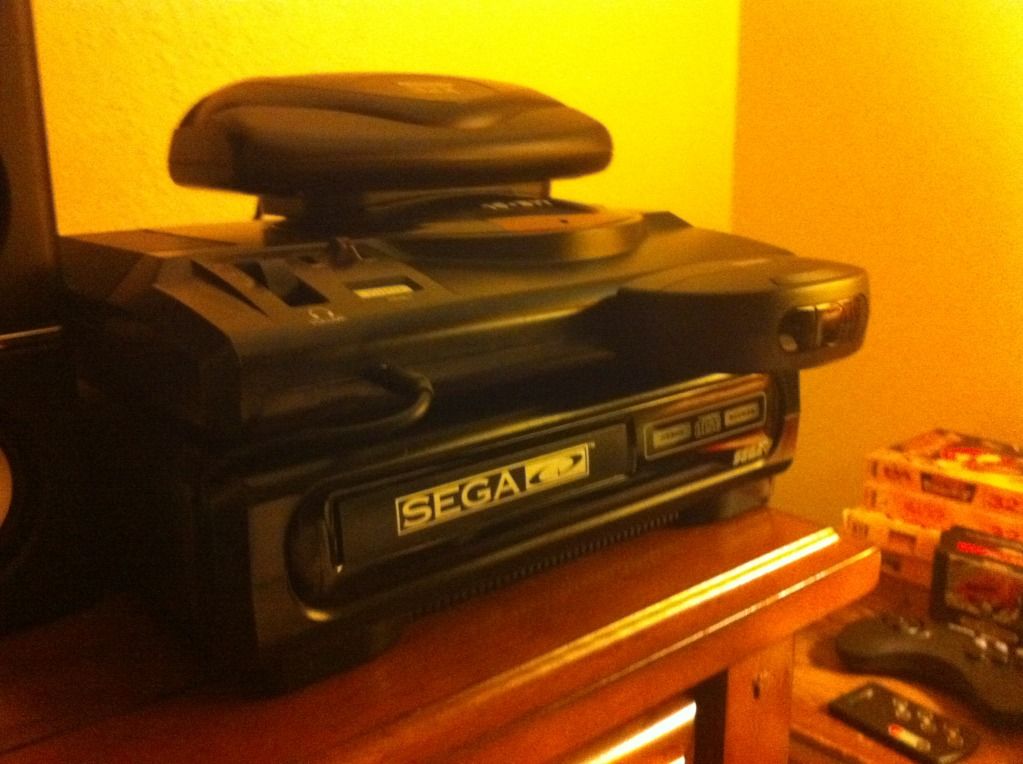
    We also narrowed down the opening and closing of the tray pretty much bad belts on both systems we replaced it with an perfectly fitting O-Ring that I bought from Pep Boys it came in an assorted pack. (Help O-Rings 80000) For $2.99 and now the tray stays closed and open so smoothly ^^' Here's a picture of the beauty all setup.

    Last edited by Go-Kyo; 01-02-2012 at 10:15 PM.

  7. #7
    Pear (Level 6) Oldskool's Avatar
    Join Date
    Oct 2009
    Location
    Las Vegas
    Posts
    1,262
    Thanks Thanks Given 
    0
    Thanks Thanks Received 
    0
    Thanked in
    0 Posts

    Default

    Right on. The pictures don't do it justice. It's a beautiful piece of machinery that works and purrs like a kitten now!

    Talk about frustrating though. 3 problems with it! (But worked fine according to the eBay seller)

    The HELP O-ring from the auto parts store worked PERFECT. Nice and snug, but with enough slack to not ruin the gear motor.

    The external fuse mod was real nice, I recommend it to anyone. Sure will make it easier in the future if the fuse should blow again.

    Good thing we found another Sega CD locally for cheap - the laser assembly was put to good use from it.

    Few things learned.. never pull the tray in and out by hand, it will disconnect it'self from the big black gear. If you want to test the operation of the tray mechanisms turn the big gear instead.

    The proper way to line up the big gear when re-installing the tray is to first manually turn the big gear so that the laser assembly is in the full "up" position. Then turn the gear so that the notchless side faces the edge of the tray. Then you can insert the tray without the gear turning.. right near the end you will have to move the gear a little bit to lock it into place. As soon as the gear is locked into place you can manually turn the big gear to "close" position until the laser goes into the locked upwards position.

    Once you figure it out it's very easy to remove and install the tray - it's just figuring it out that's the hard part.

    When the cd assembly is in the up position, the "close" limit switch should be slightly bent. To test the operation turn the big gear and see if the laser assembly drops down, and then see if the tray comes out.. once the tray is all the way in the "open" position check the "open" limit switch to see if it's been triggered. And then finally, if all is well, turn the gear by hand (or use a tool) until it's fully closed again and do a final check to see if the switch is activated in the close position. If it is then you should be good to go providing you have a good laser and the belt is ok.

    The O-ring actually worked out VERY well, and I don't see it slipping any time soon. It's hard to explain but if anyone has any questions just ask.
    Last edited by Oldskool; 01-03-2012 at 12:46 AM.

  8. #8
    Pear (Level 6) Oldskool's Avatar
    Join Date
    Oct 2009
    Location
    Las Vegas
    Posts
    1,262
    Thanks Thanks Given 
    0
    Thanks Thanks Received 
    0
    Thanked in
    0 Posts

    Default

    The bent looking fuse at the front of the power PCB labeled "F1" is the fuse that needs to be replaced for a system that won't power on. It looks like a resistor, but it's actually a fuse. To test it check for continuity through it. If you don't get continuity it's bad.

    What we did is I removed the fuse entirely and soldered two wires into the holes where the legs of the fuse go into the PCB. I soldered them underneath the PCB so that the wires could be routed in a hidden fashion for that clean look.


    The mess with both systems apart, taking the best parts from both to make one very nicely working system.


    Next we are going to try to get the parts machine working. Will try to take better pictures of things to help explain things.

    On the parts machine it's going to need:

    The external fuse mod - fuse is blown
    New/Used laser
    New belt

    And lastly, a part that keeps the laser assembly/pcb moving up and down where it hinges is broken. So the whole assembly doesn't line up properly when dropping down and going up. A new/used laser assembly may cover that if we can get it with a working tray assembly as well.
    Last edited by Oldskool; 01-03-2012 at 12:44 AM.

  9. #9
    Apple (Level 5) xelement5x's Avatar
    Join Date
    Feb 2011
    Location
    Southwest US
    Posts
    1,052
    Thanks Thanks Given 
    0
    Thanks Thanks Received 
    0
    Thanked in
    0 Posts

    Default

    I wish I'd been around sooner but it looks like you guys figured it out just fine. I had the same issue with the belt and got a pack of O-rings from advance auto parts and that did the job like a charm for me. The most confusing part for me was actually getting the whole tray back in and aligned right with the gear.

  10. #10
    Pretzel (Level 4) APE992's Avatar
    Join Date
    Jun 2007
    Location
    Chico, CA
    Posts
    999
    Thanks Thanks Given 
    0
    Thanks Thanks Received 
    0
    Thanked in
    0 Posts
    Xbox LIVE
    APE992

    Default

    Might be worth putting in a PPTC fuse if you can find one of an appropriate value. I've been installing them into PS1 and PS2s with blown fuses for vibration. Waste of money to replace one when you can have it reset itself.
    I fix things. You name it, I'll work on it. Want something modded? Recapped?

  11. #11
    Pac-Man (Level 10) FABombjoy's Avatar
    Join Date
    Jul 2002
    Location
    Lansing, MI
    Posts
    2,145
    Thanks Thanks Given 
    0
    Thanks Thanks Received 
    0
    Thanked in
    0 Posts

    Default

    All the PPTC datasheets that I've read show that they have really slow reaction time.

    For example, the Sega CD uses a 2.5A fuse, and the equivalent TE Connectivity PTC (RUEF250) can sustain 12.5A for 10 seconds. That's a long time for something downstream to flame out. By comparison, an OEM-type 2.5A pico fuse passing 5A will open within 1 second.
    Console5.com - Console parts, kits, games and more. [shop] [wiki] [RSS] [f] [t]

  12. #12
    Pretzel (Level 4) APE992's Avatar
    Join Date
    Jun 2007
    Location
    Chico, CA
    Posts
    999
    Thanks Thanks Given 
    0
    Thanks Thanks Received 
    0
    Thanked in
    0 Posts
    Xbox LIVE
    APE992

    Default

    I would have to agree with you there. The 800ma PPTC fuses I swapped into Playstations have a MUCH quicker reaction time almost on par with traditional fuses. Granted the reason the last fuse for vibration blew, that I replaced, was because of a 3rd party controller drawing what was likely 50-100ma more juice than the fuse would allow. Obviously having a slightly longer than normal reaction time there would be just fine, however bad soldering has been the cause of most fuse replacements I've done.

    I'd imagine if there is a fuse that meets the requirements it might be prohibitively expensive.
    I fix things. You name it, I'll work on it. Want something modded? Recapped?

  13. #13
    Pear (Level 6) Oldskool's Avatar
    Join Date
    Oct 2009
    Location
    Las Vegas
    Posts
    1,262
    Thanks Thanks Given 
    0
    Thanks Thanks Received 
    0
    Thanked in
    0 Posts

    Default

    That's interesting about the fuses that reset themselves. I think the route we went with should be just fine though. The fuses were 2.5A which is spec and came in a 2 pack for a few dollars. Not terribly expensive, and there is a spare in case the first one blows. Really, as long as the console is on a surge protector and the proper AC adapter is being used - it shouldn't blow.

    Kyo - you should take a picture of the back of the console to show the external fuse mod for people that have not seen it before.

    I think it looks clean, even if it does stick out the back of the console slightly. We went for the opposite side of the rear because the fuse holder that he found was the long type and it needed the room to clear. Anywhere else and it would have hit the big RF shield. Next time around a shorter fuse holder would probably be better.

    Does anyone know where a working CD laser lense/tray assembly might be? That's really all we need to get it working again.. does anyone know if all the new KSS-420A lasers you see for sale online and on eBay will work? The only photos I see does not look like the one in the console, maybe they are using stock photos.

Similar Threads

  1. Replies: 7
    Last Post: 08-17-2013, 03:51 PM
  2. Sega Saturn model 1 "Disc tray open"
    By BetaWolf47 in forum Technical and Restoration Society
    Replies: 10
    Last Post: 03-22-2010, 08:26 AM
  3. Price Check Sega CD II tray extender for Genesis model 1
    By vintagegamecrazy in forum Buying and Selling
    Replies: 7
    Last Post: 11-06-2008, 02:02 PM
  4. Sega cdx tray lid buttom sticks down sometimes
    By kngdiablo in forum Classic Gaming
    Replies: 5
    Last Post: 08-17-2008, 07:52 PM
  5. Sega CD tray not ejecting
    By swampdog in forum Technical and Restoration Society
    Replies: 4
    Last Post: 06-30-2008, 10:45 AM

Posting Permissions

  • You may not post new threads
  • You may not post replies
  • You may not post attachments
  • You may not edit your posts
  •