Results 1 to 12 of 12

Thread: New Pokedex GBA Mod (Alpha Sapphire & Omega Ruby)

  1. #1
    Unapologetic Japanophile teh_d3th_st4r's Avatar
    Join Date
    Mar 2013
    Location
    Santa Cruz, CA
    Posts
    46
    Thanks Thanks Given 
    0
    Thanks Thanks Received 
    0
    Thanked in
    0 Posts

    Default New Pokedex GBA Mod (Alpha Sapphire & Omega Ruby)

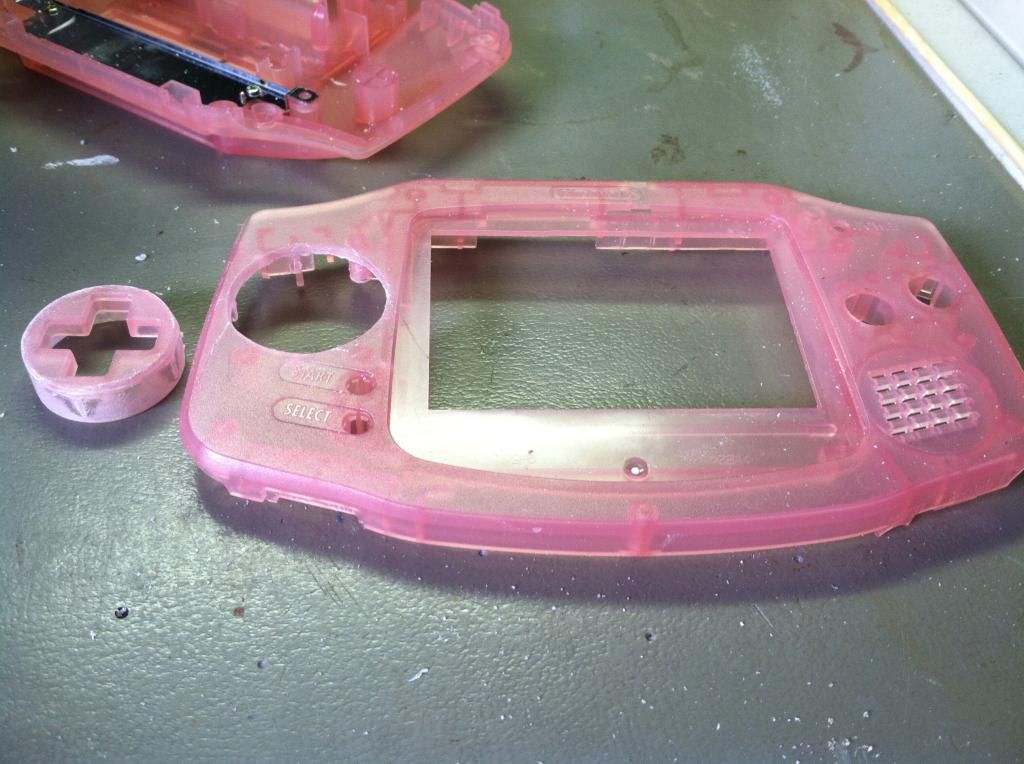
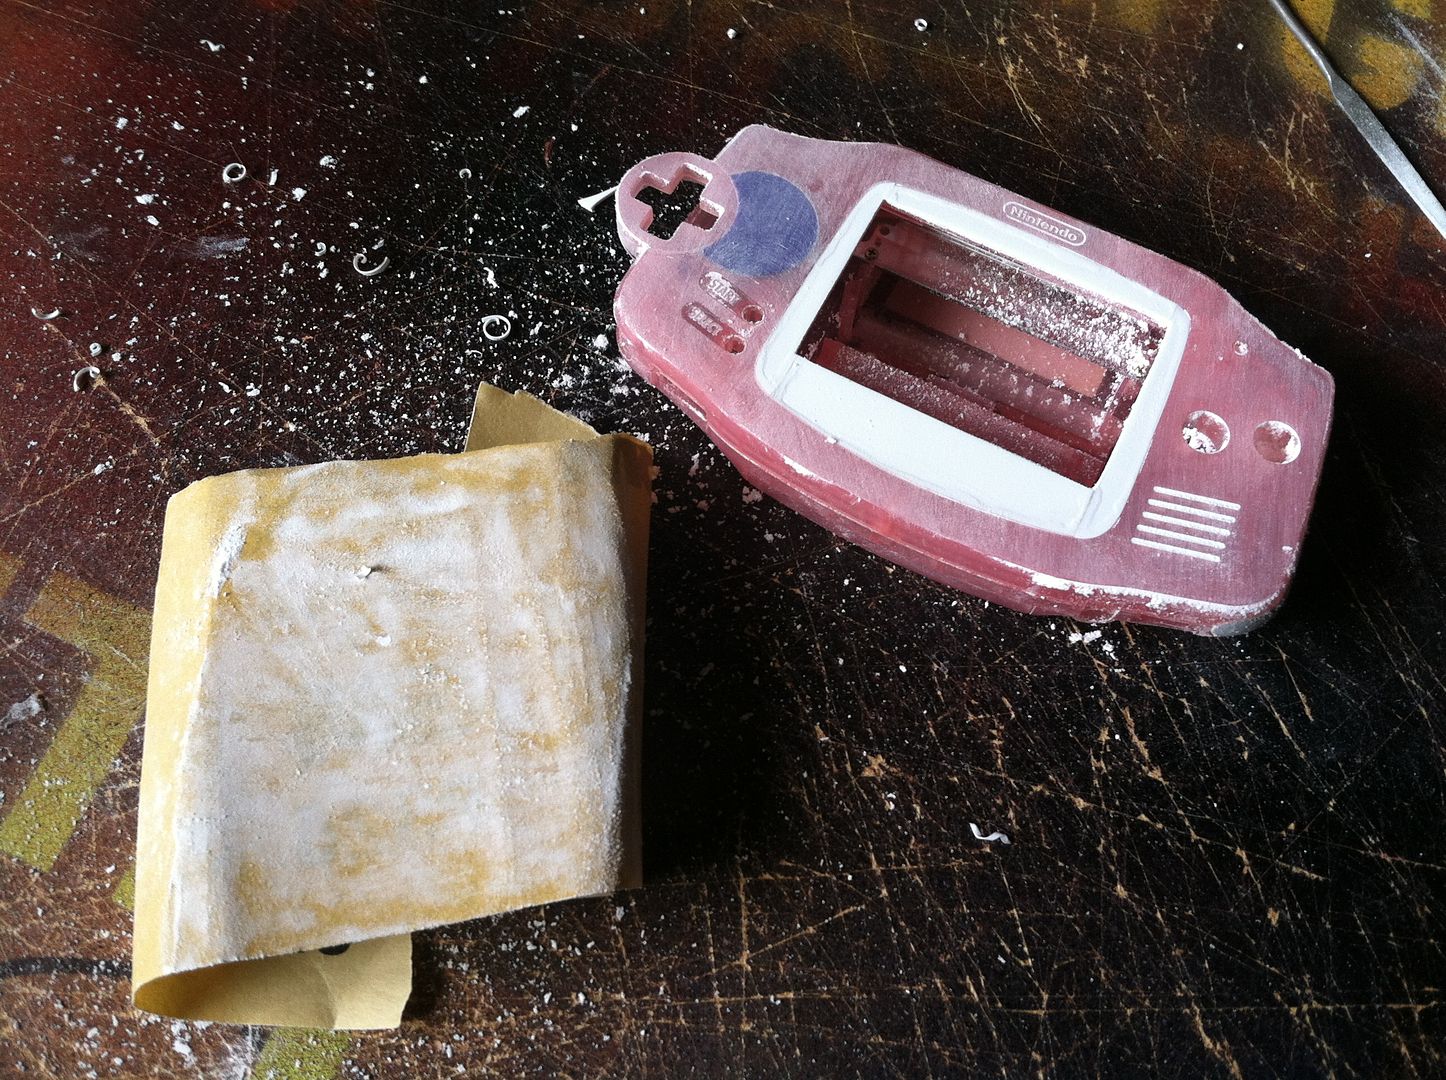
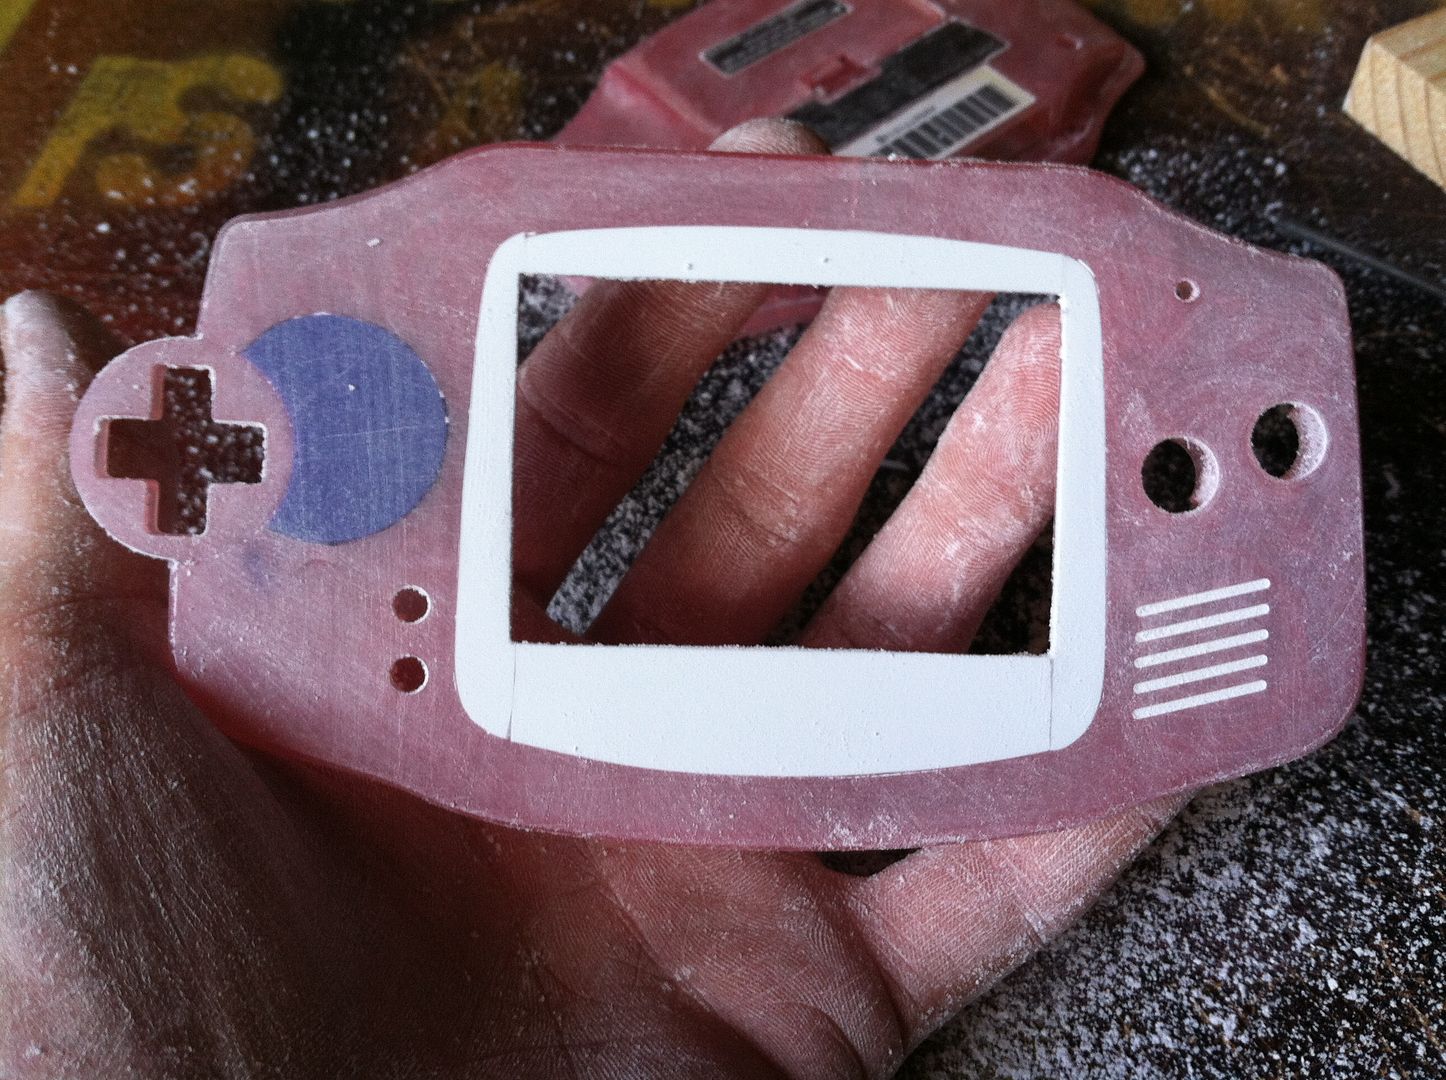
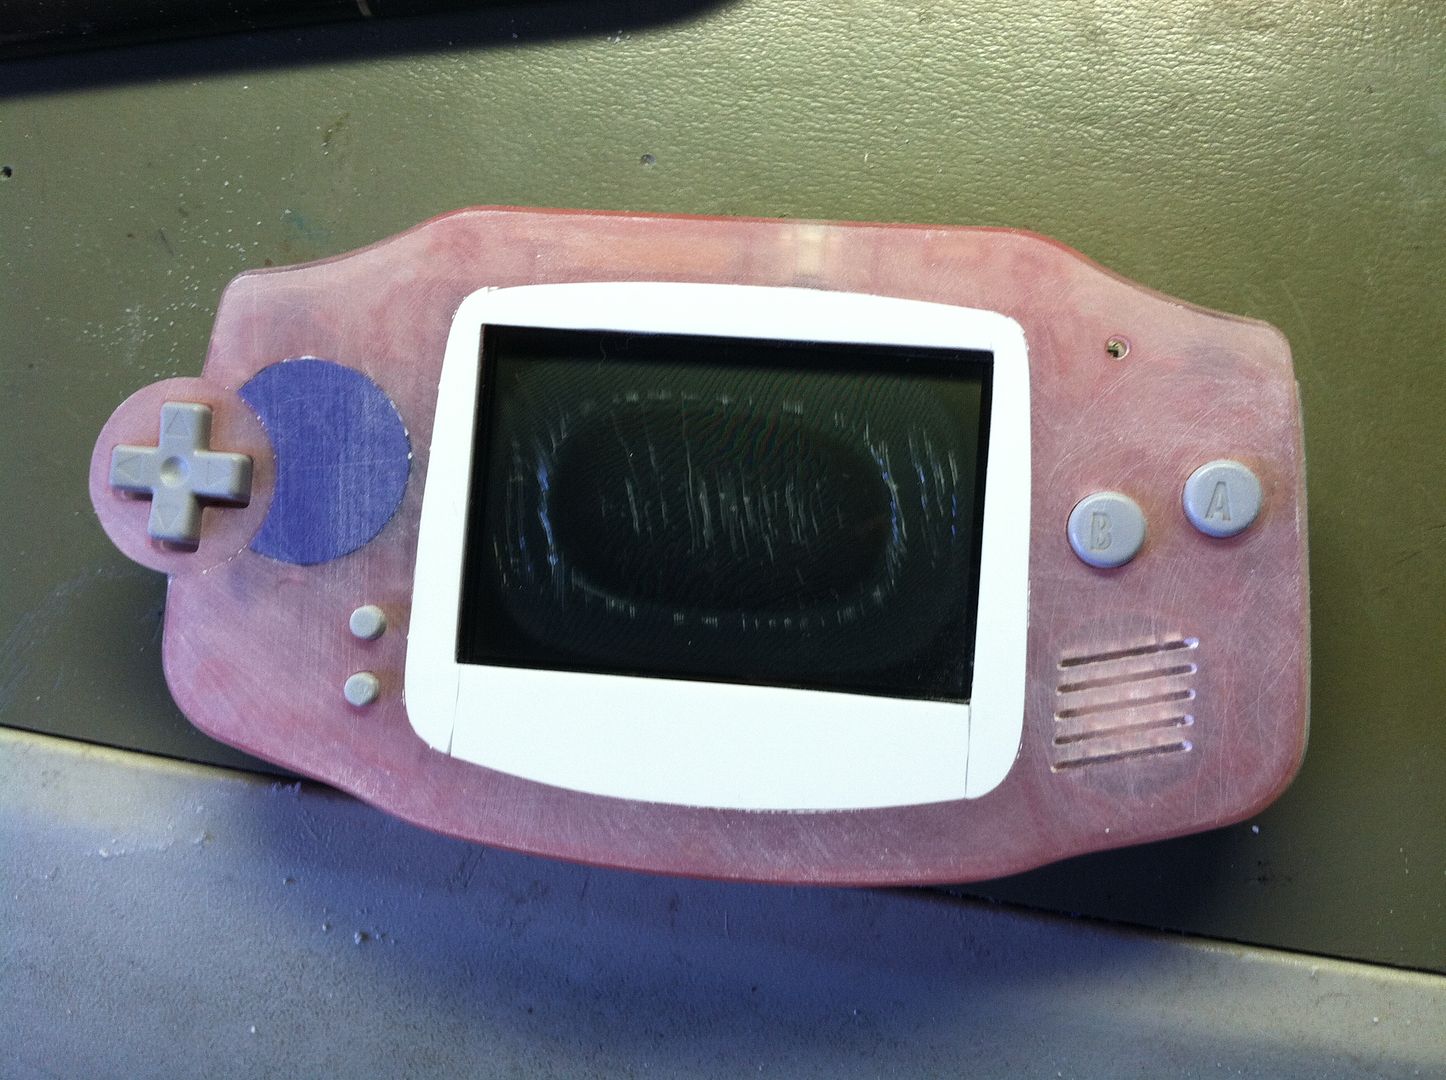
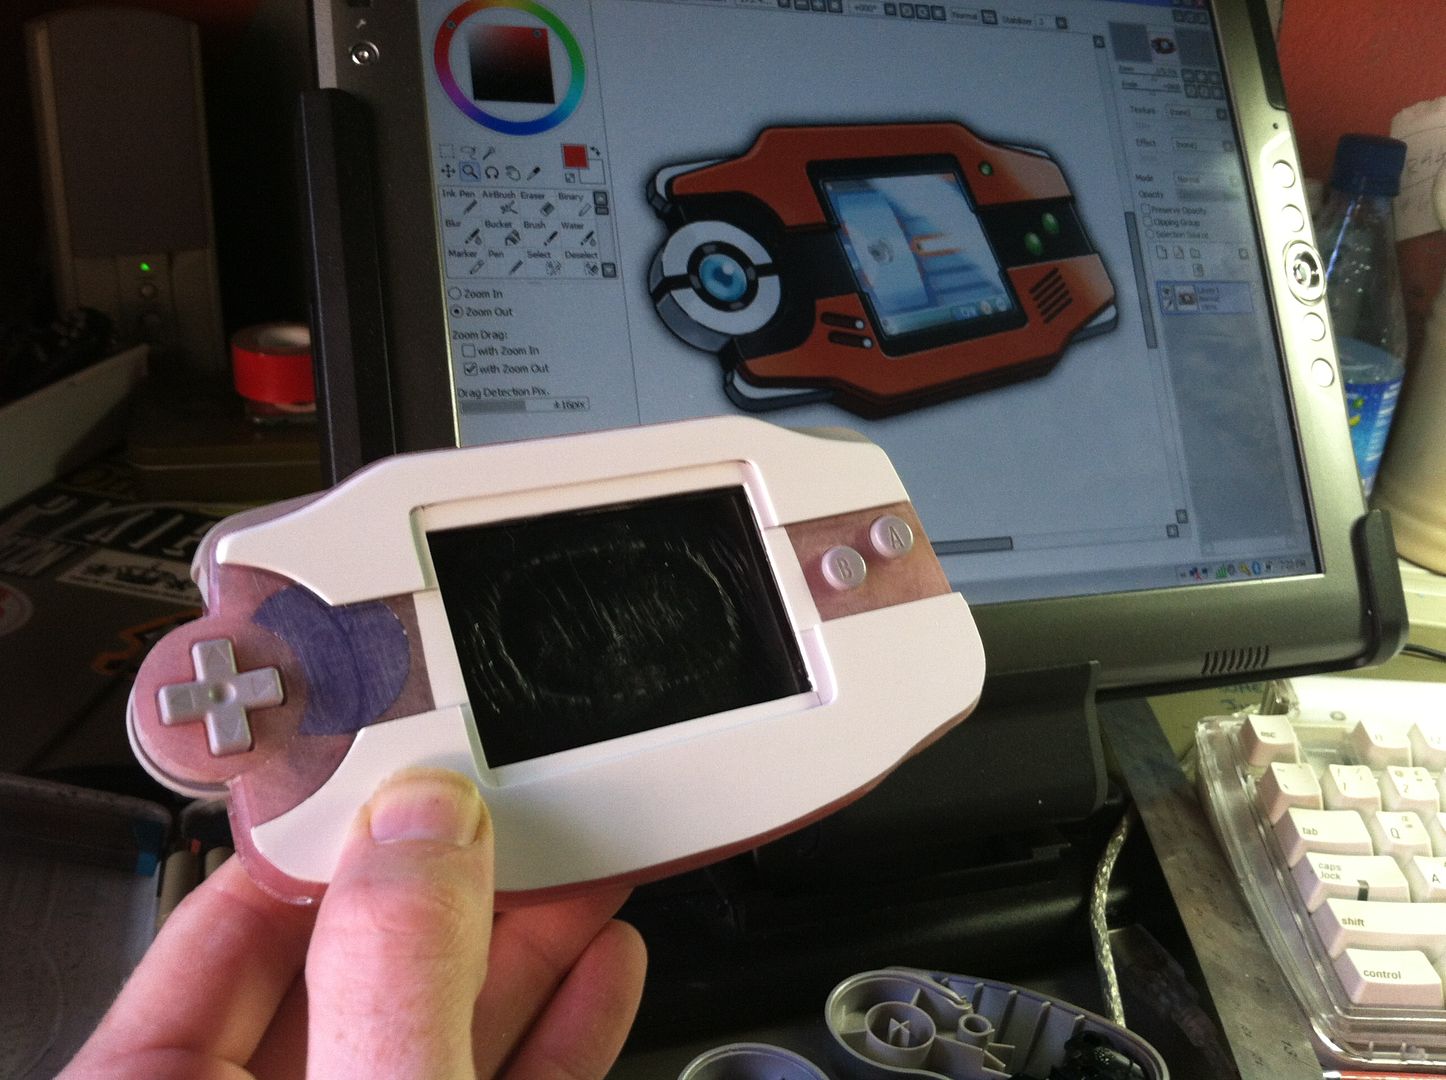
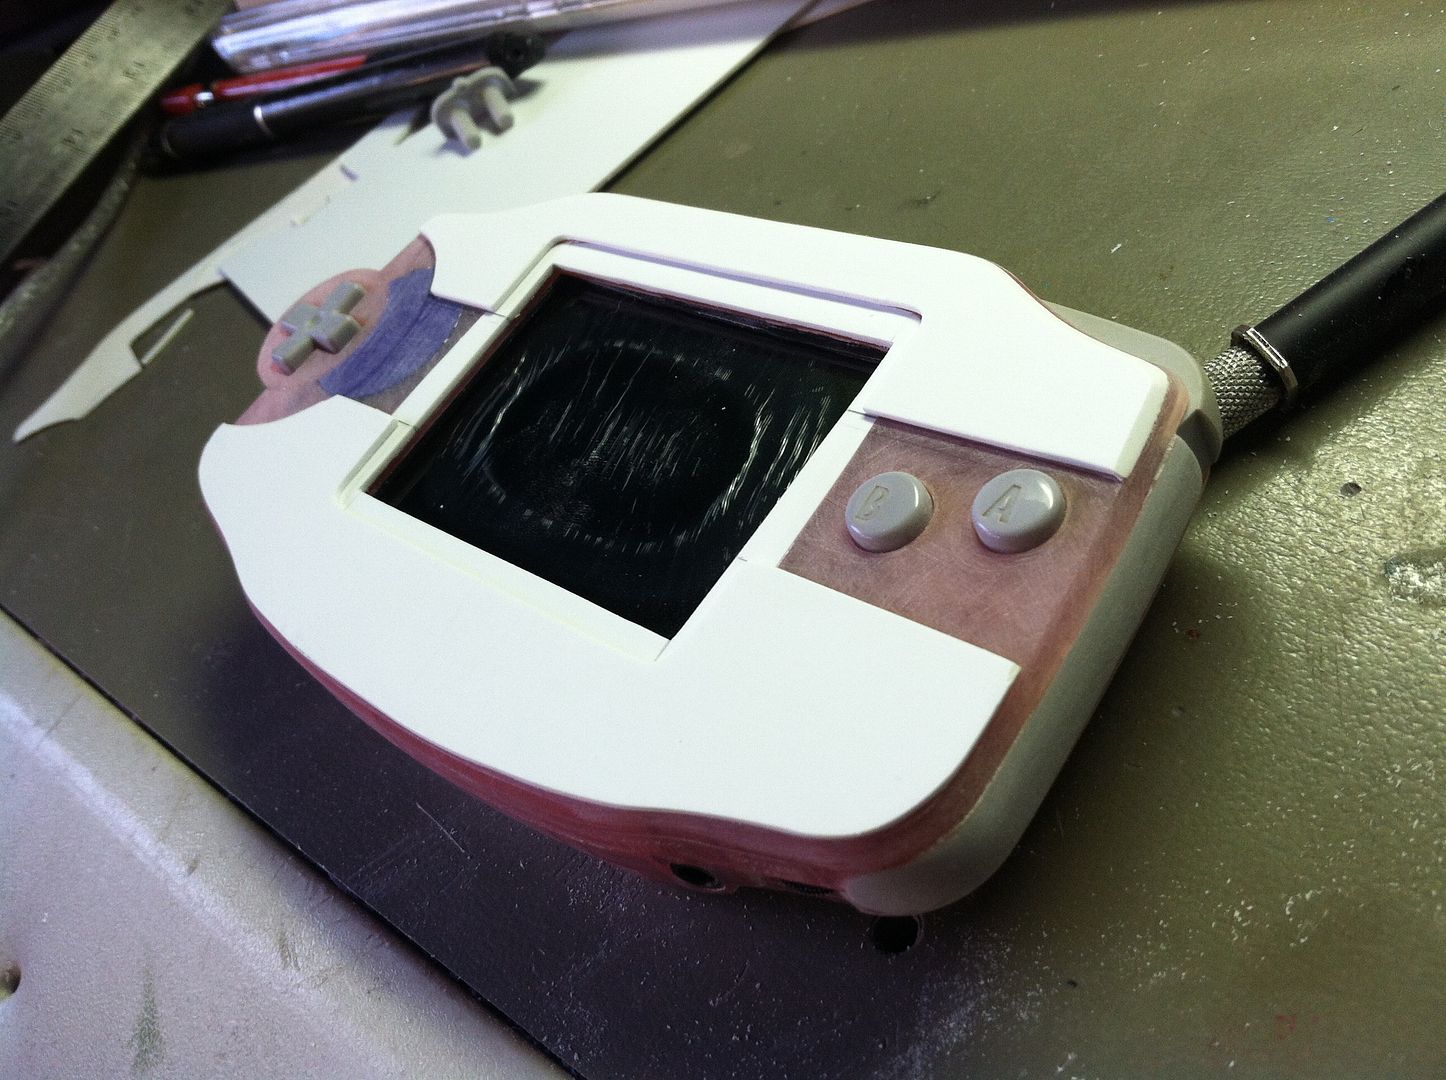
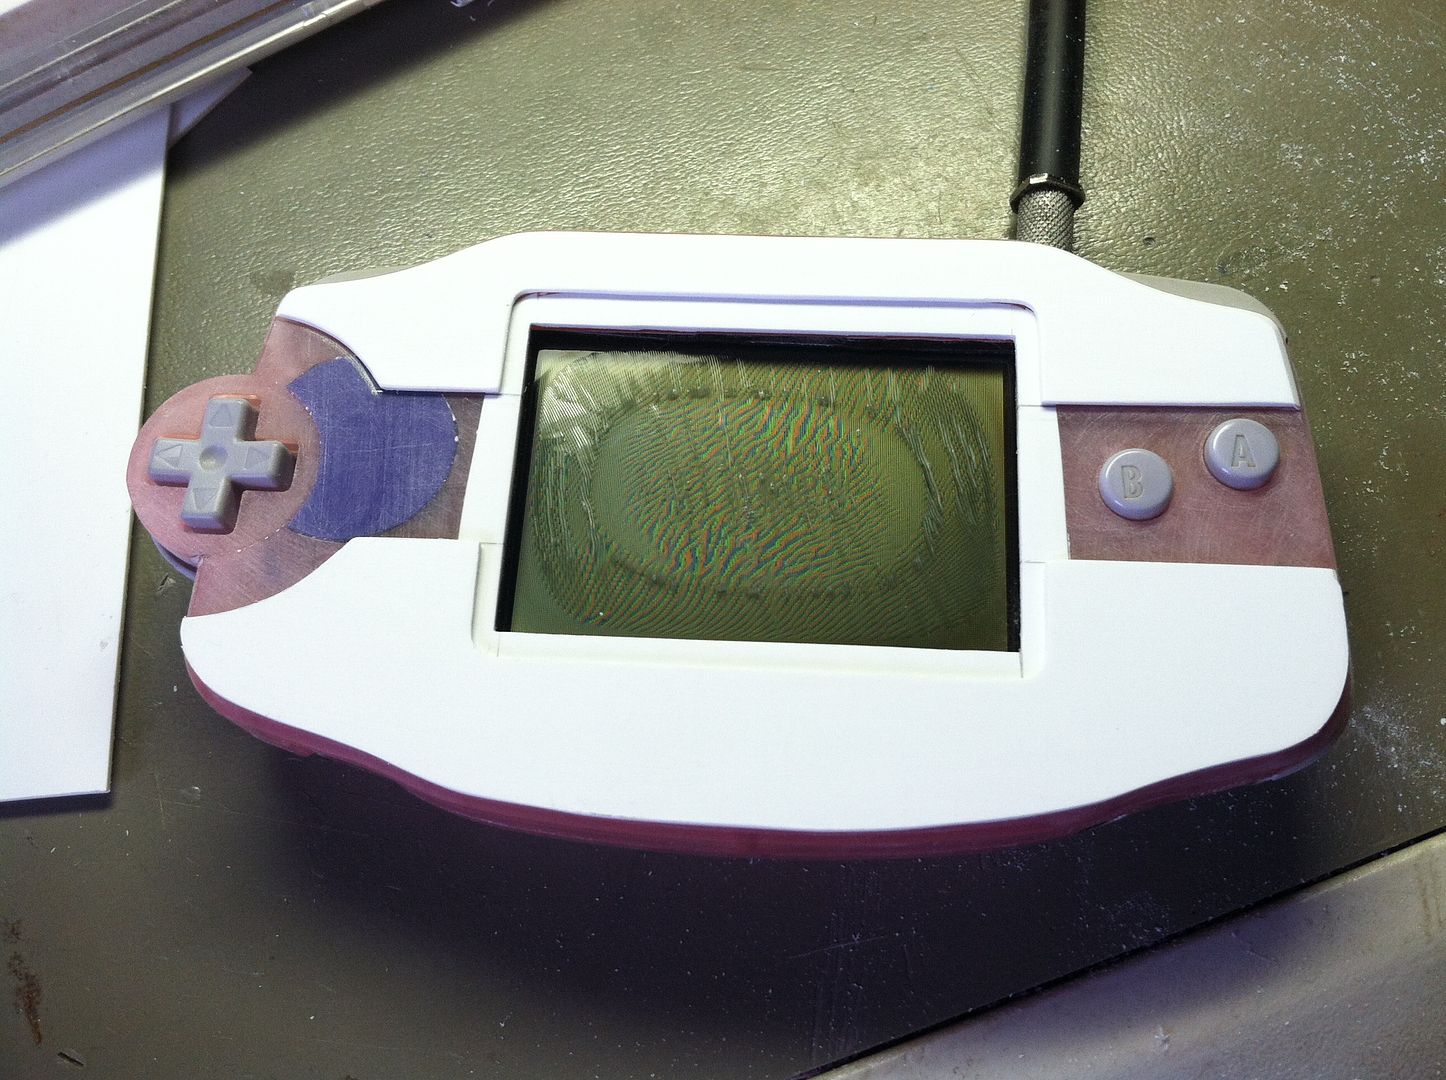
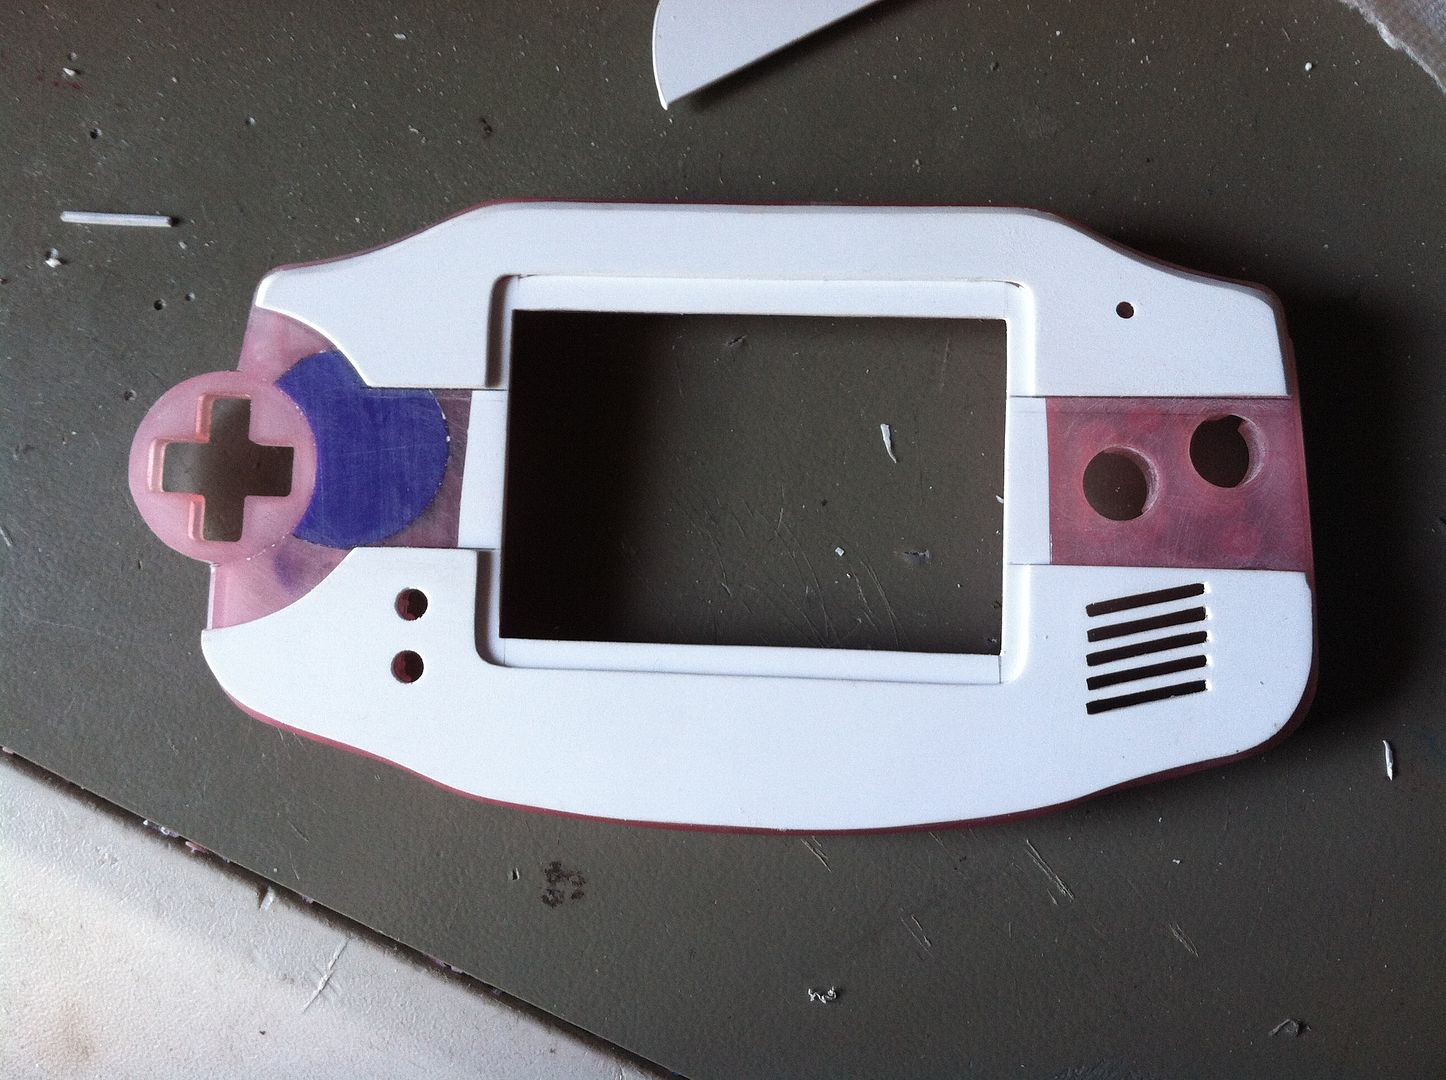
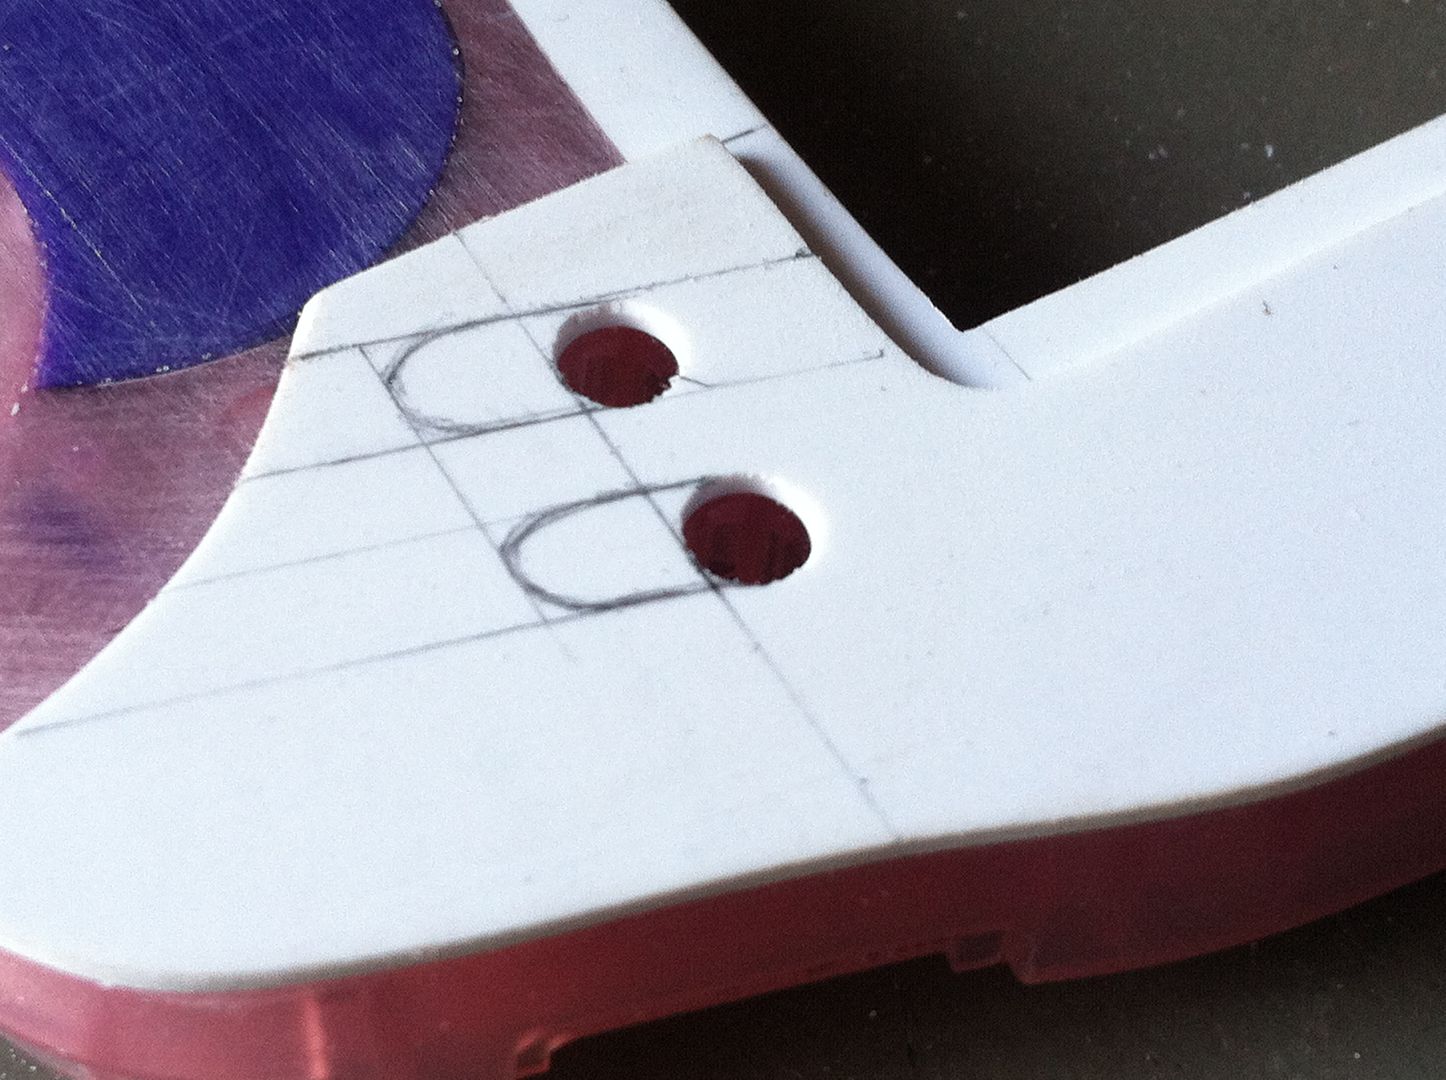
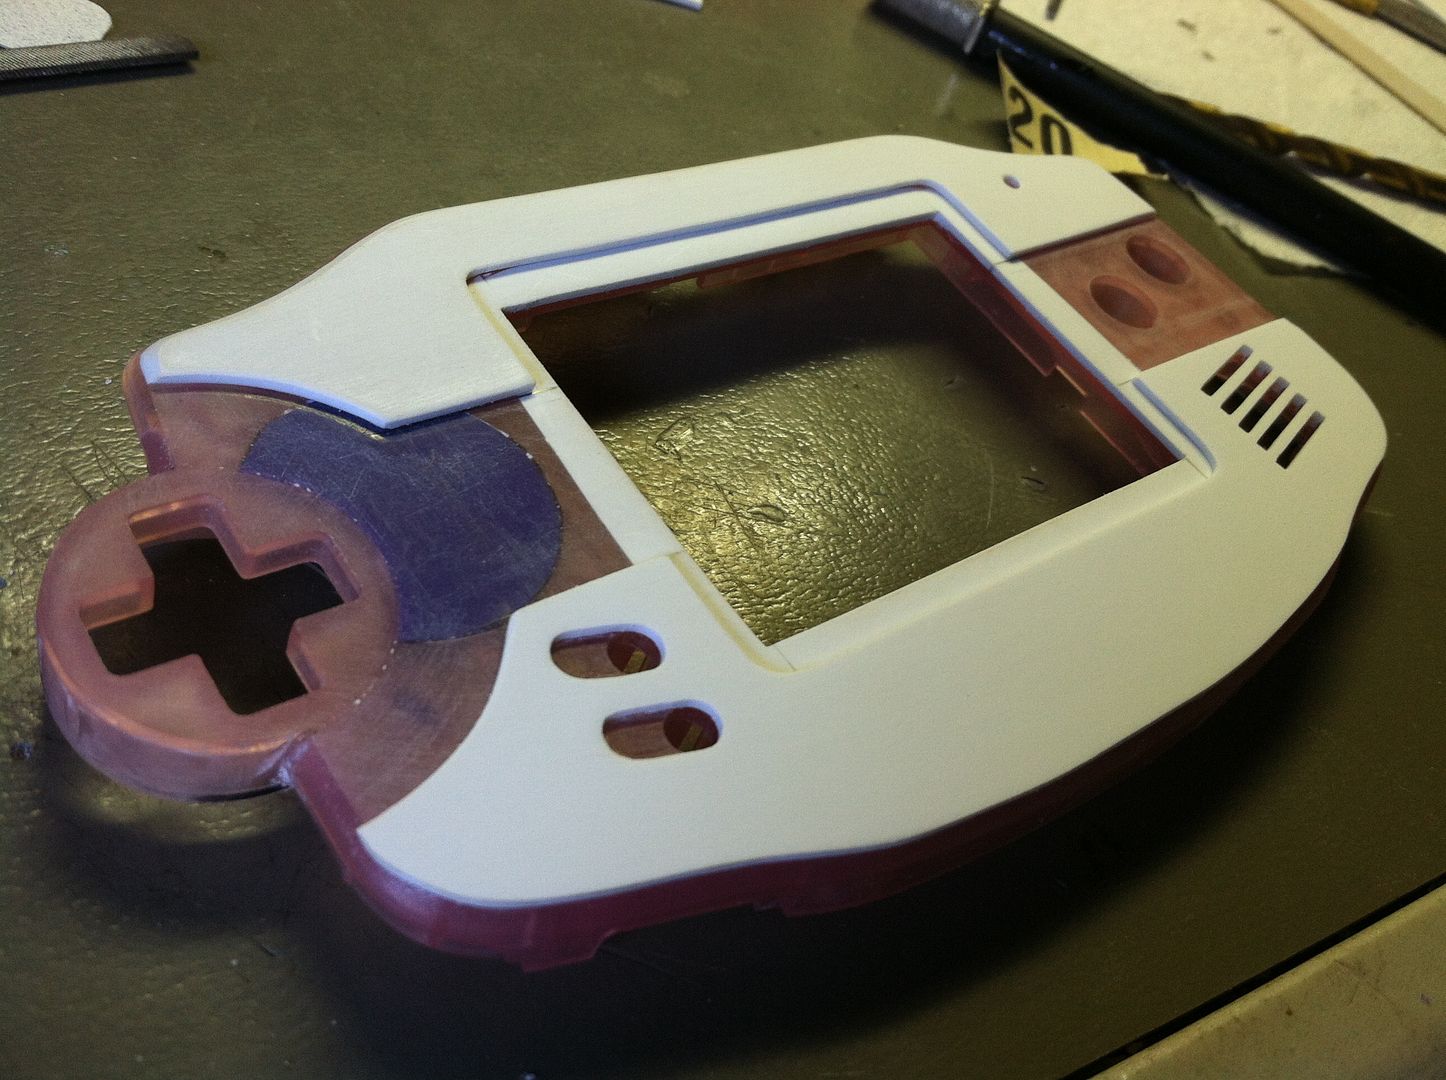
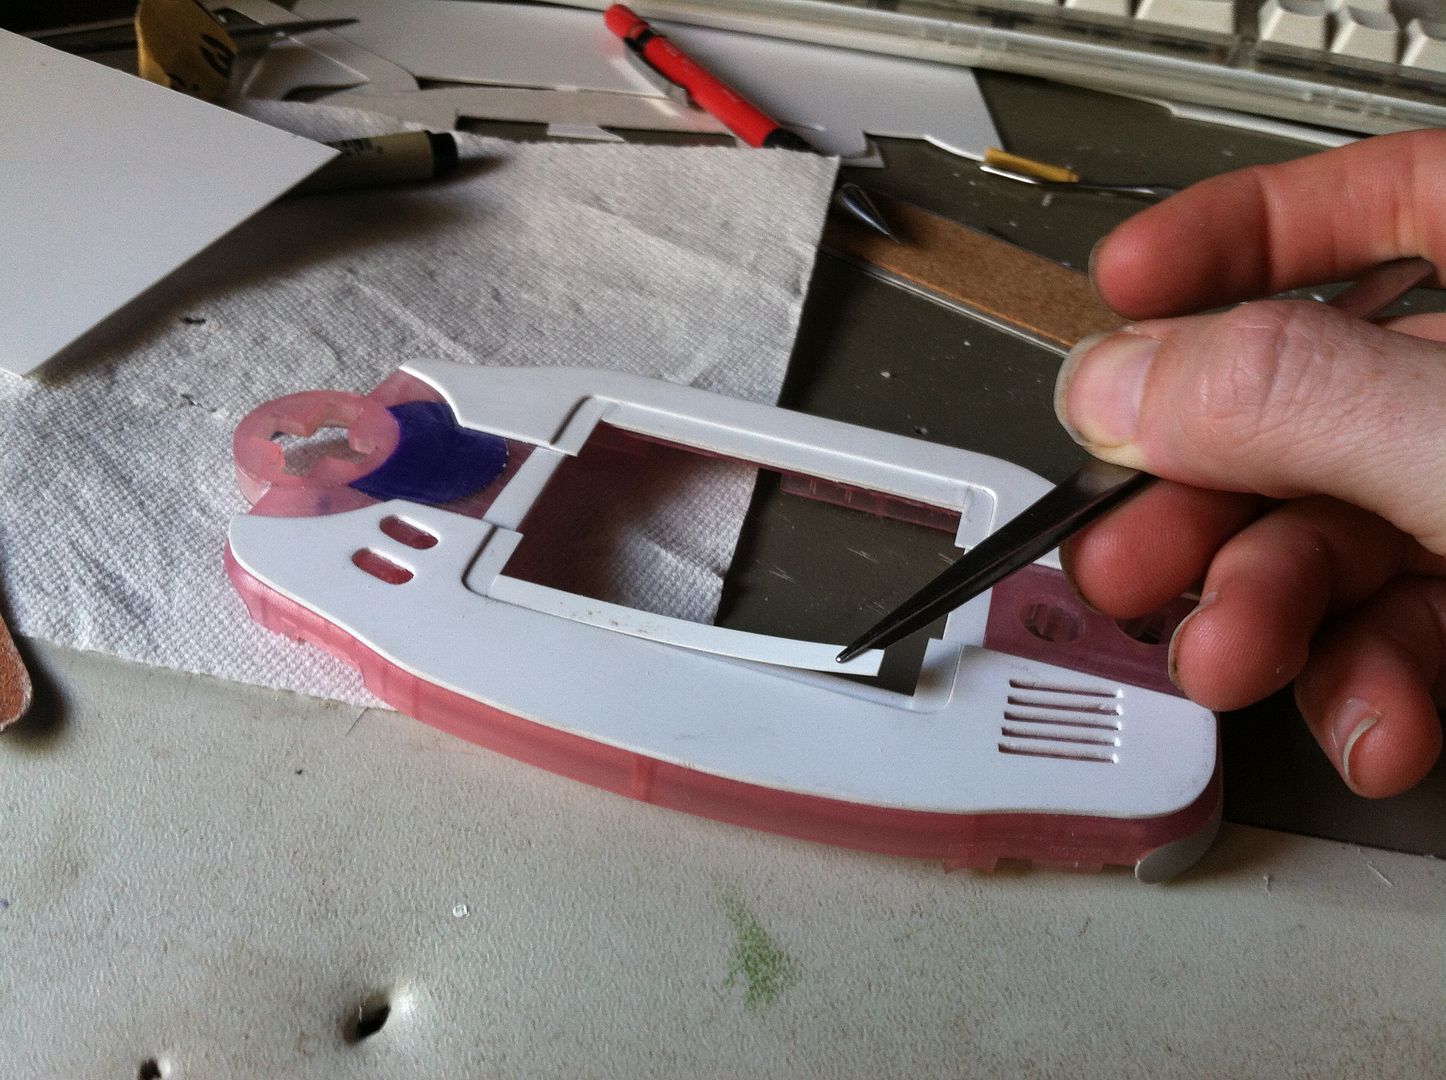
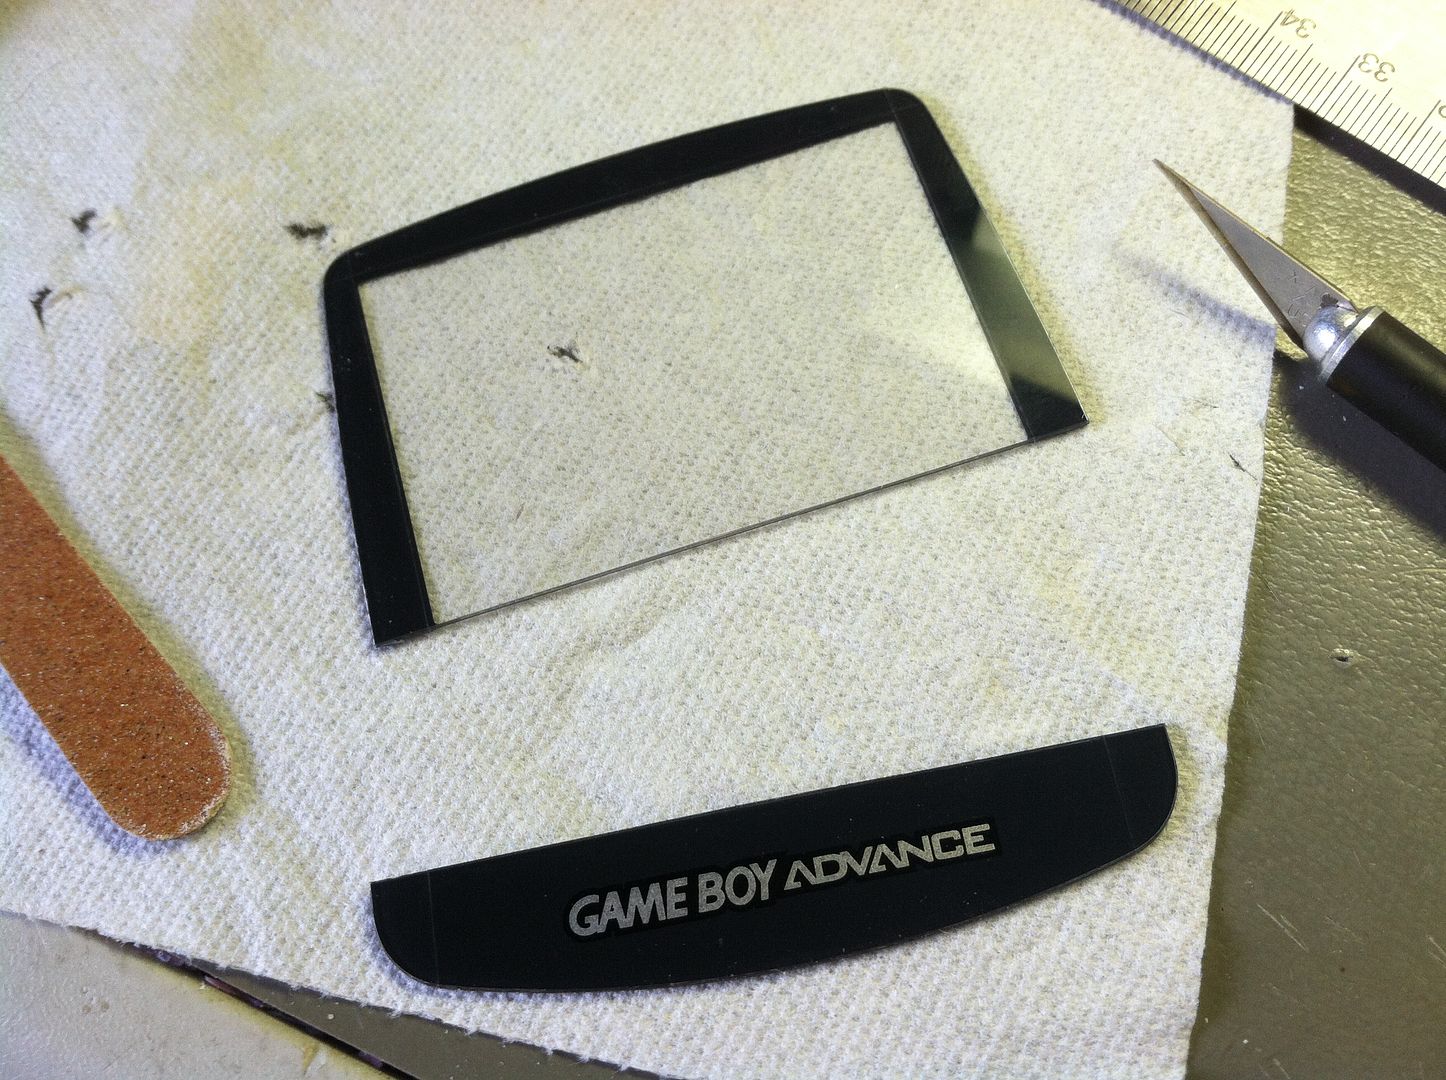
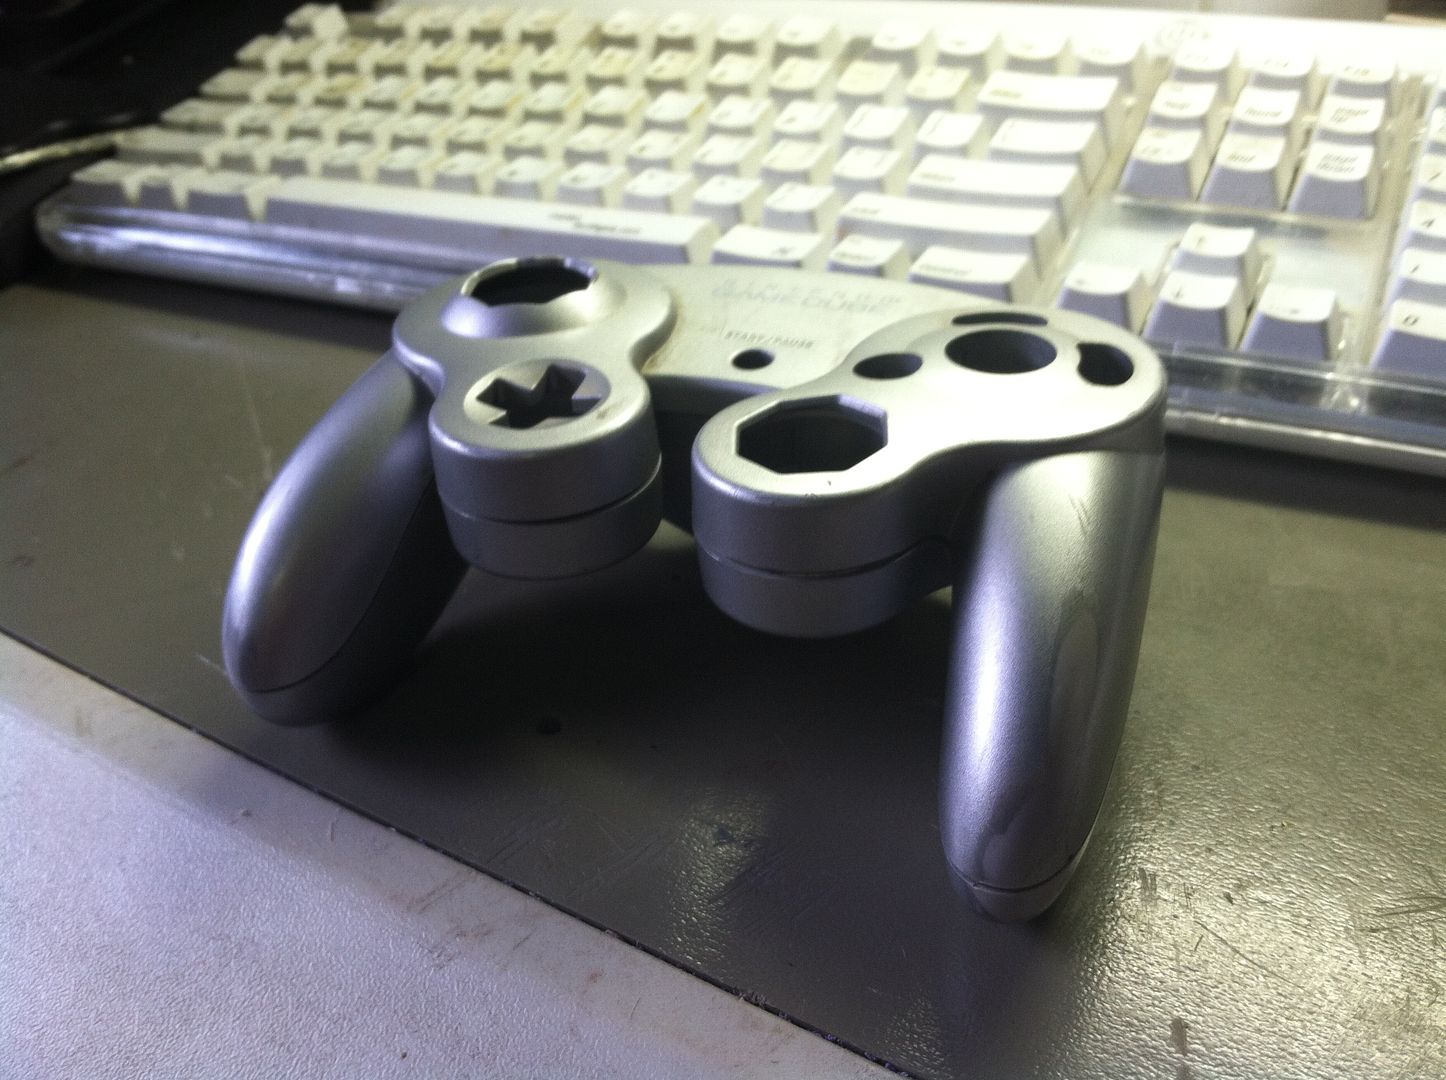
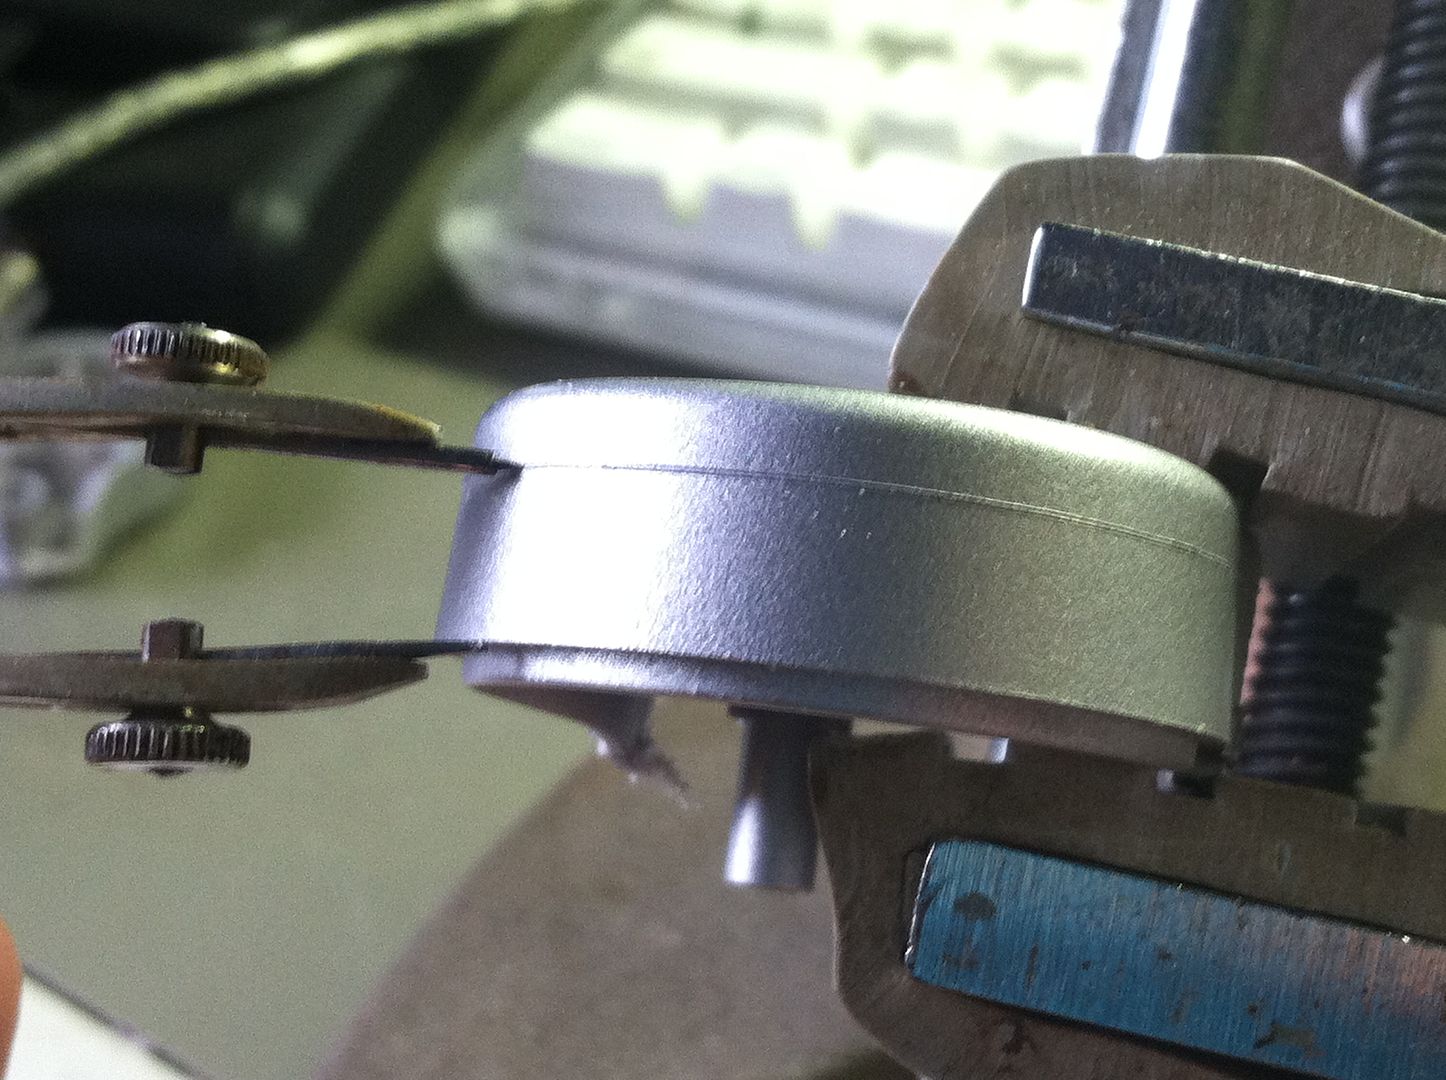
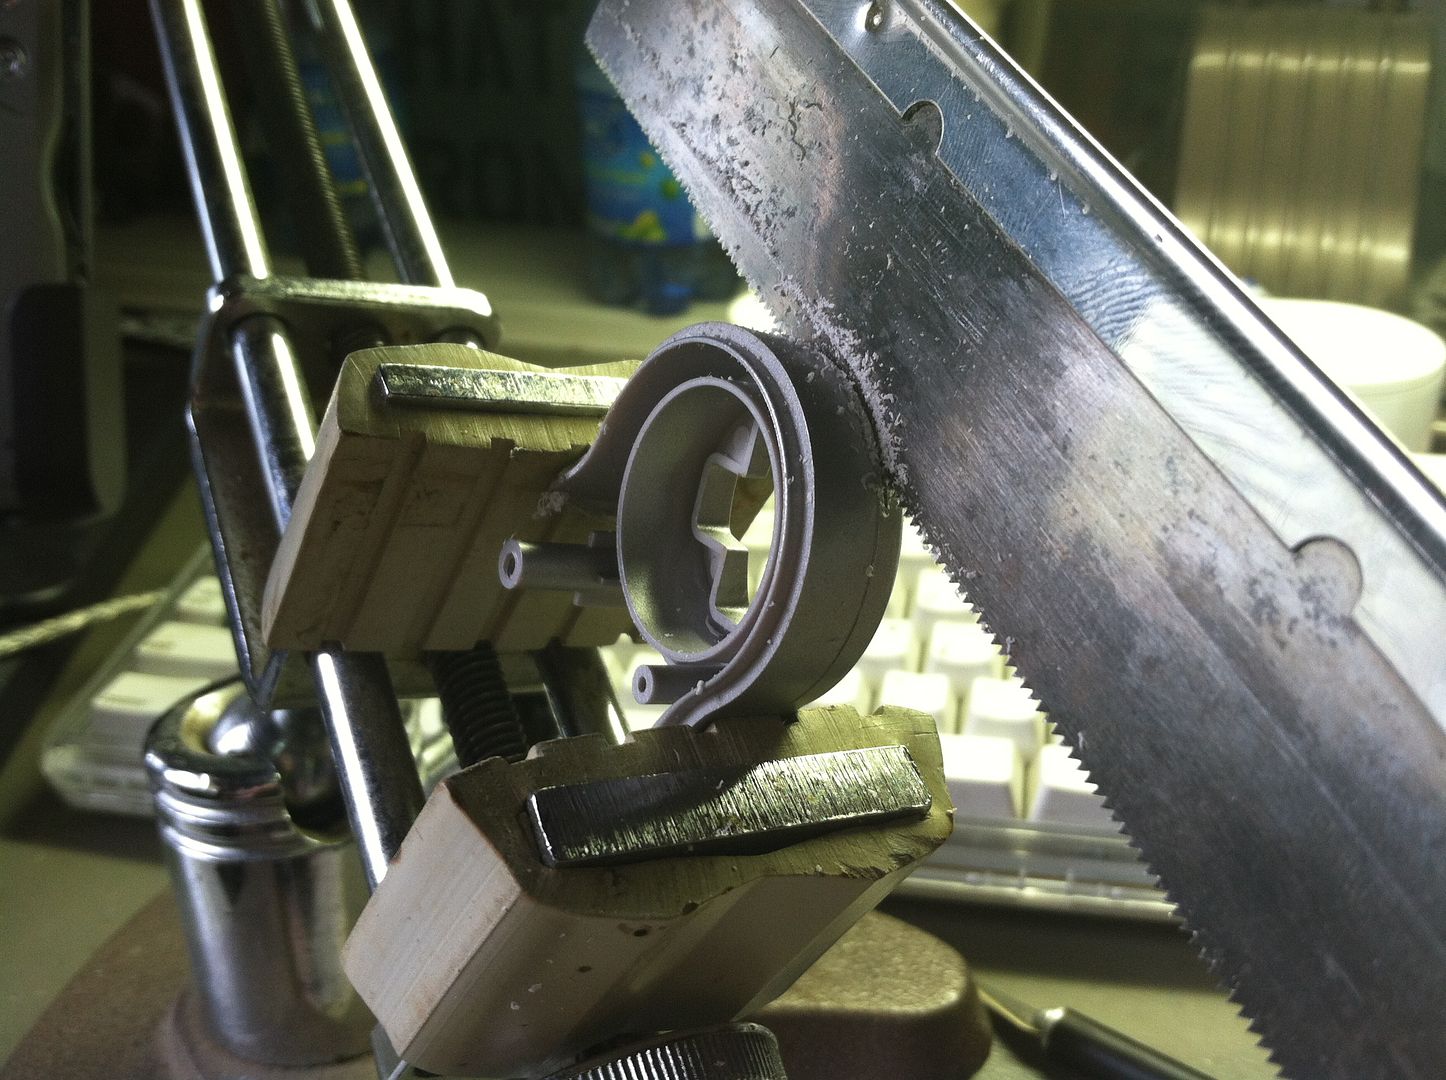
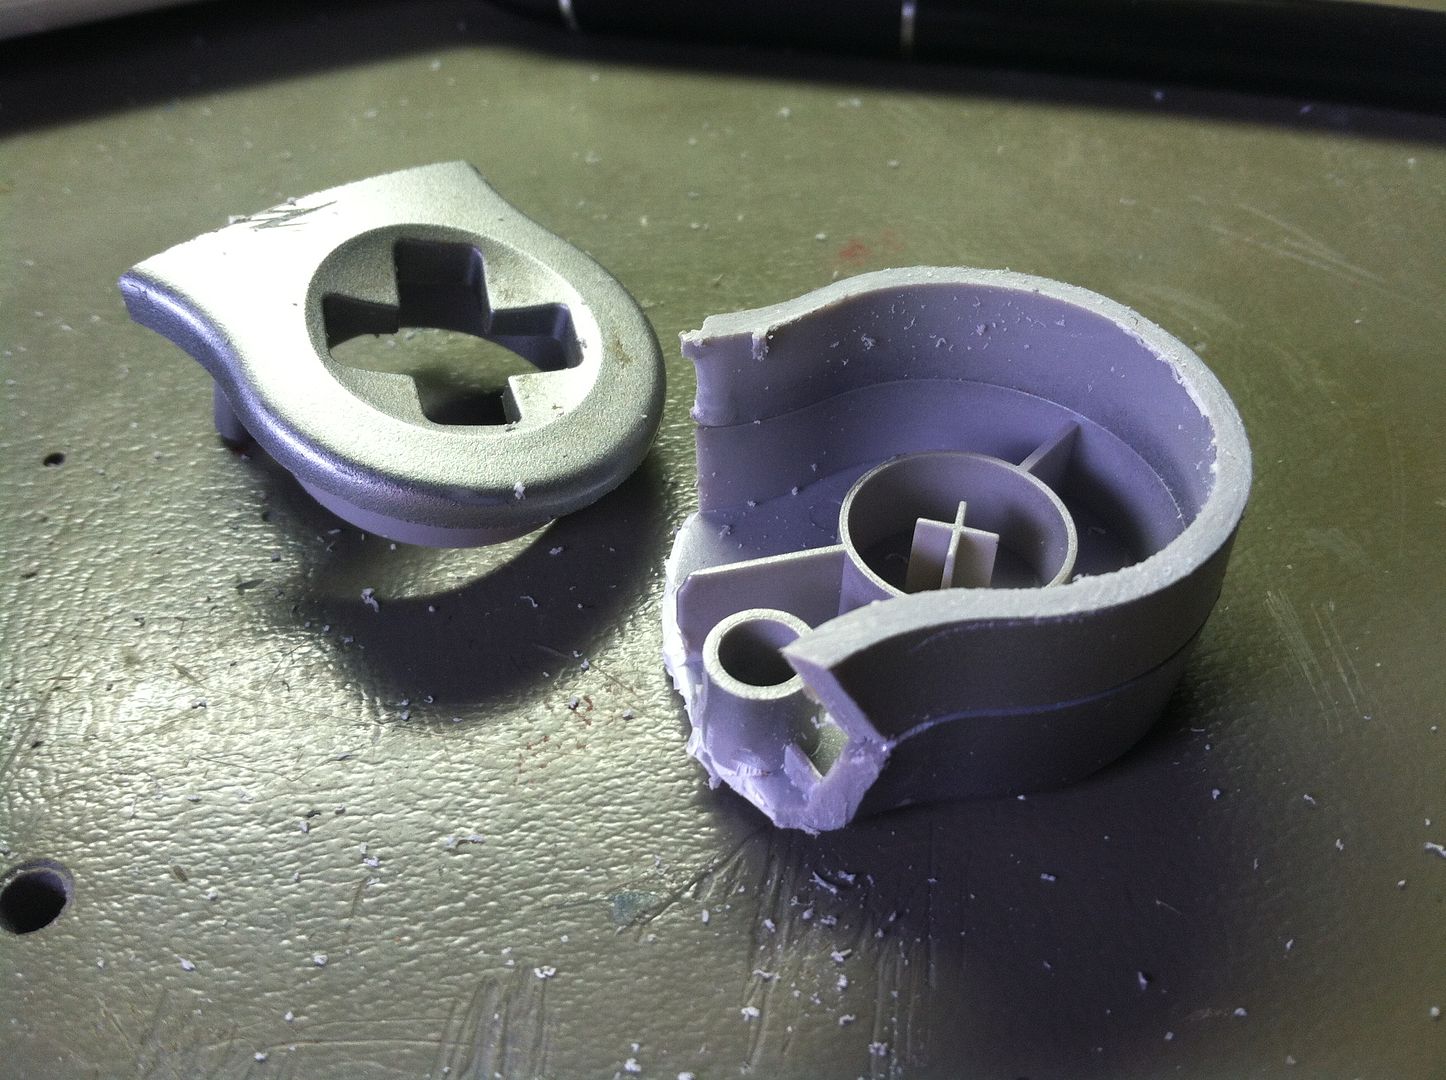
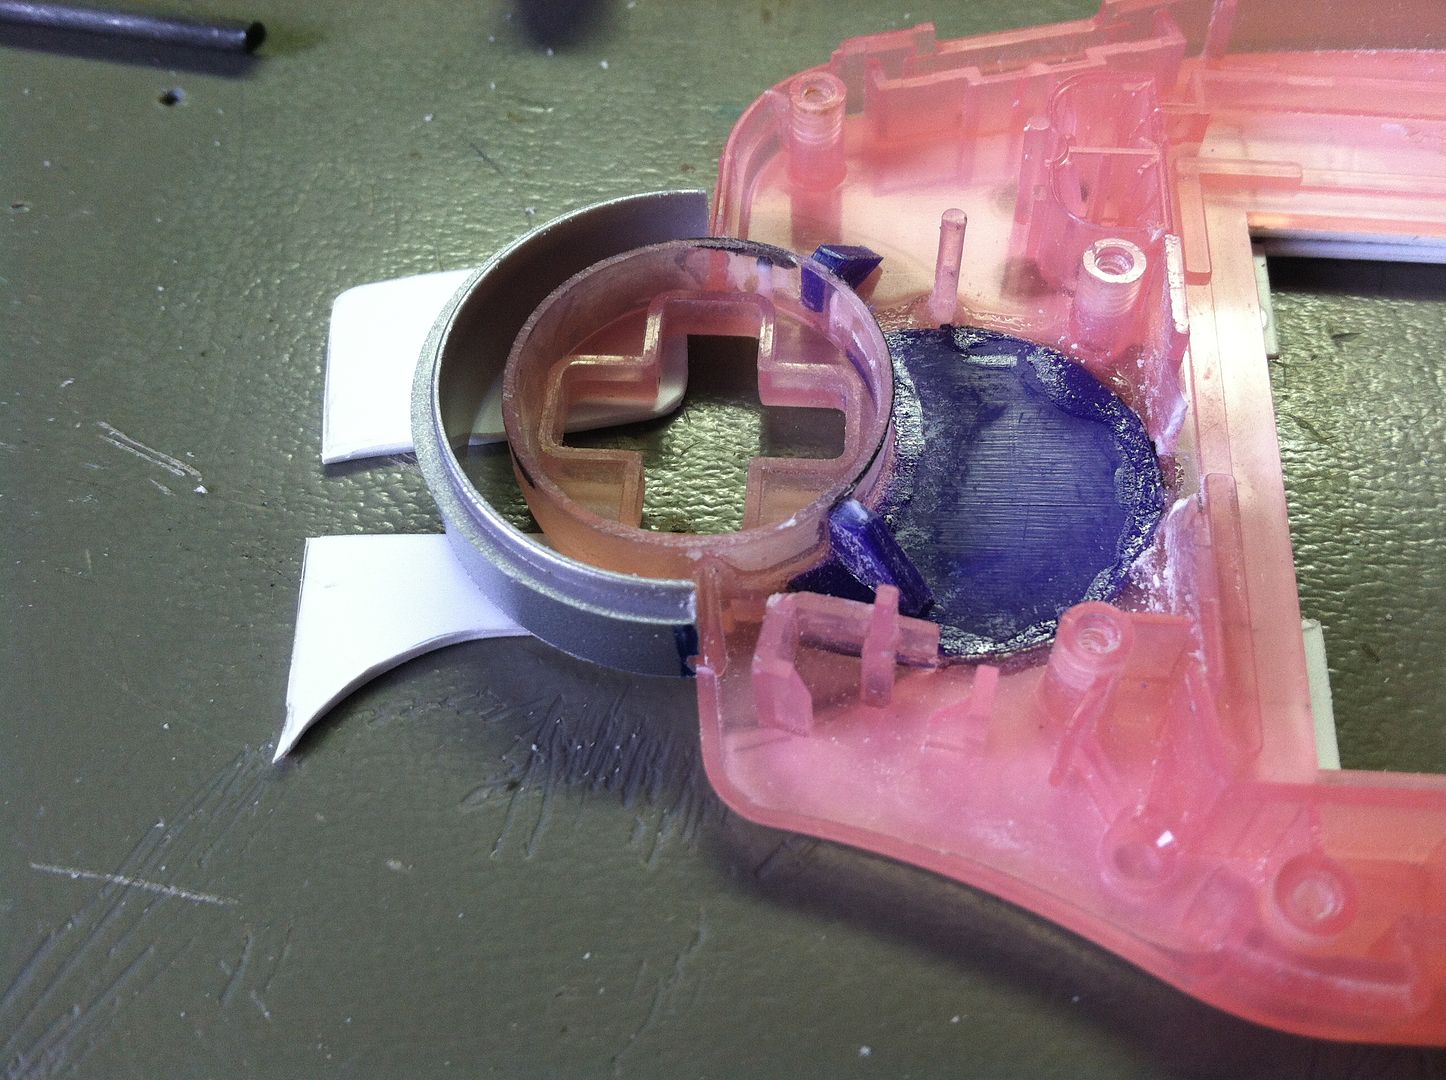
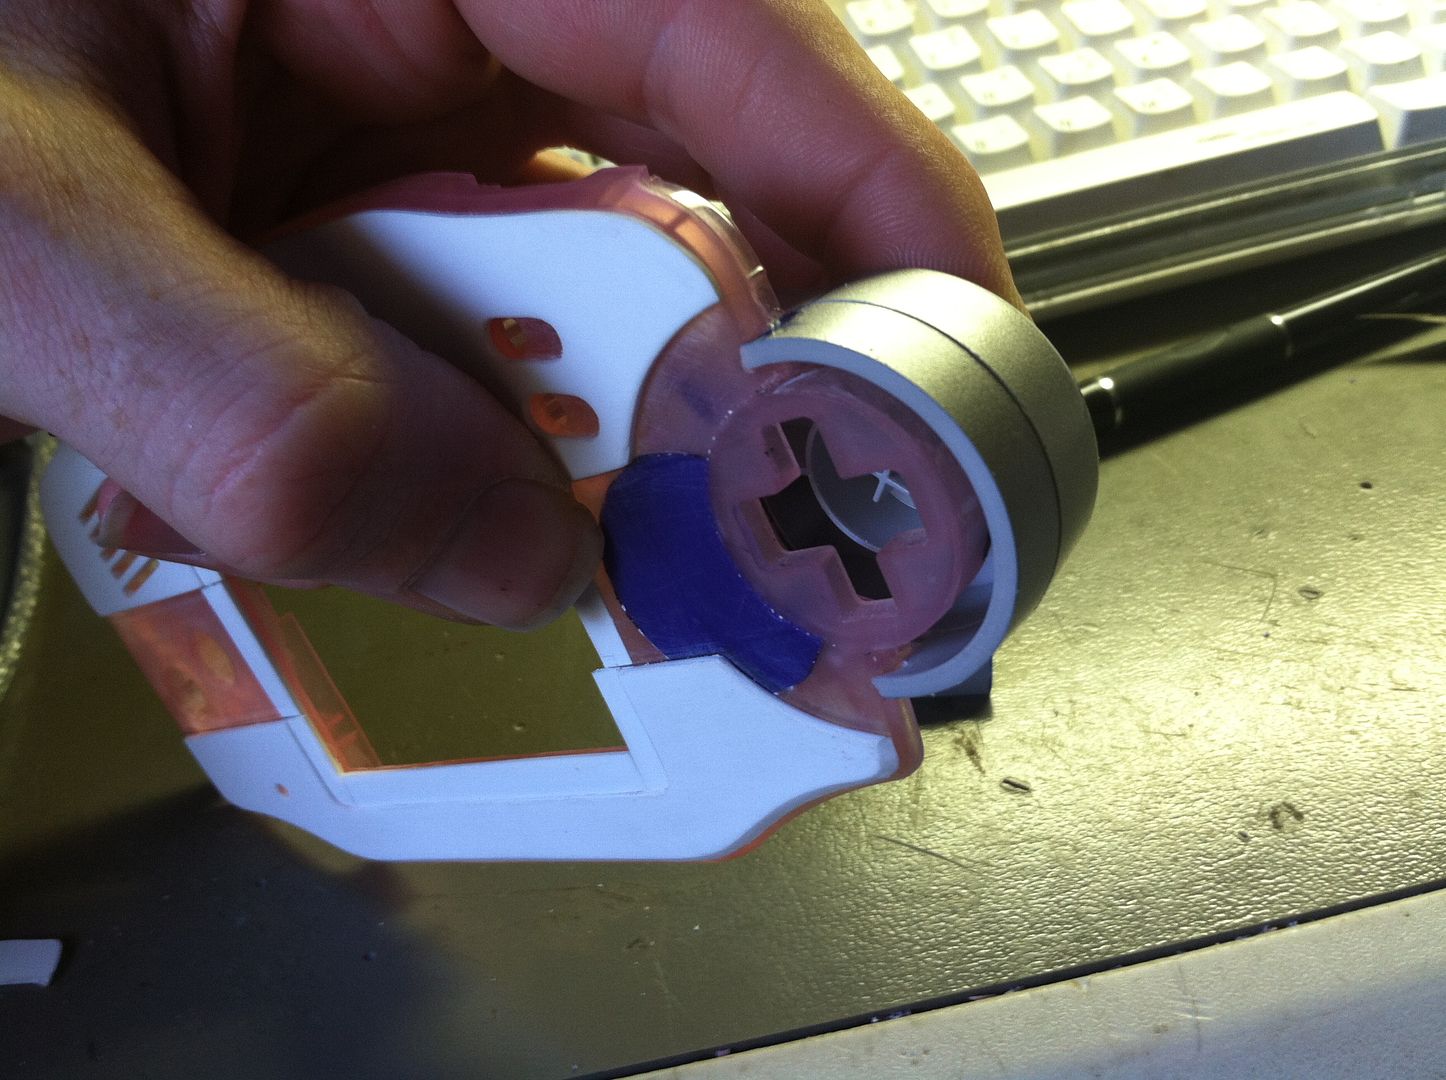
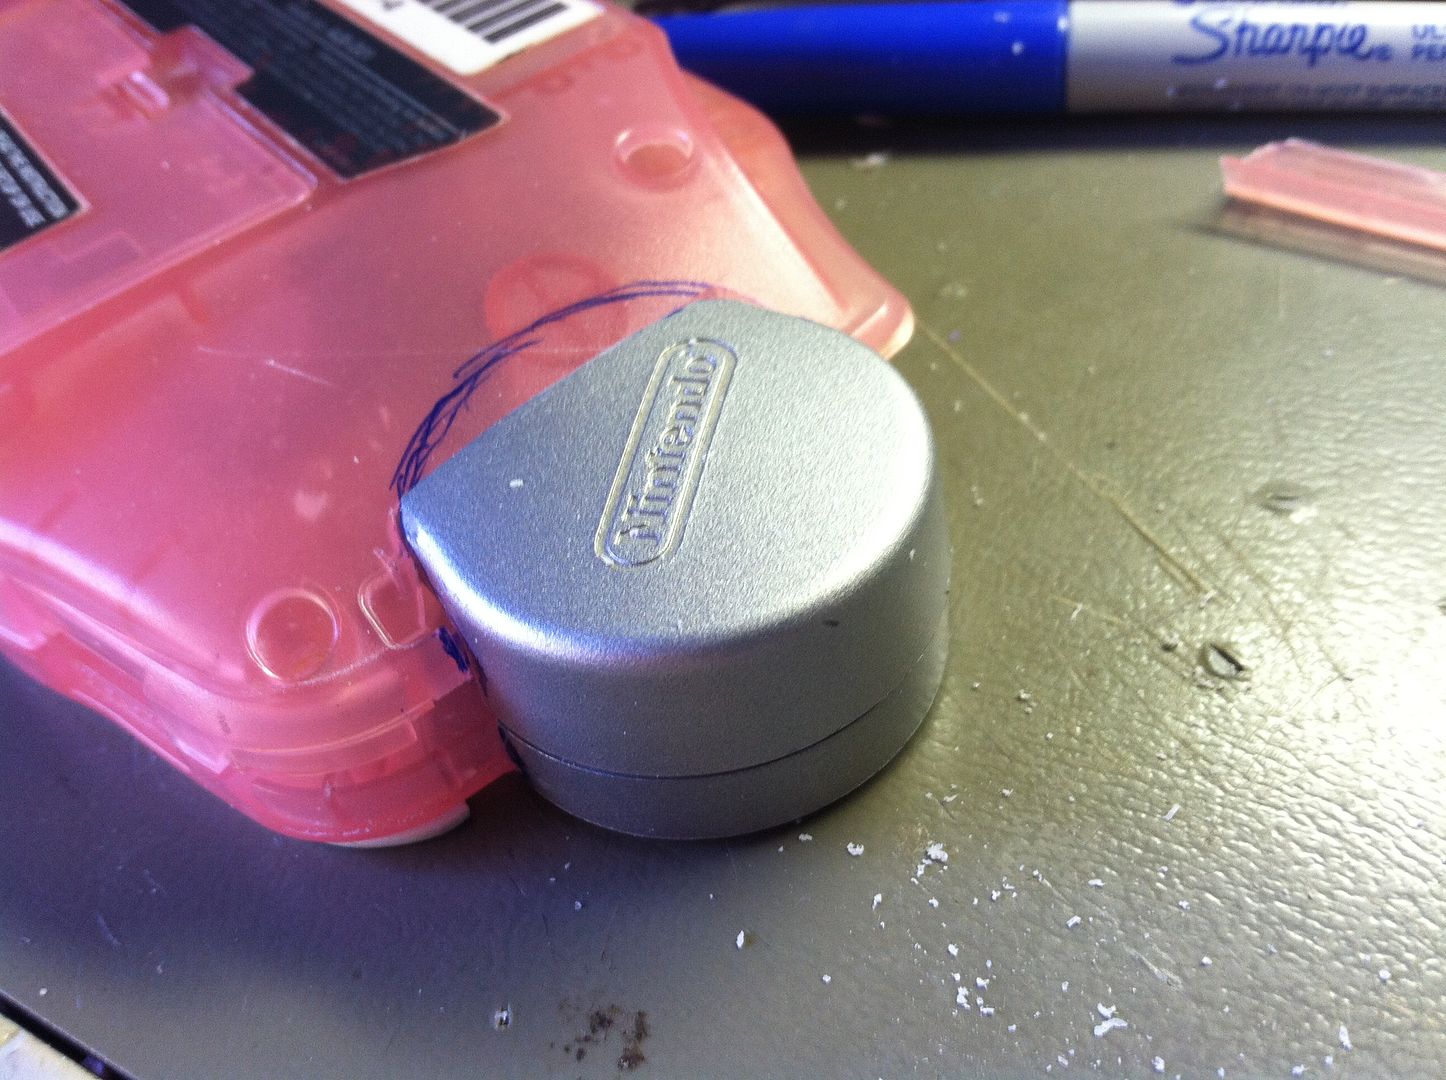
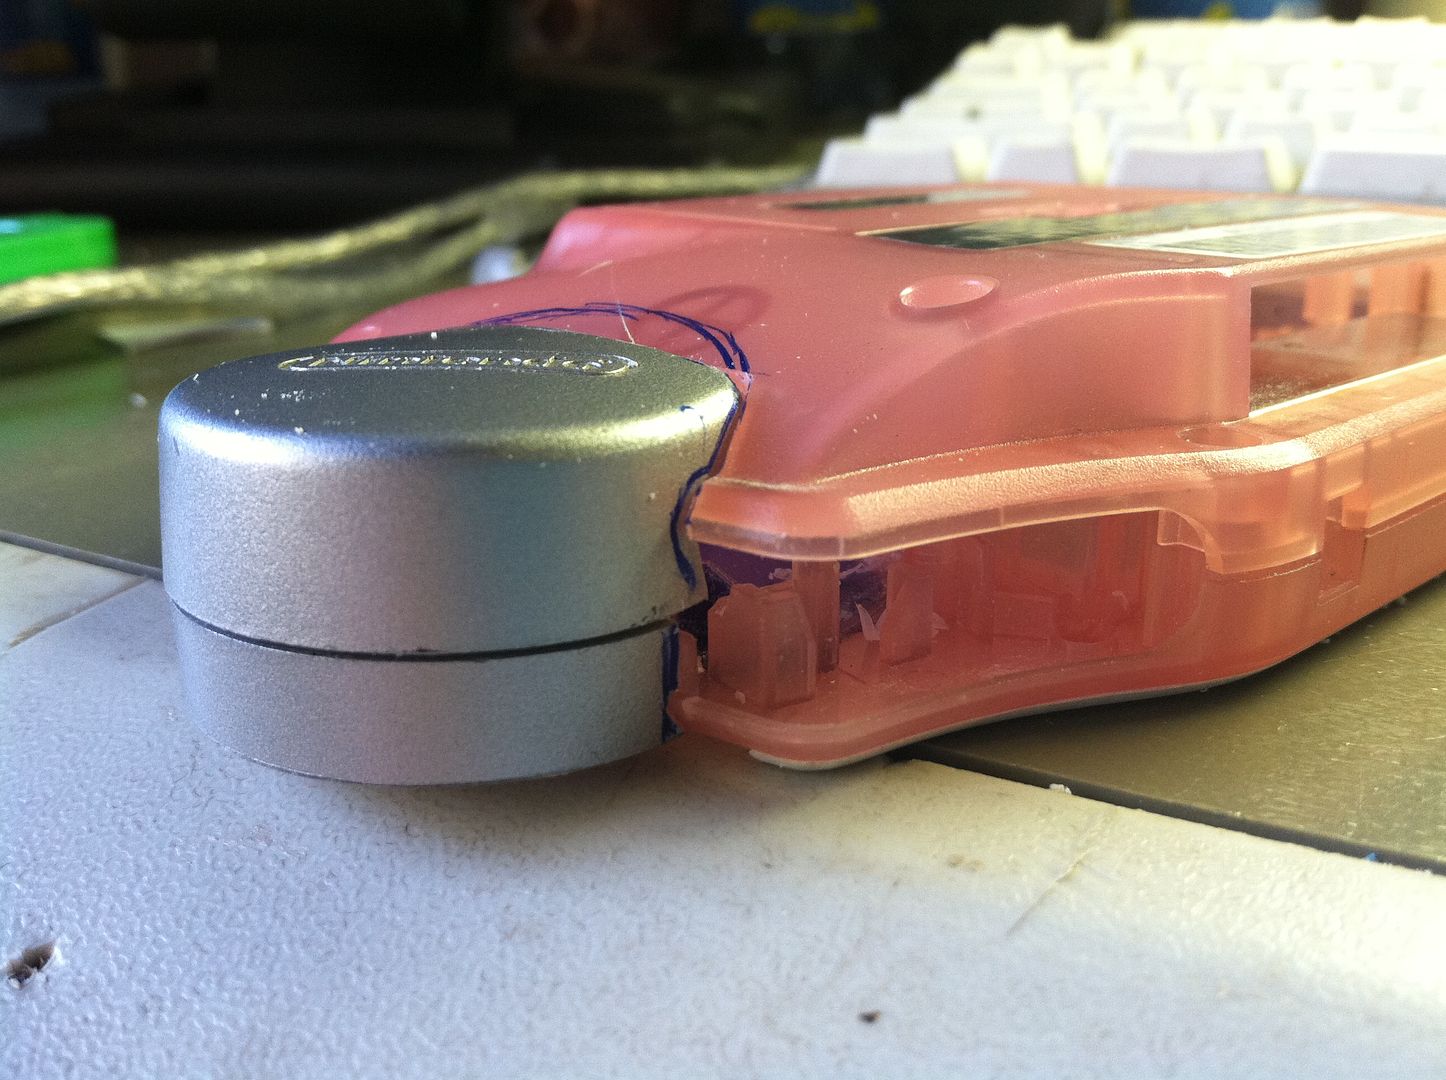
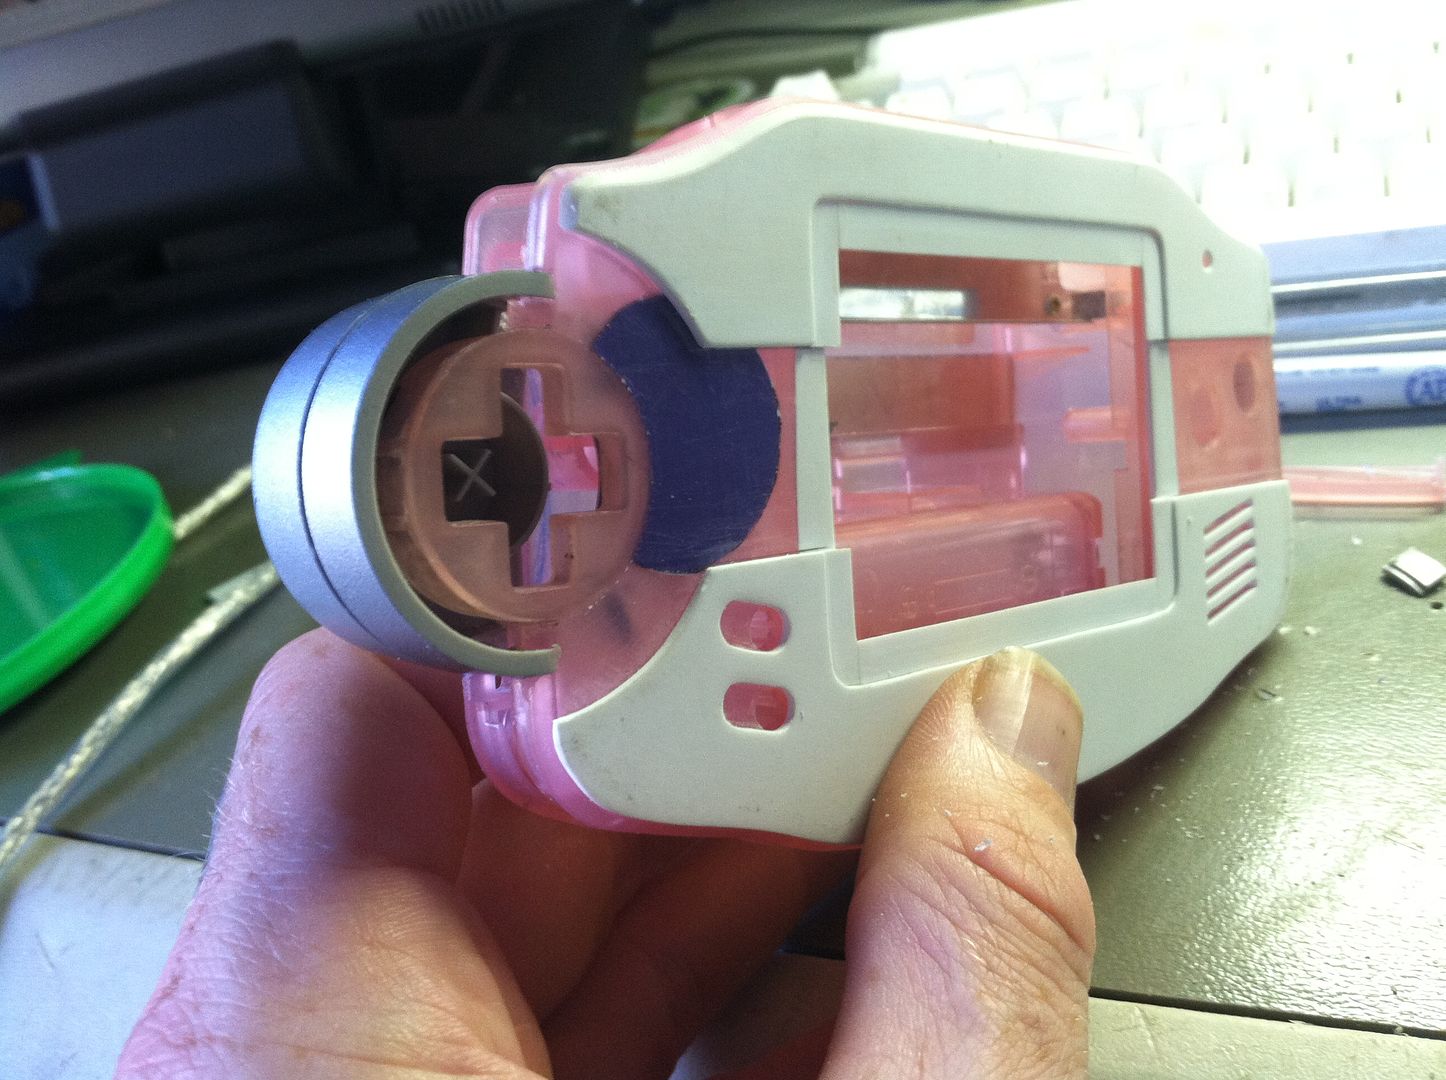
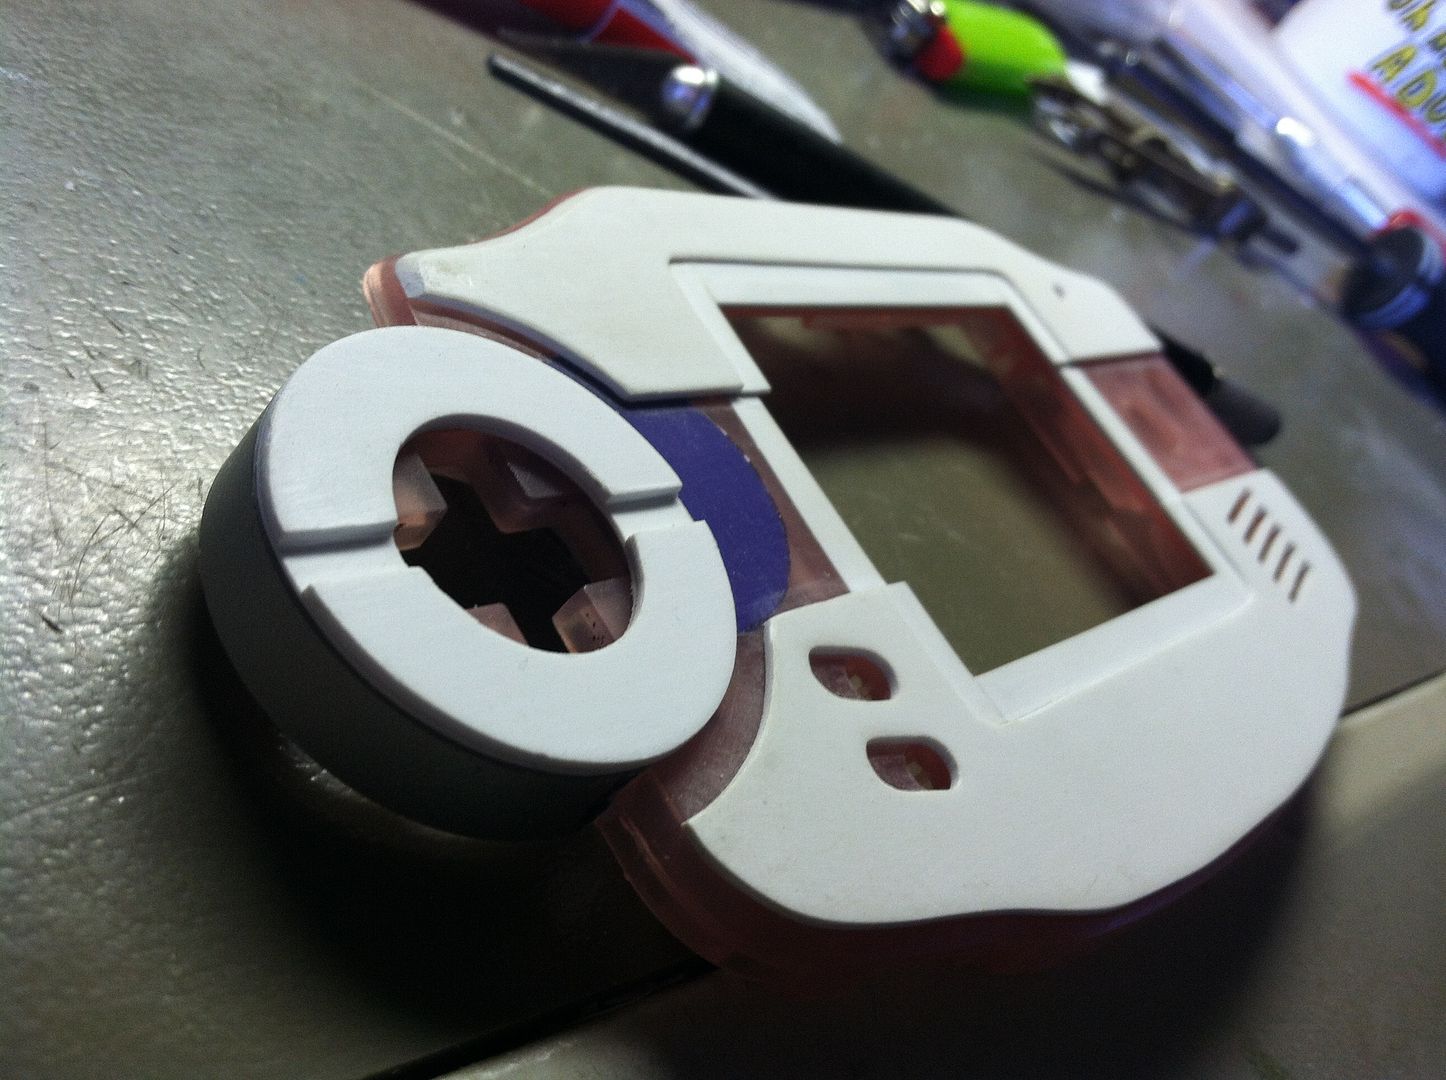
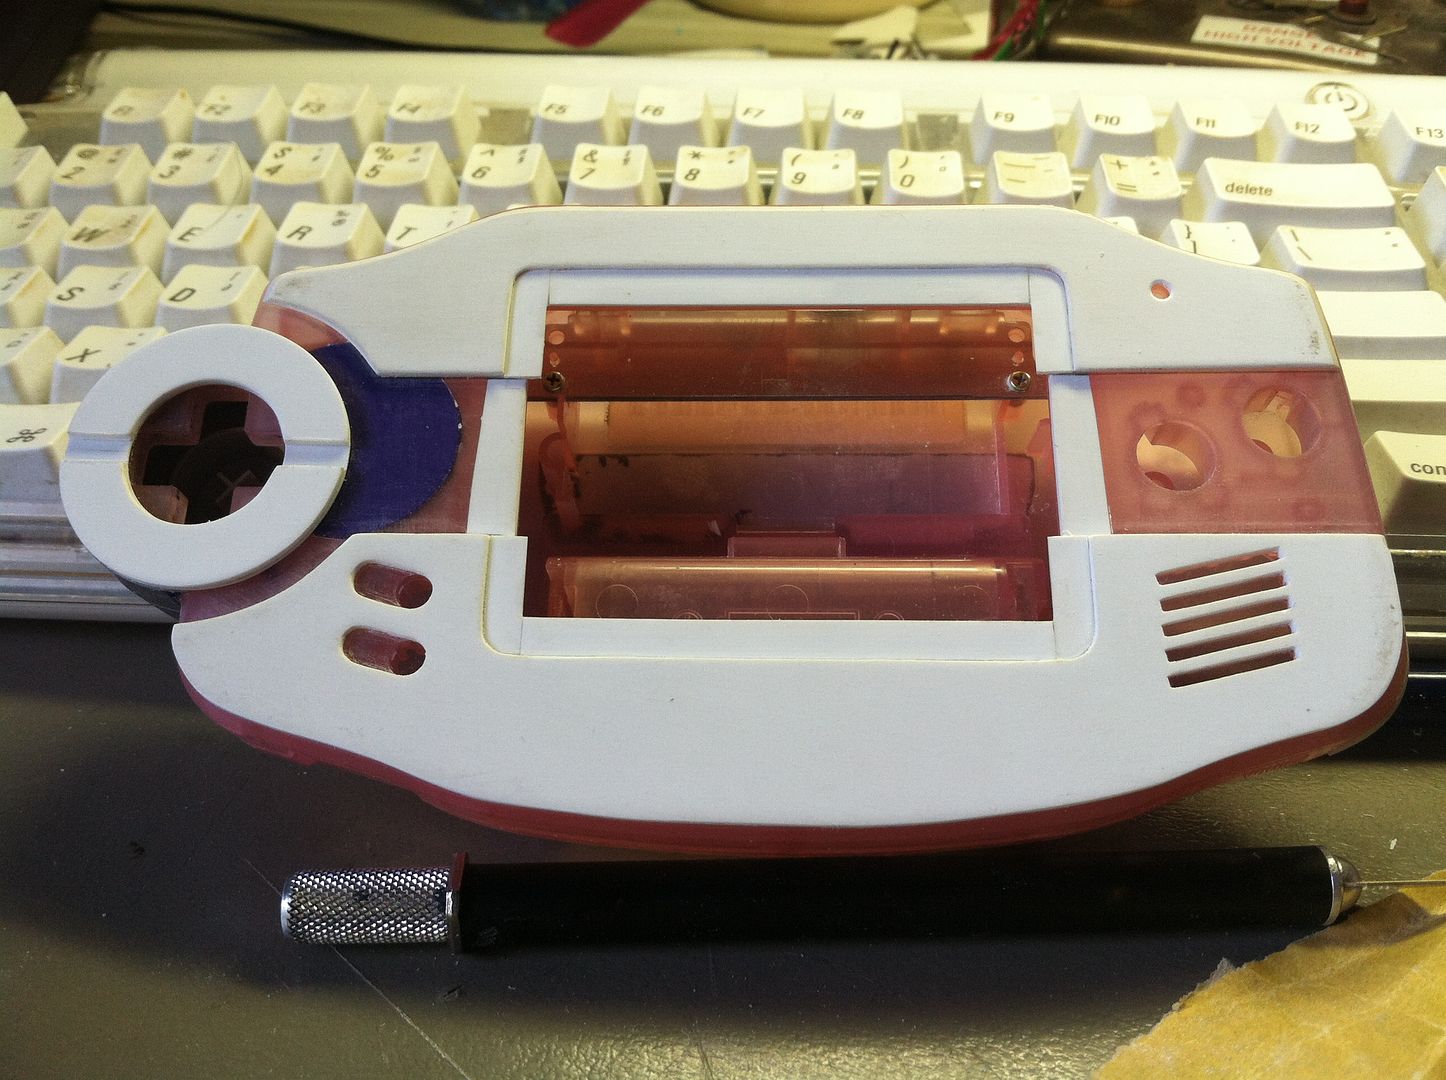
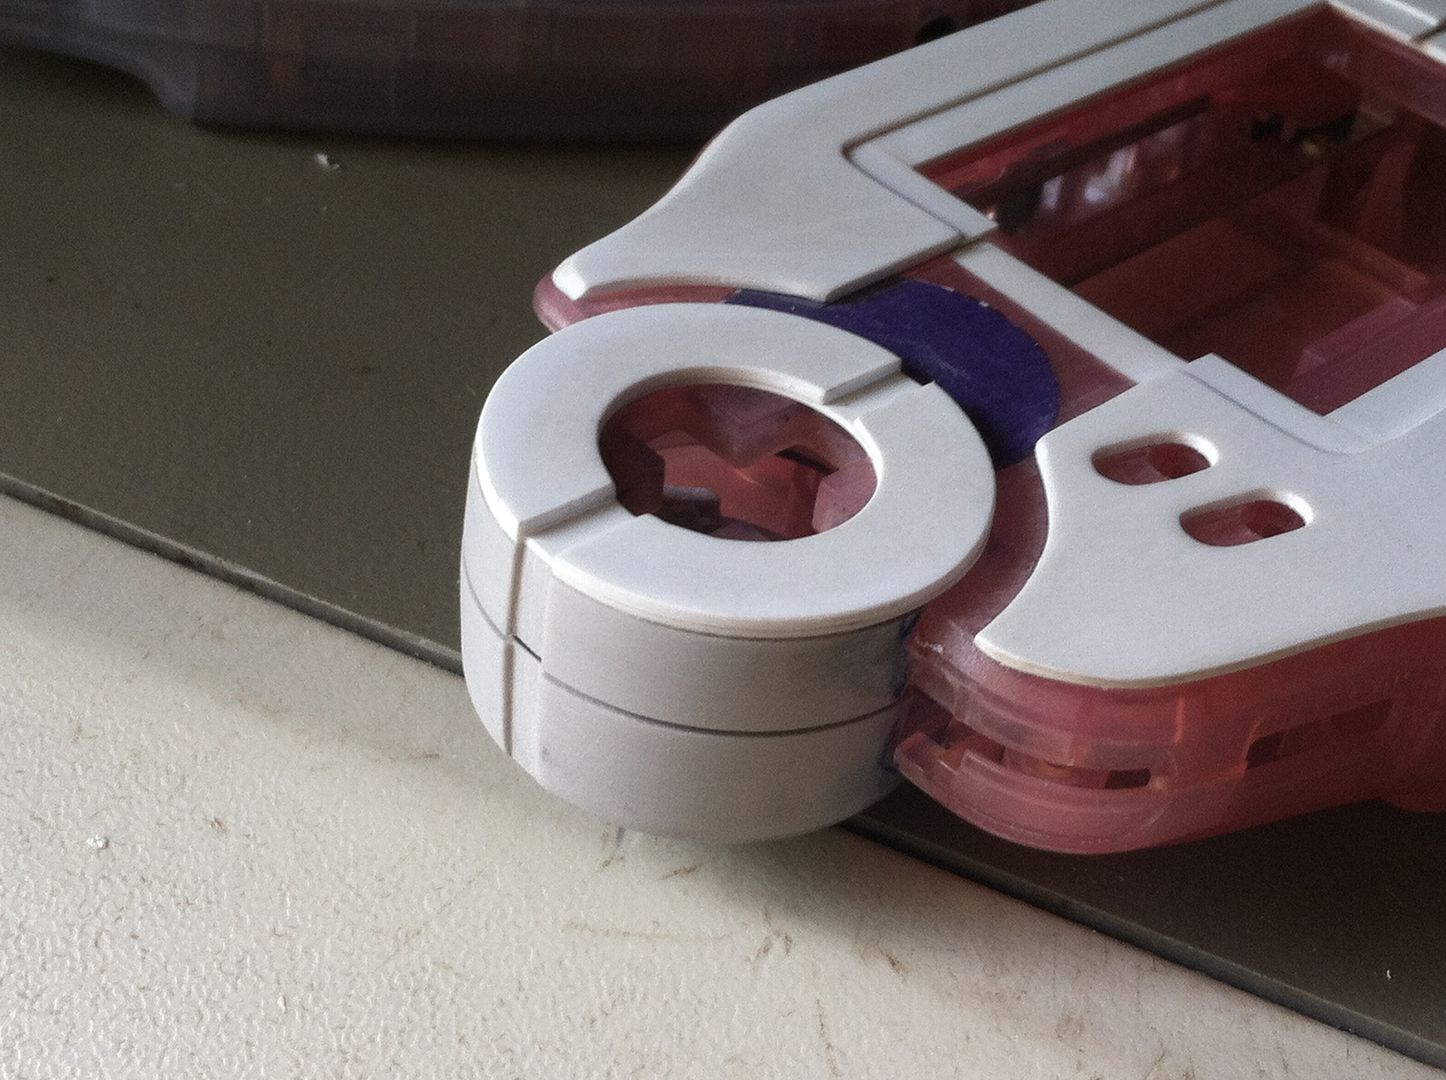
    Alright people, it's been a while.
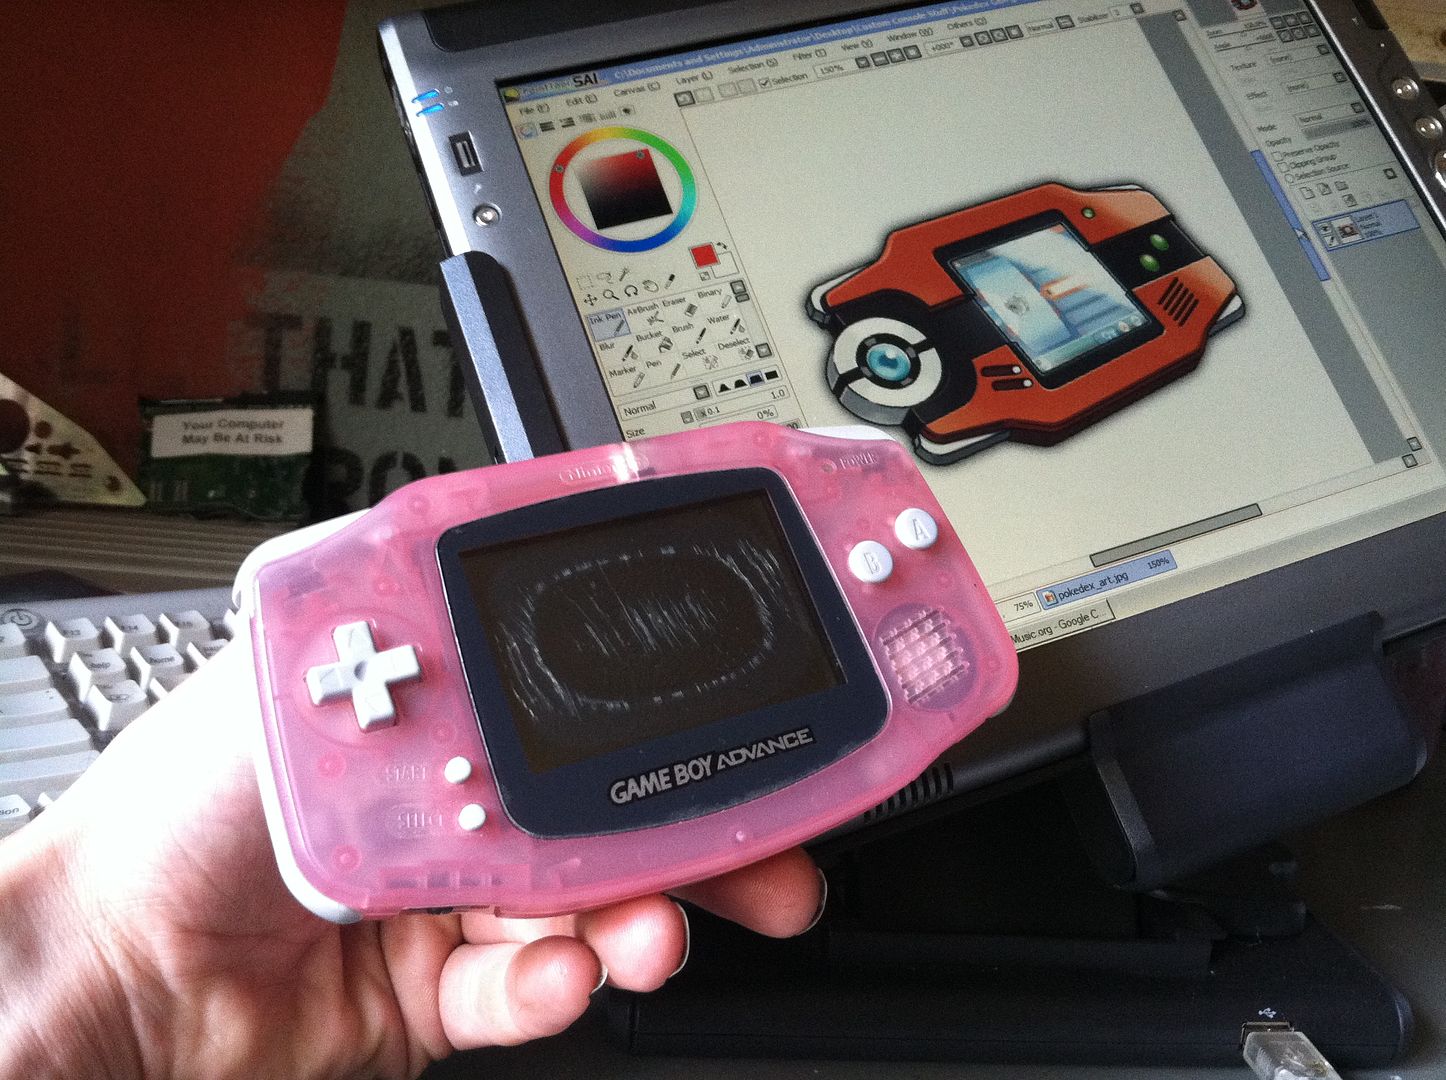
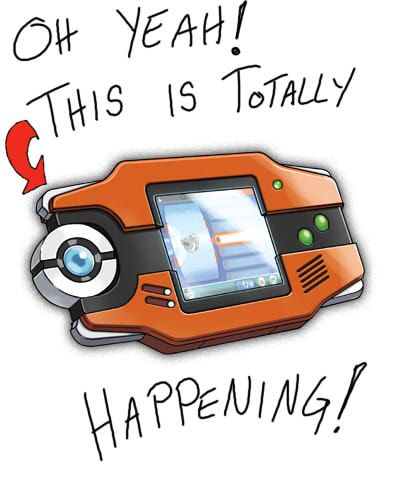
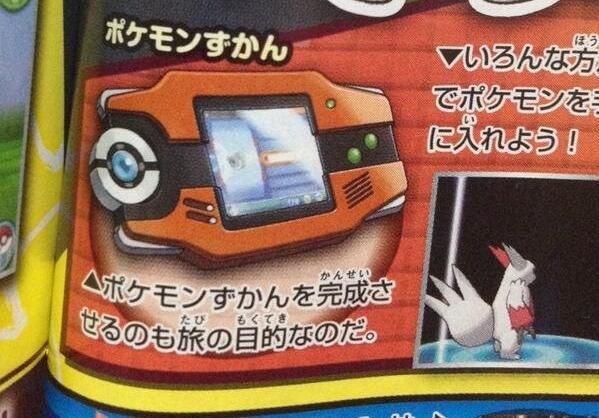
    I just stumbled on my next build.


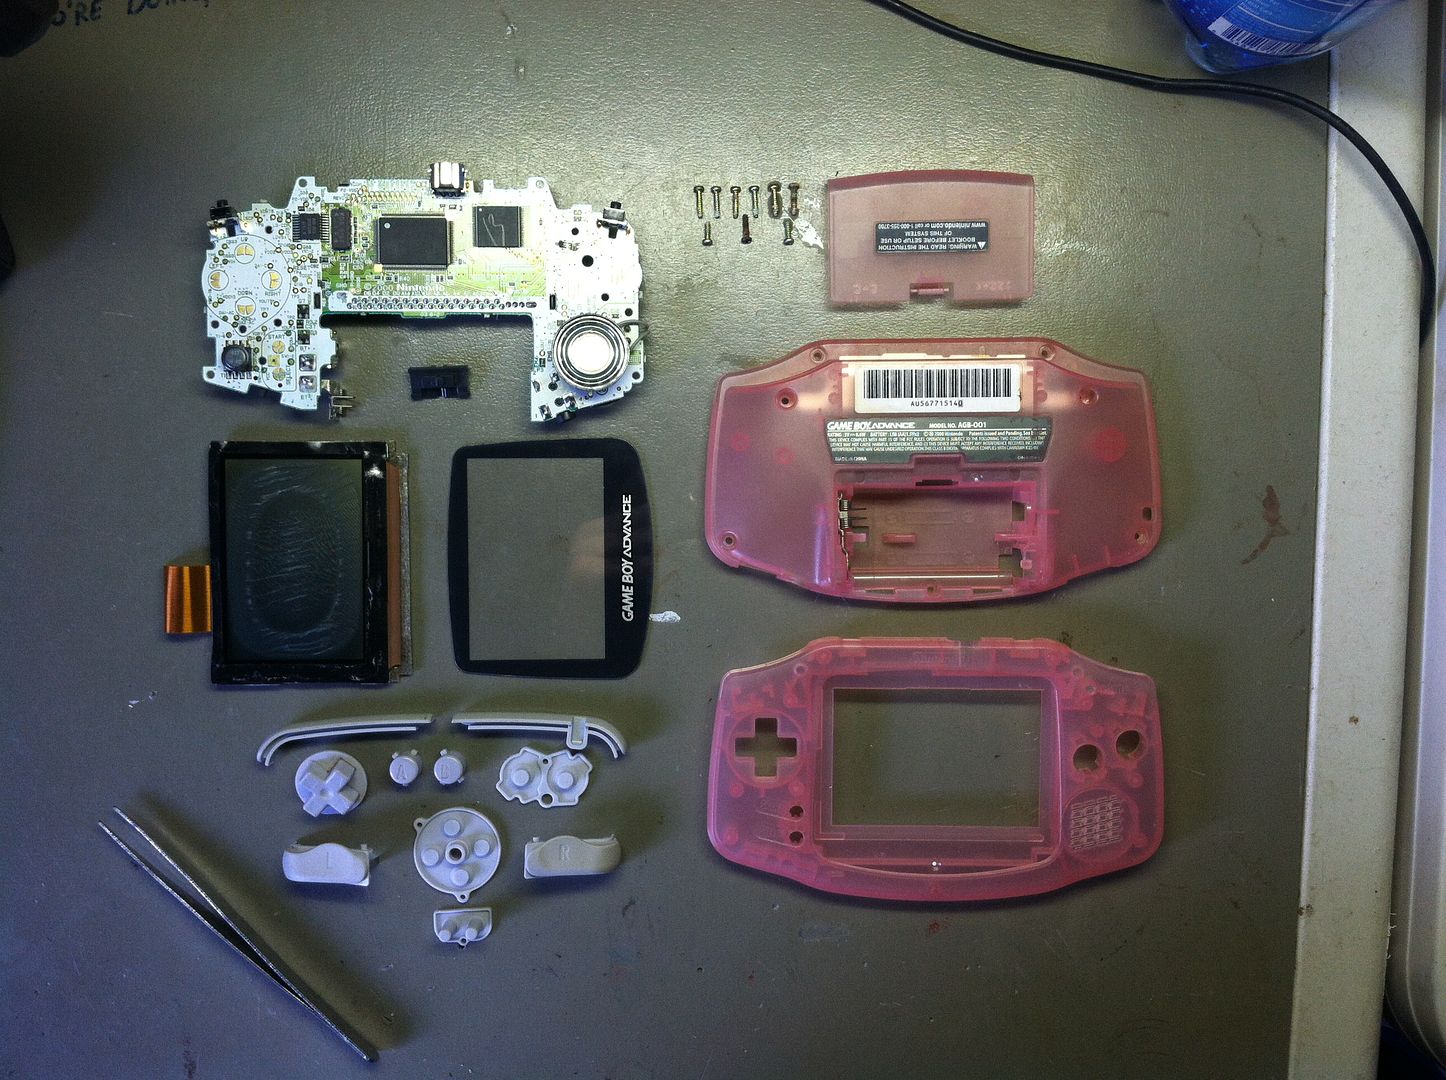
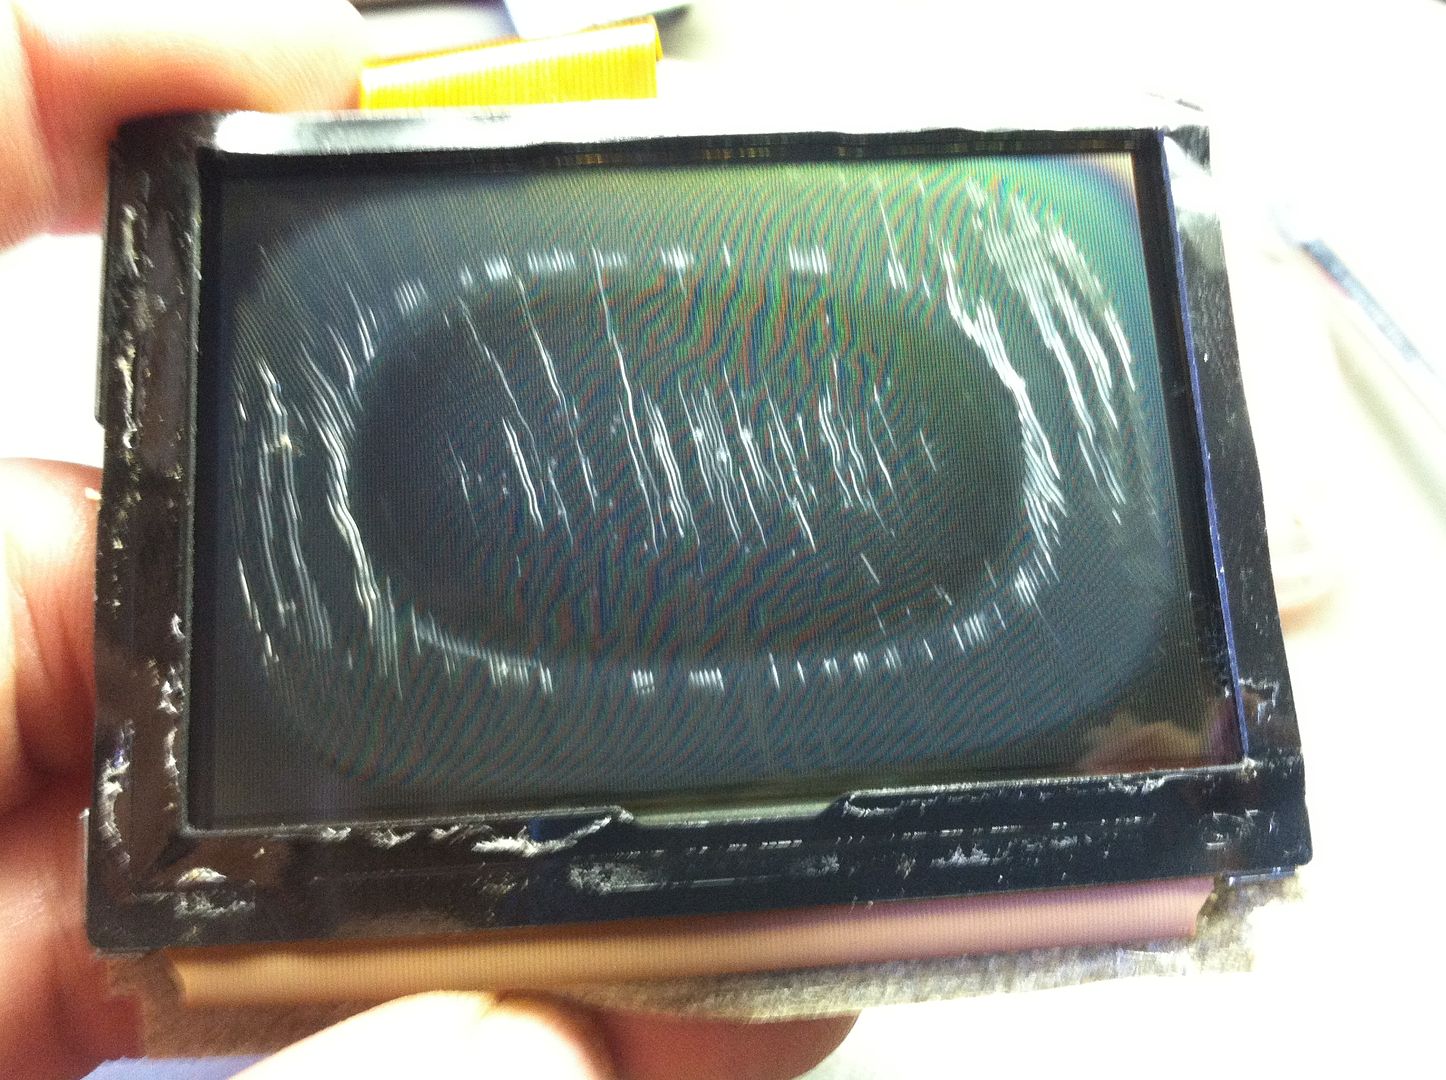
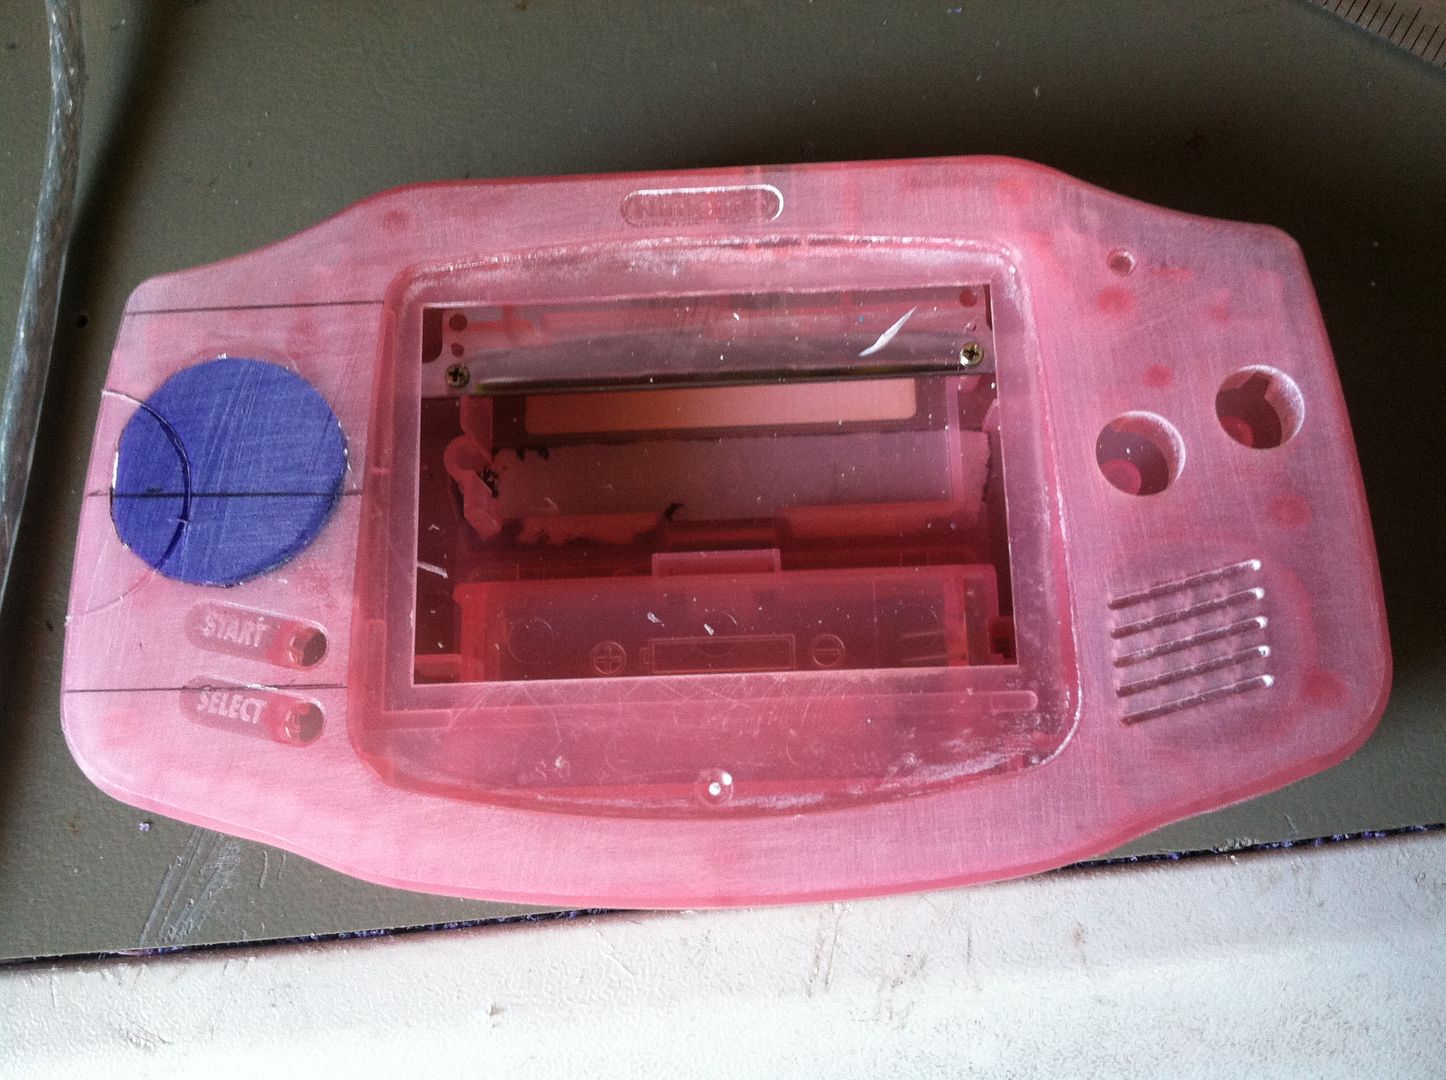
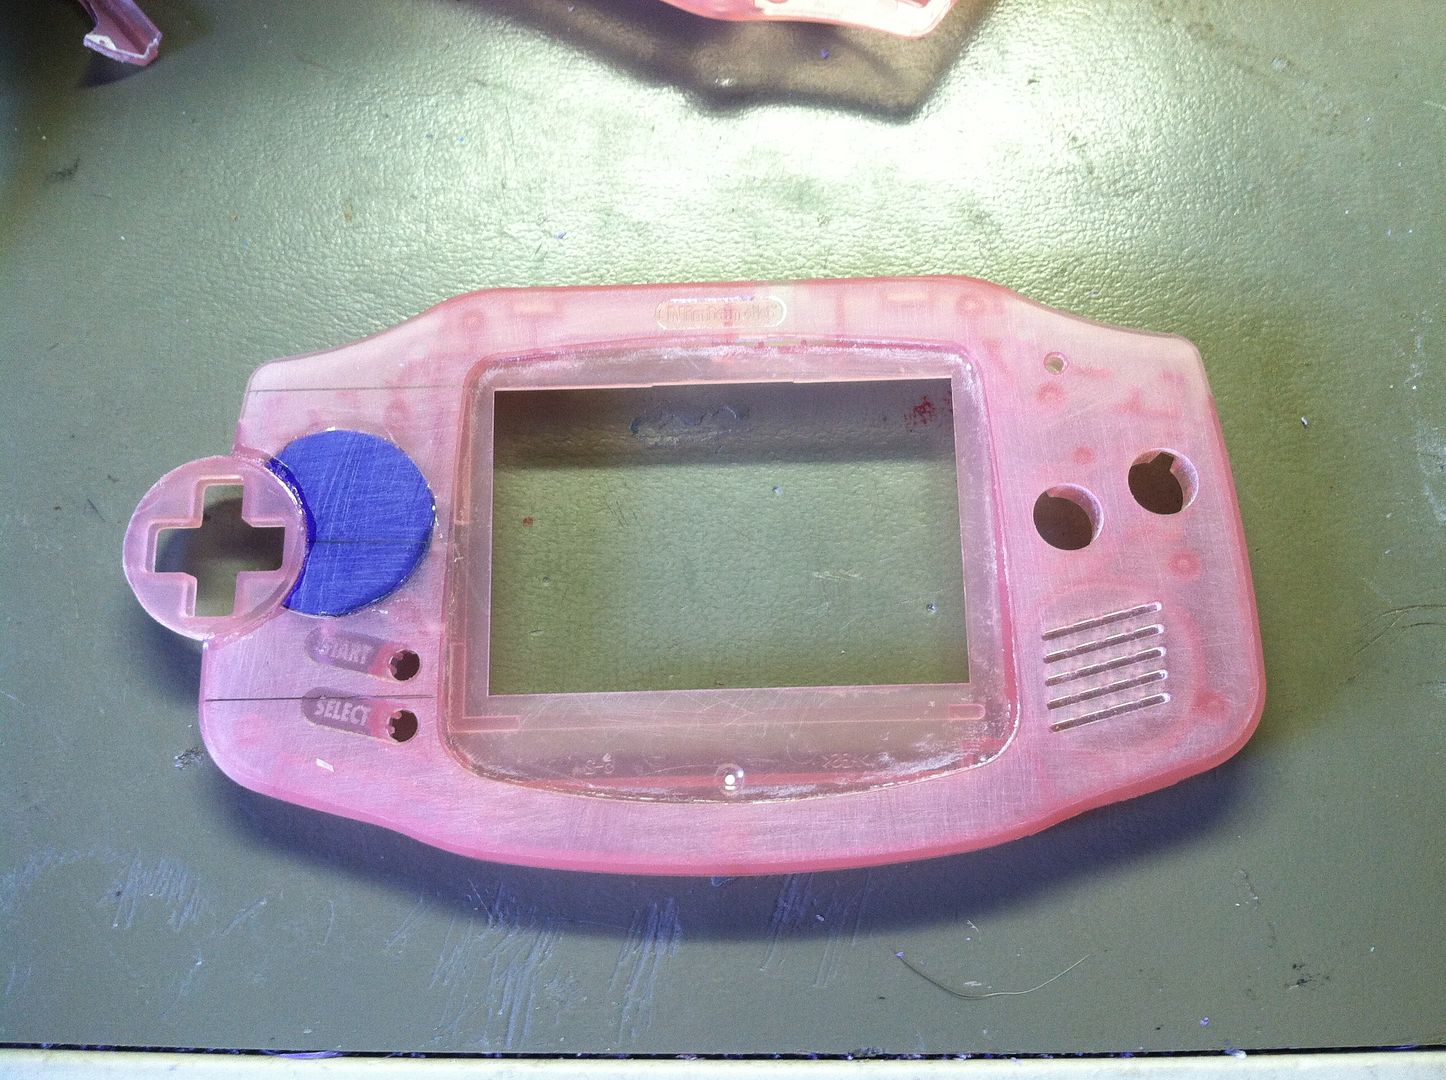
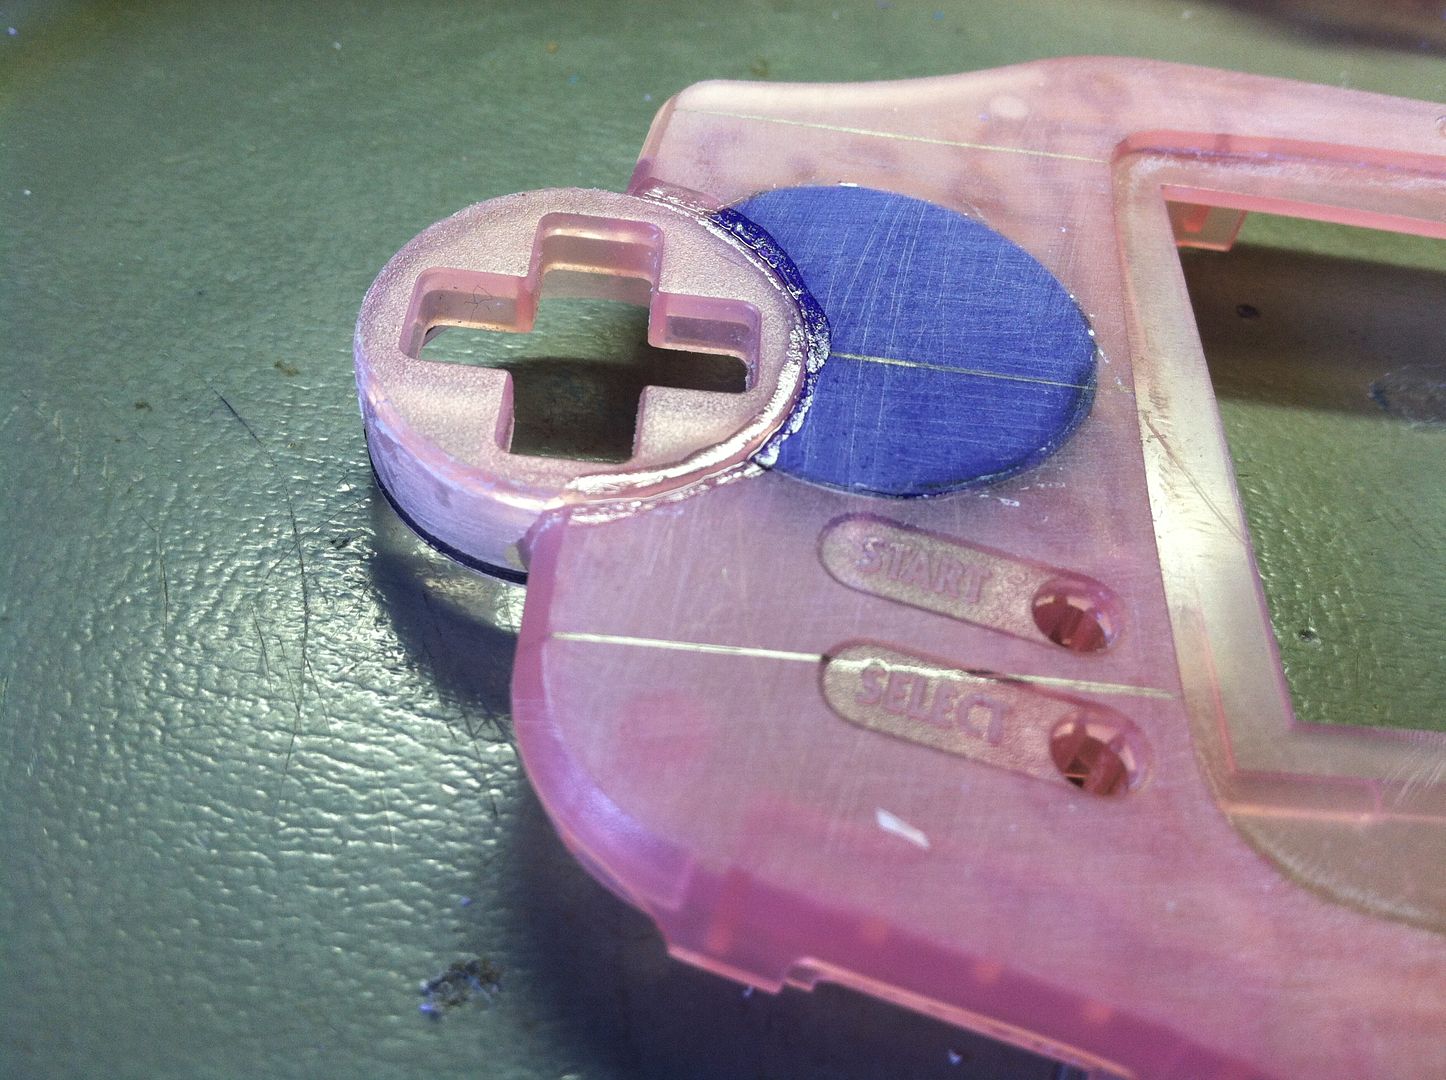
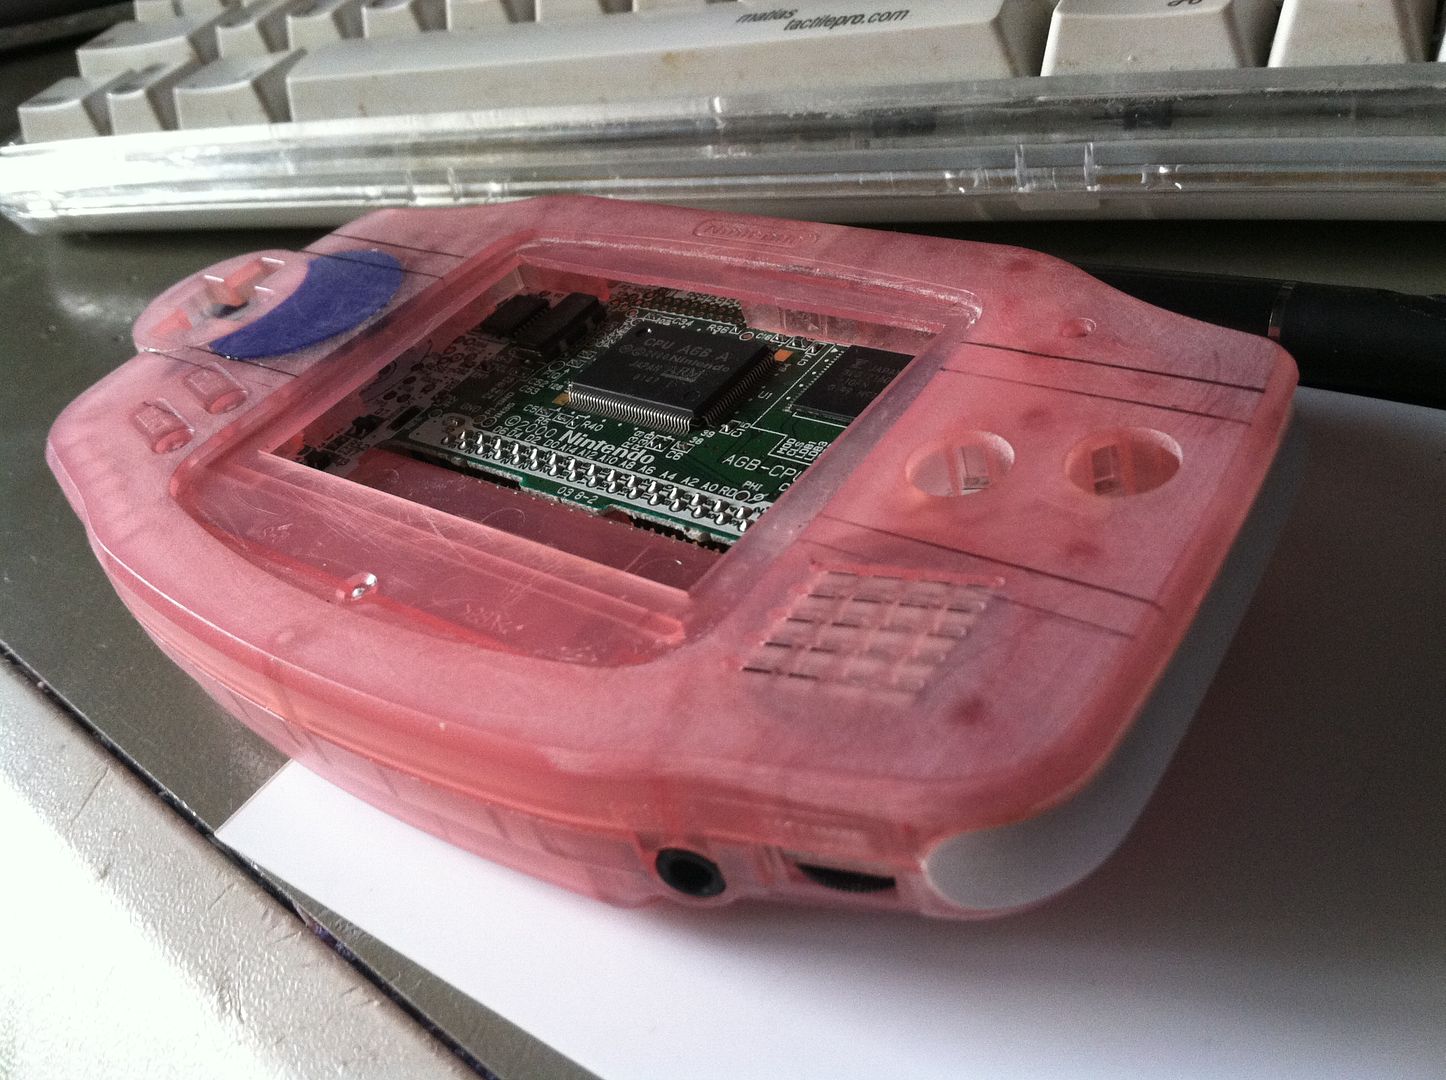
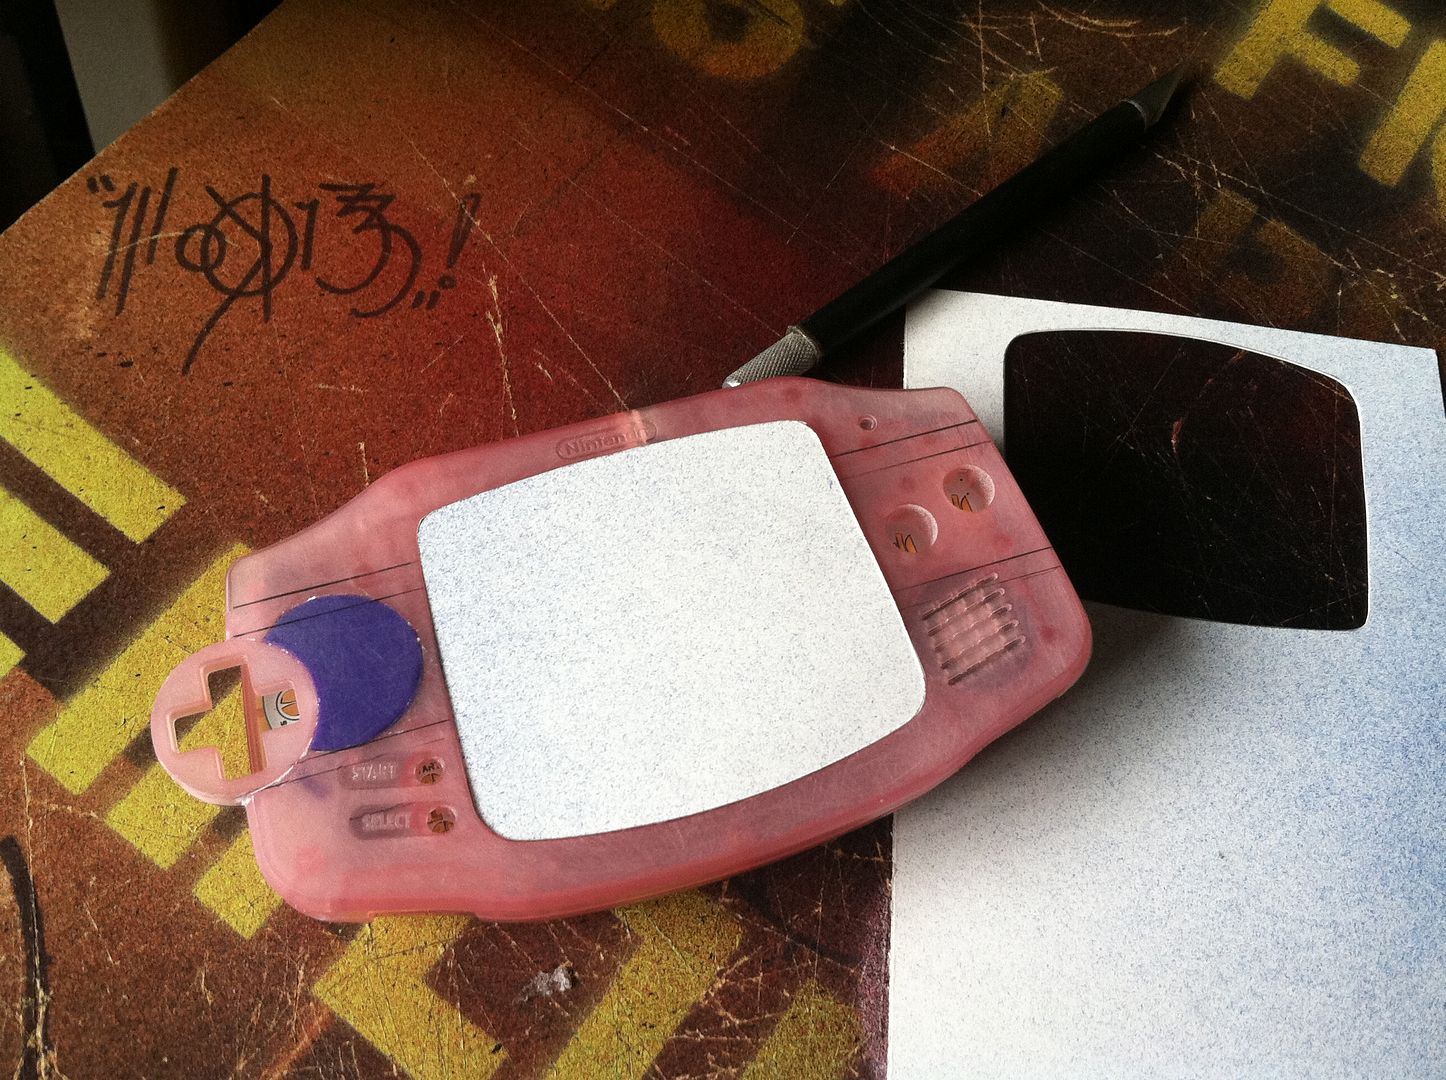
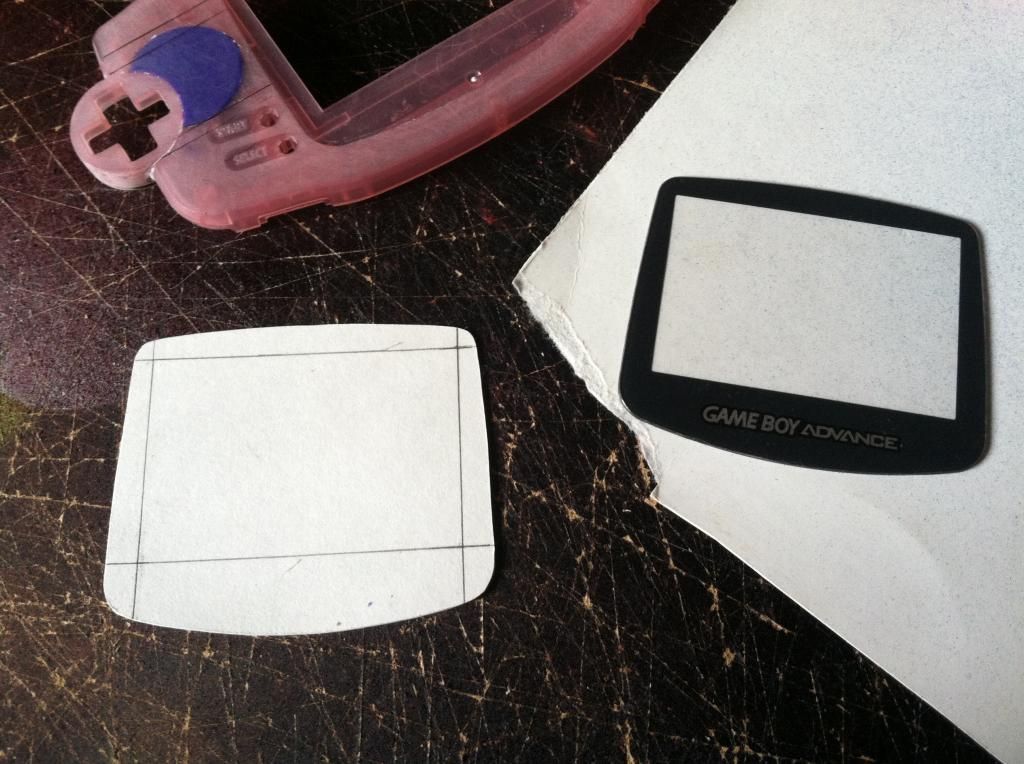
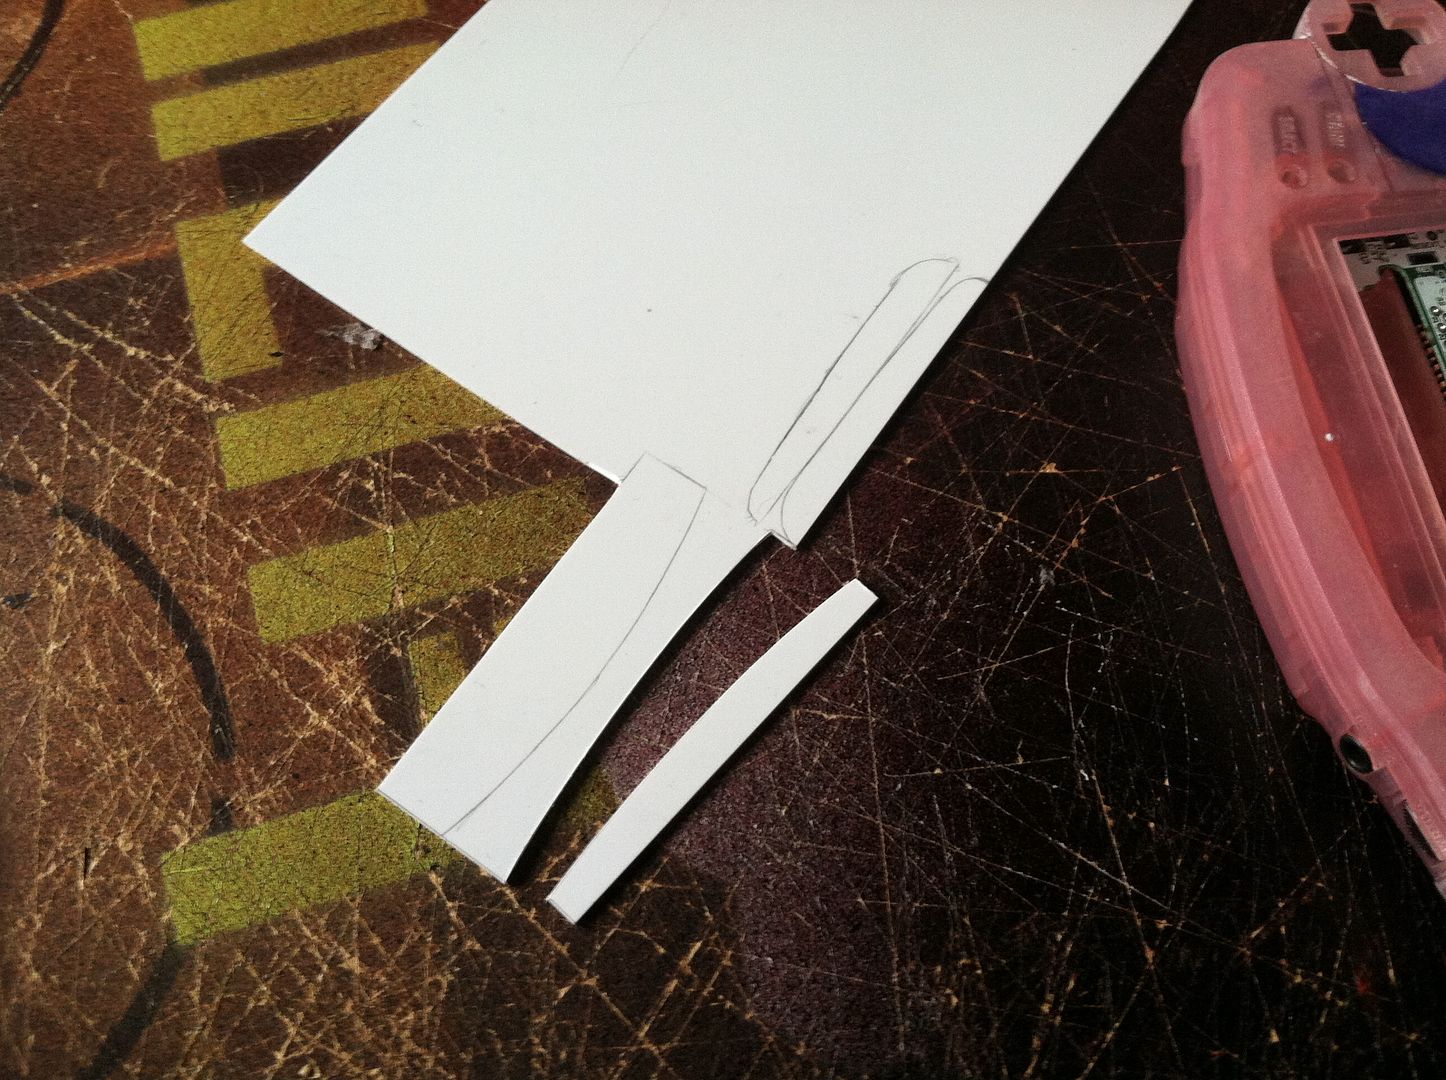
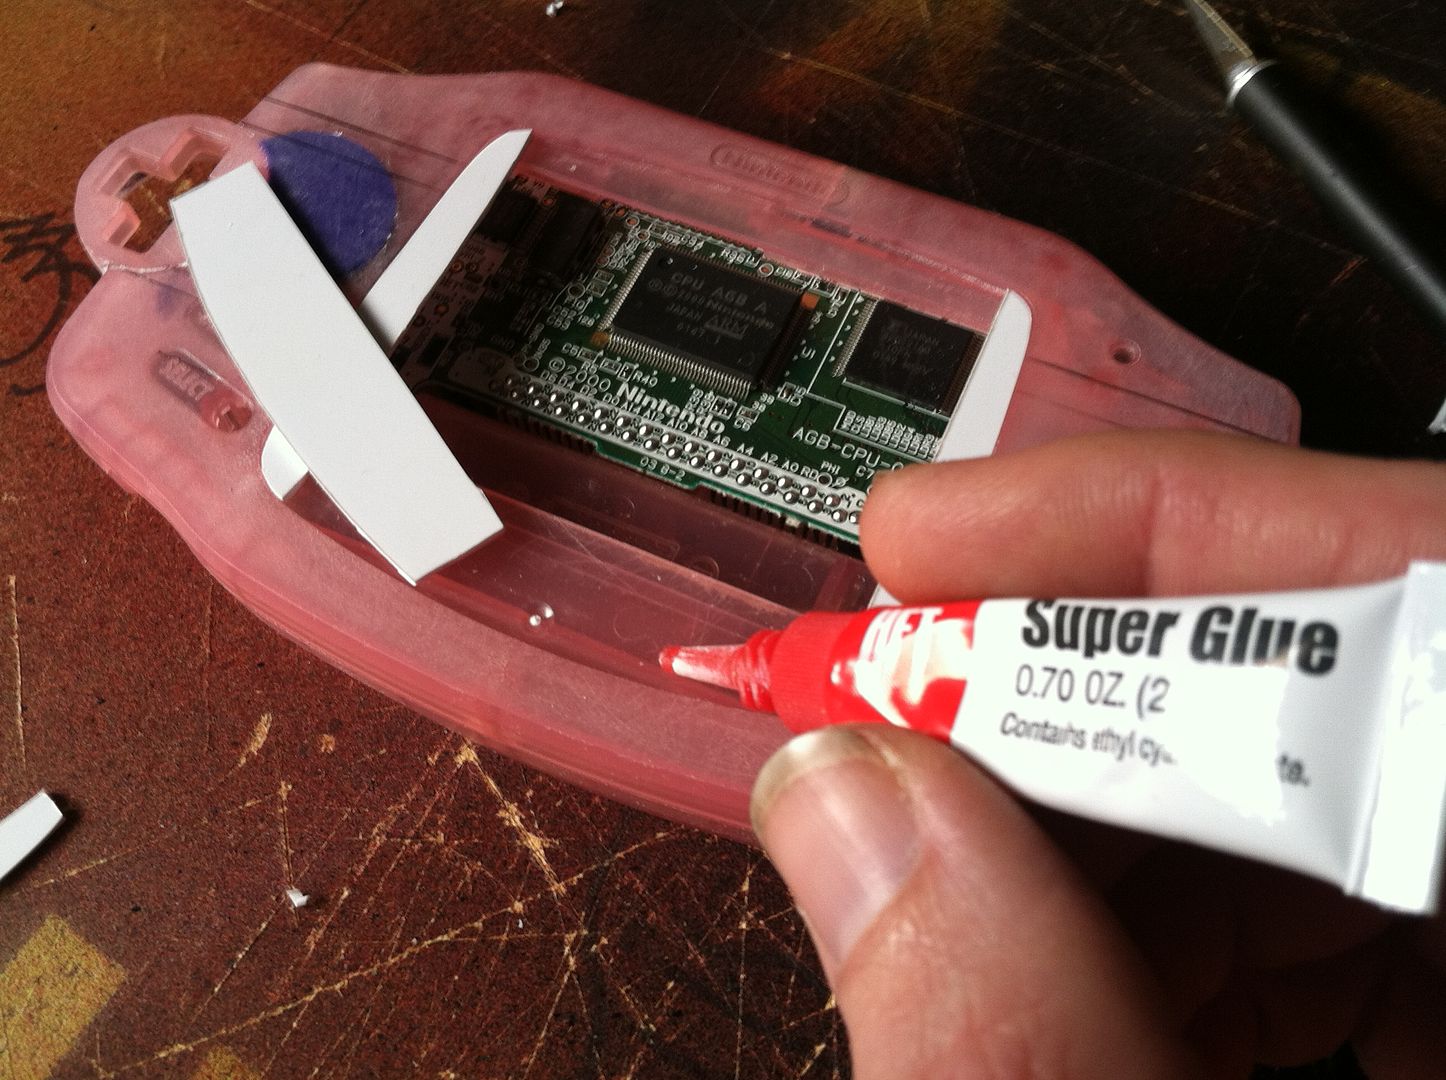
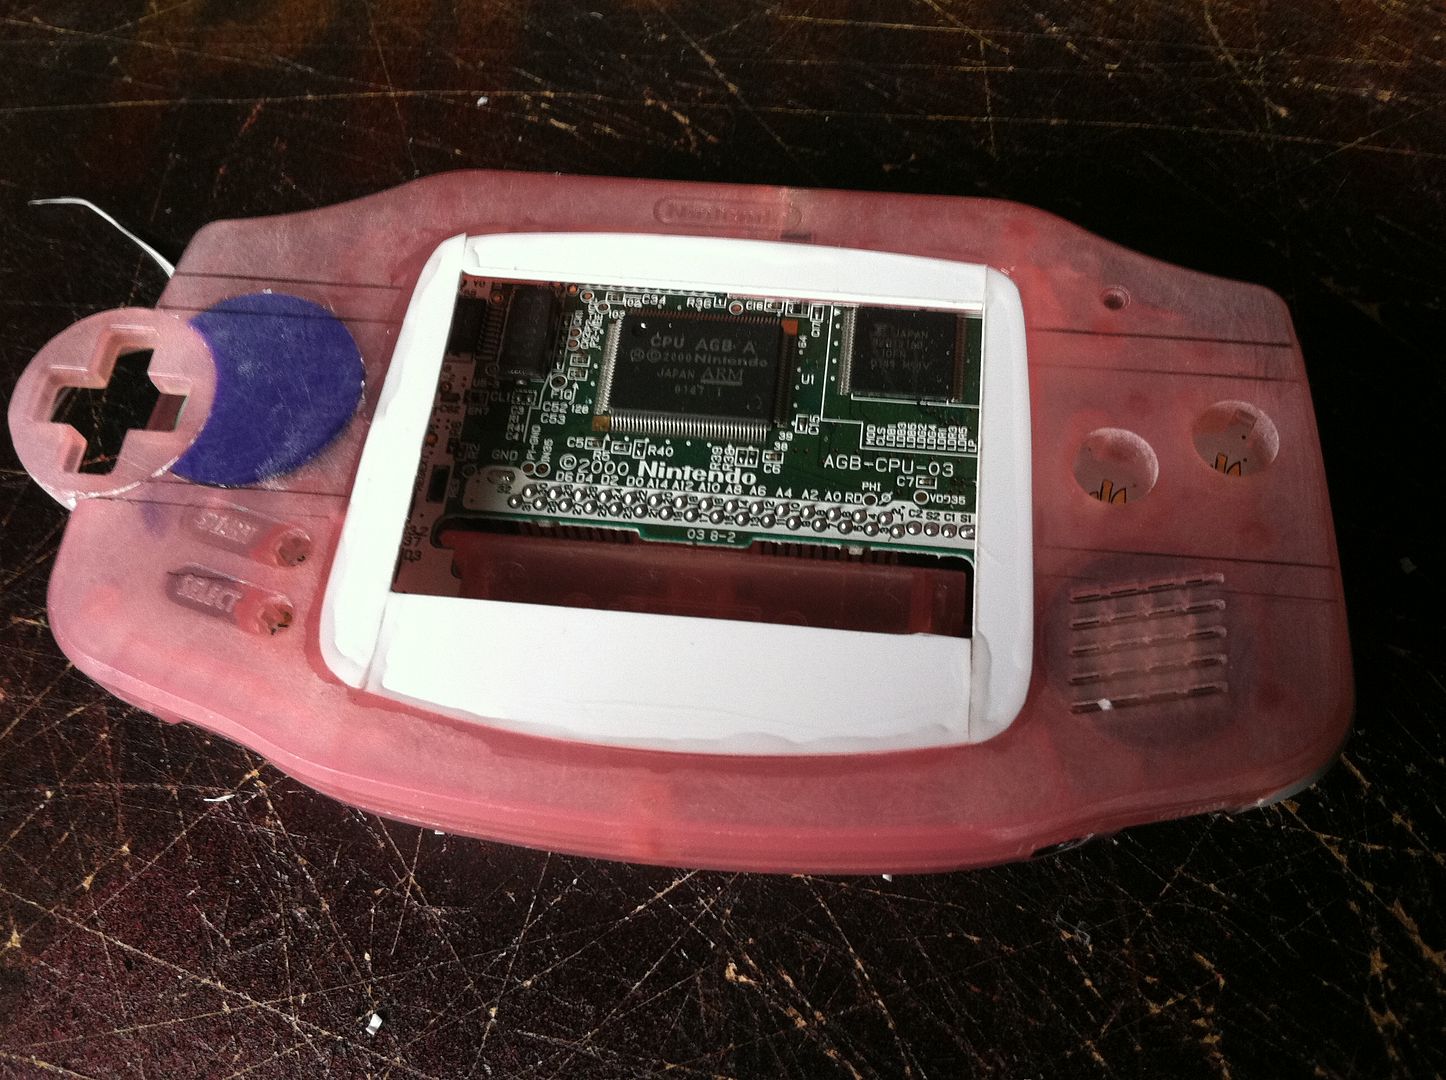
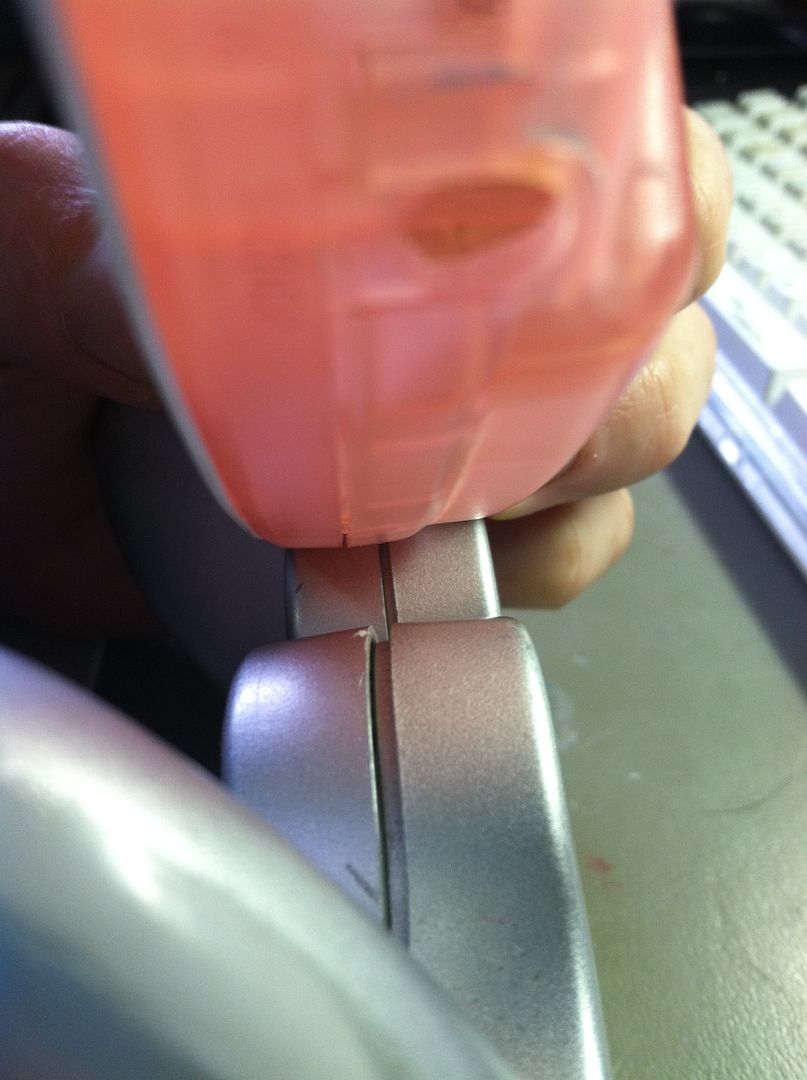
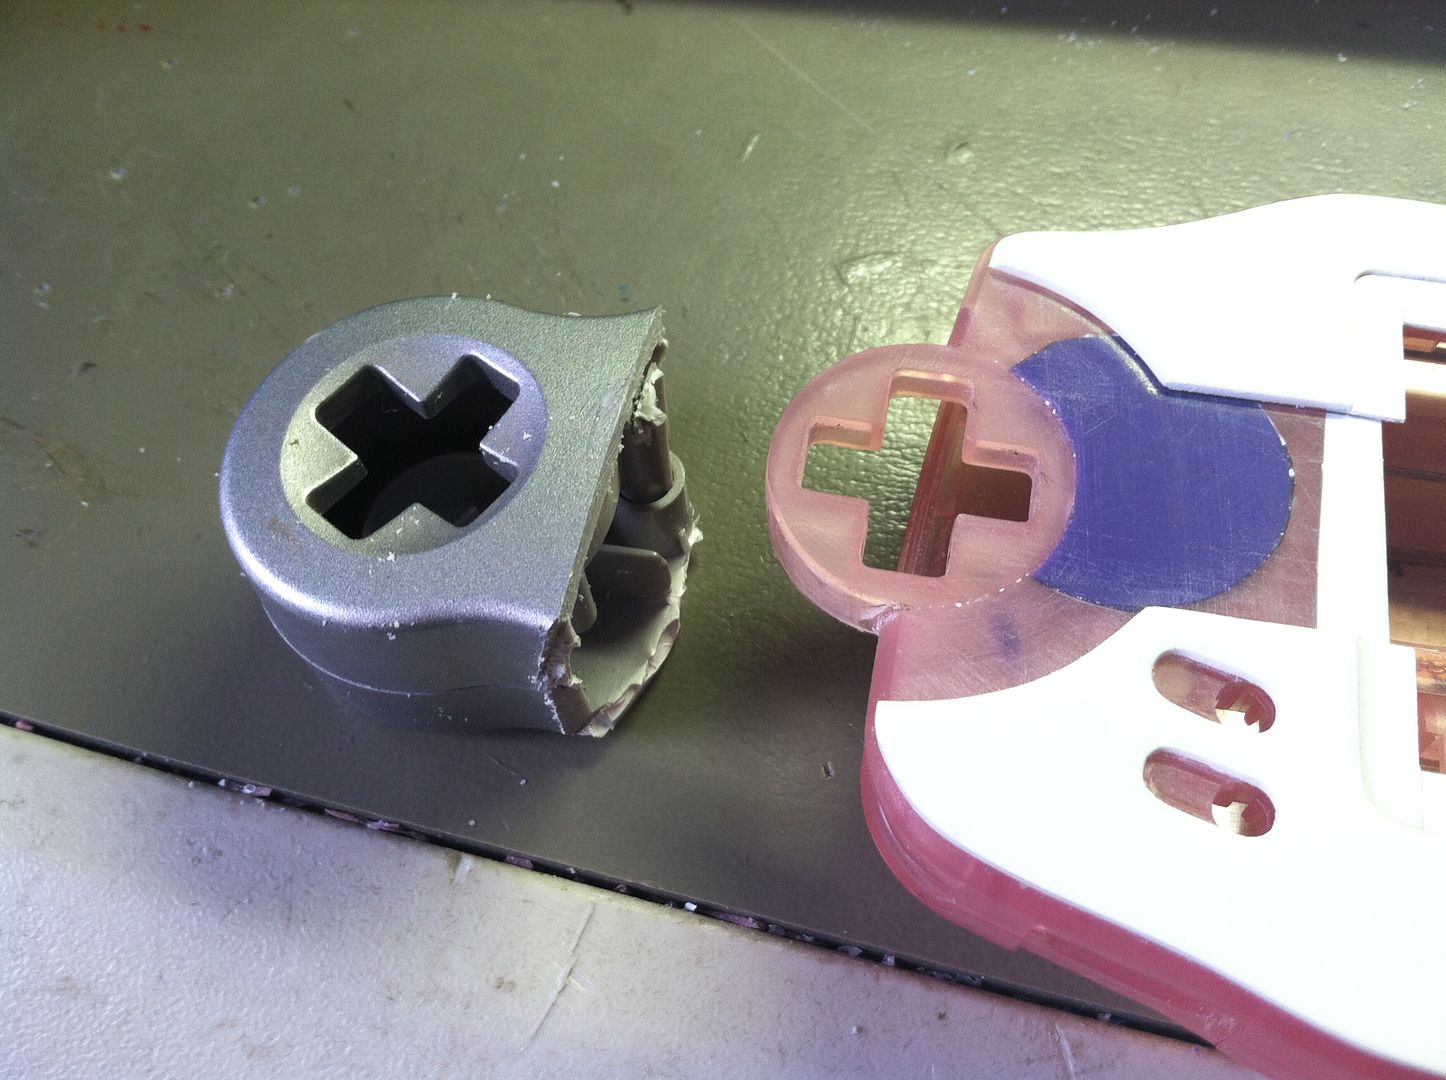
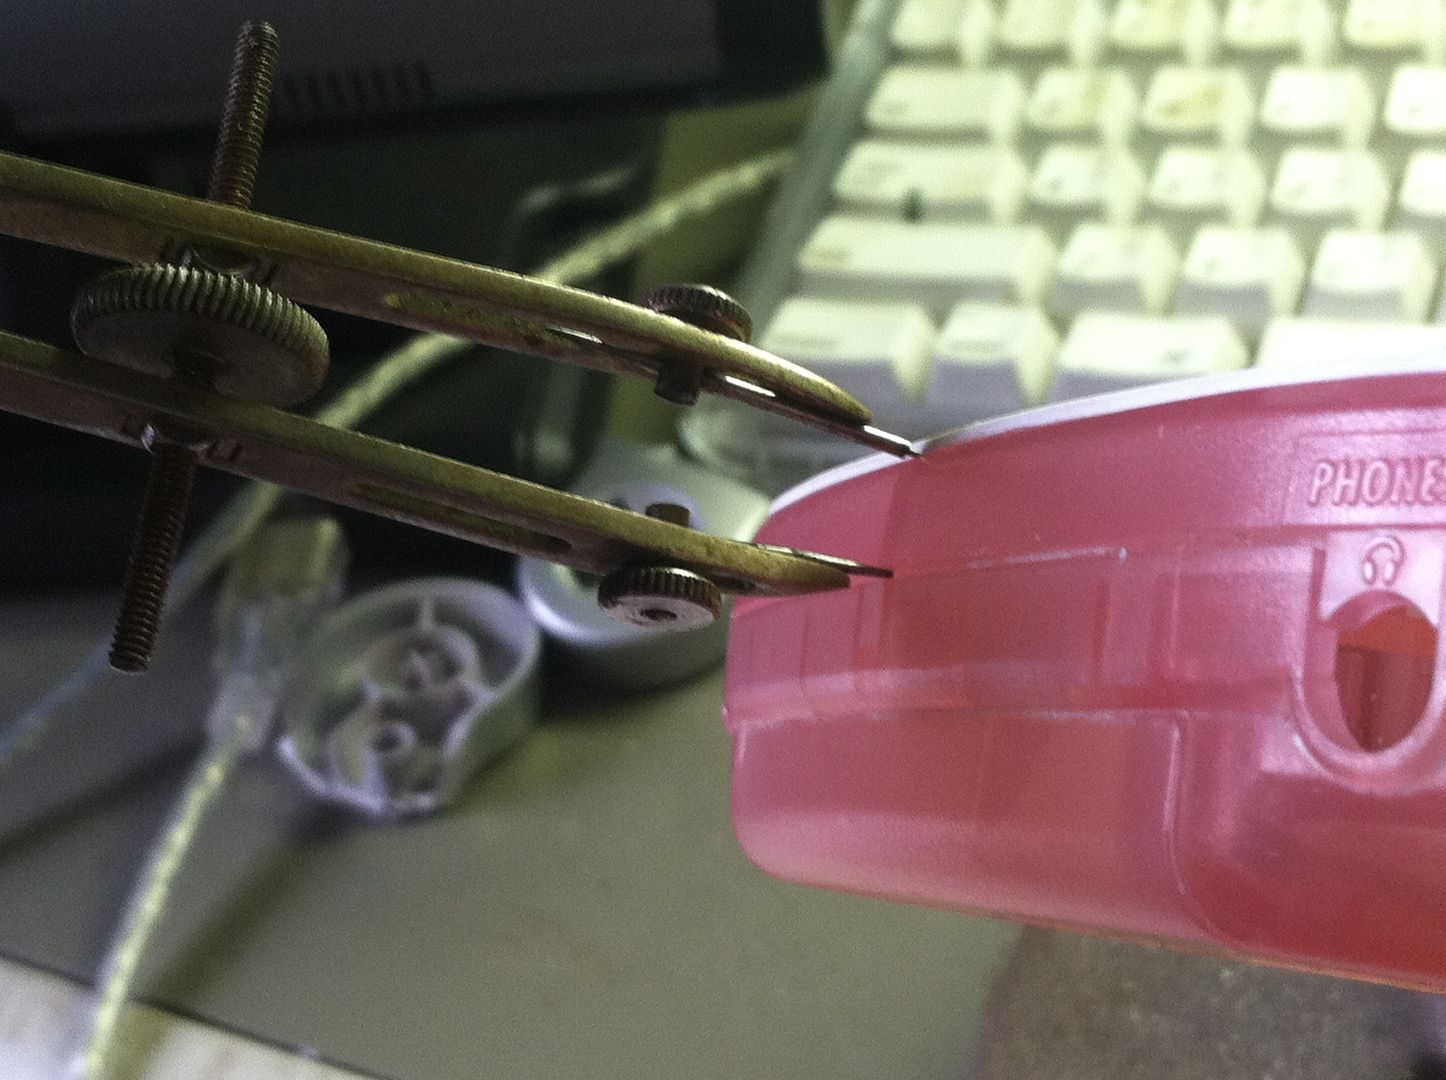
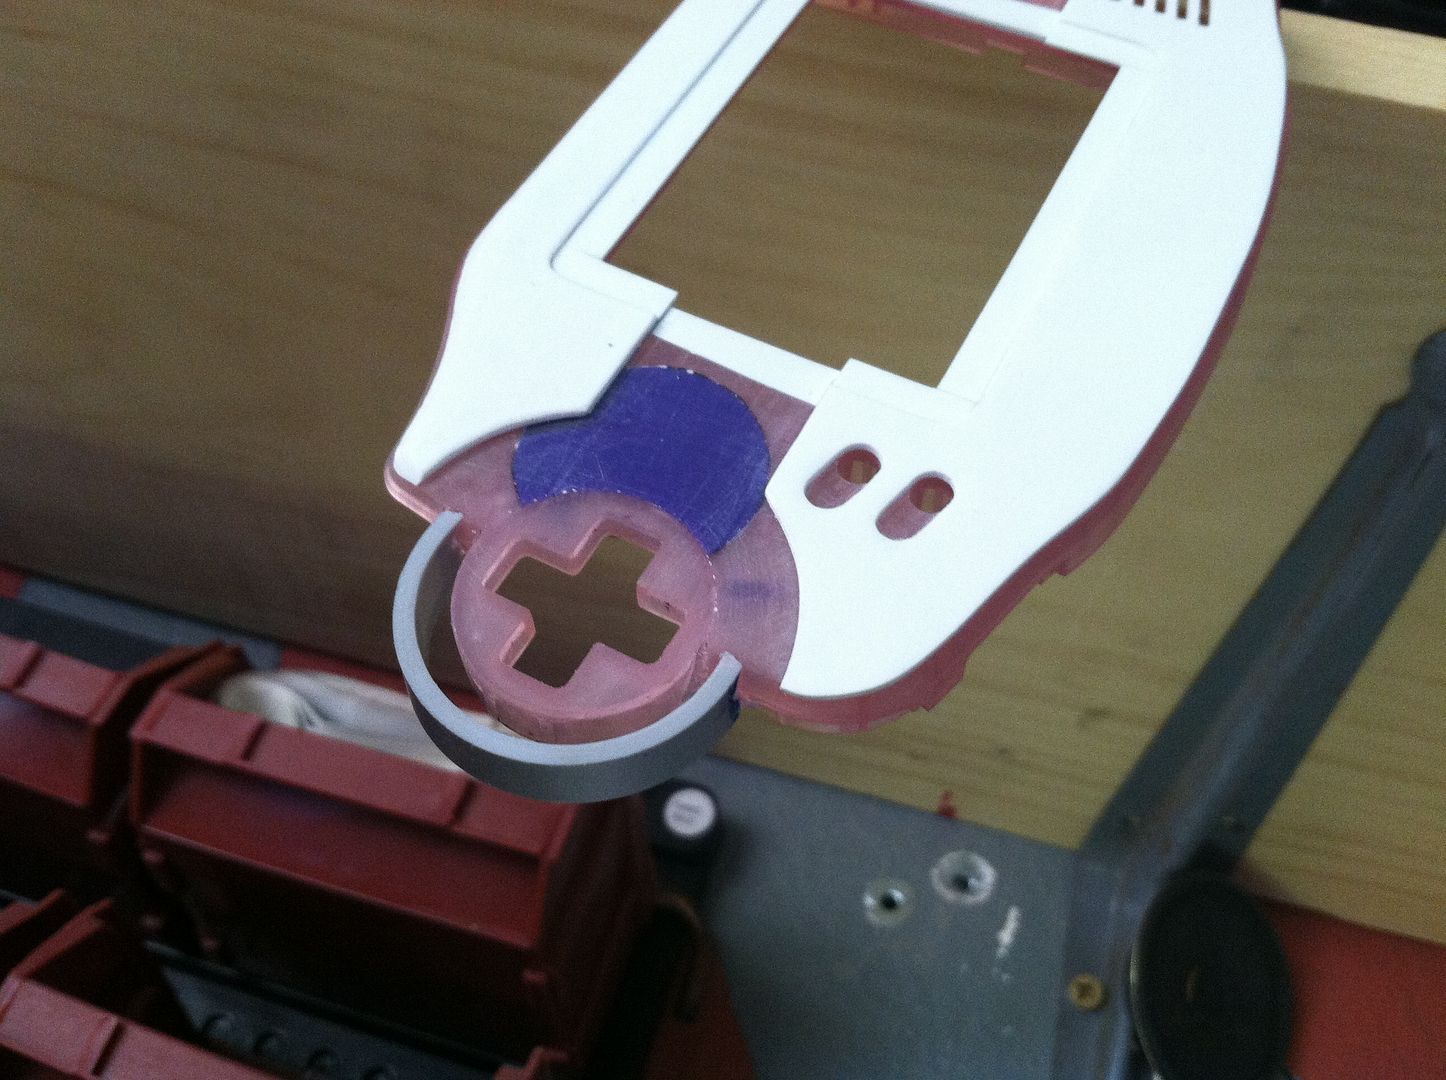
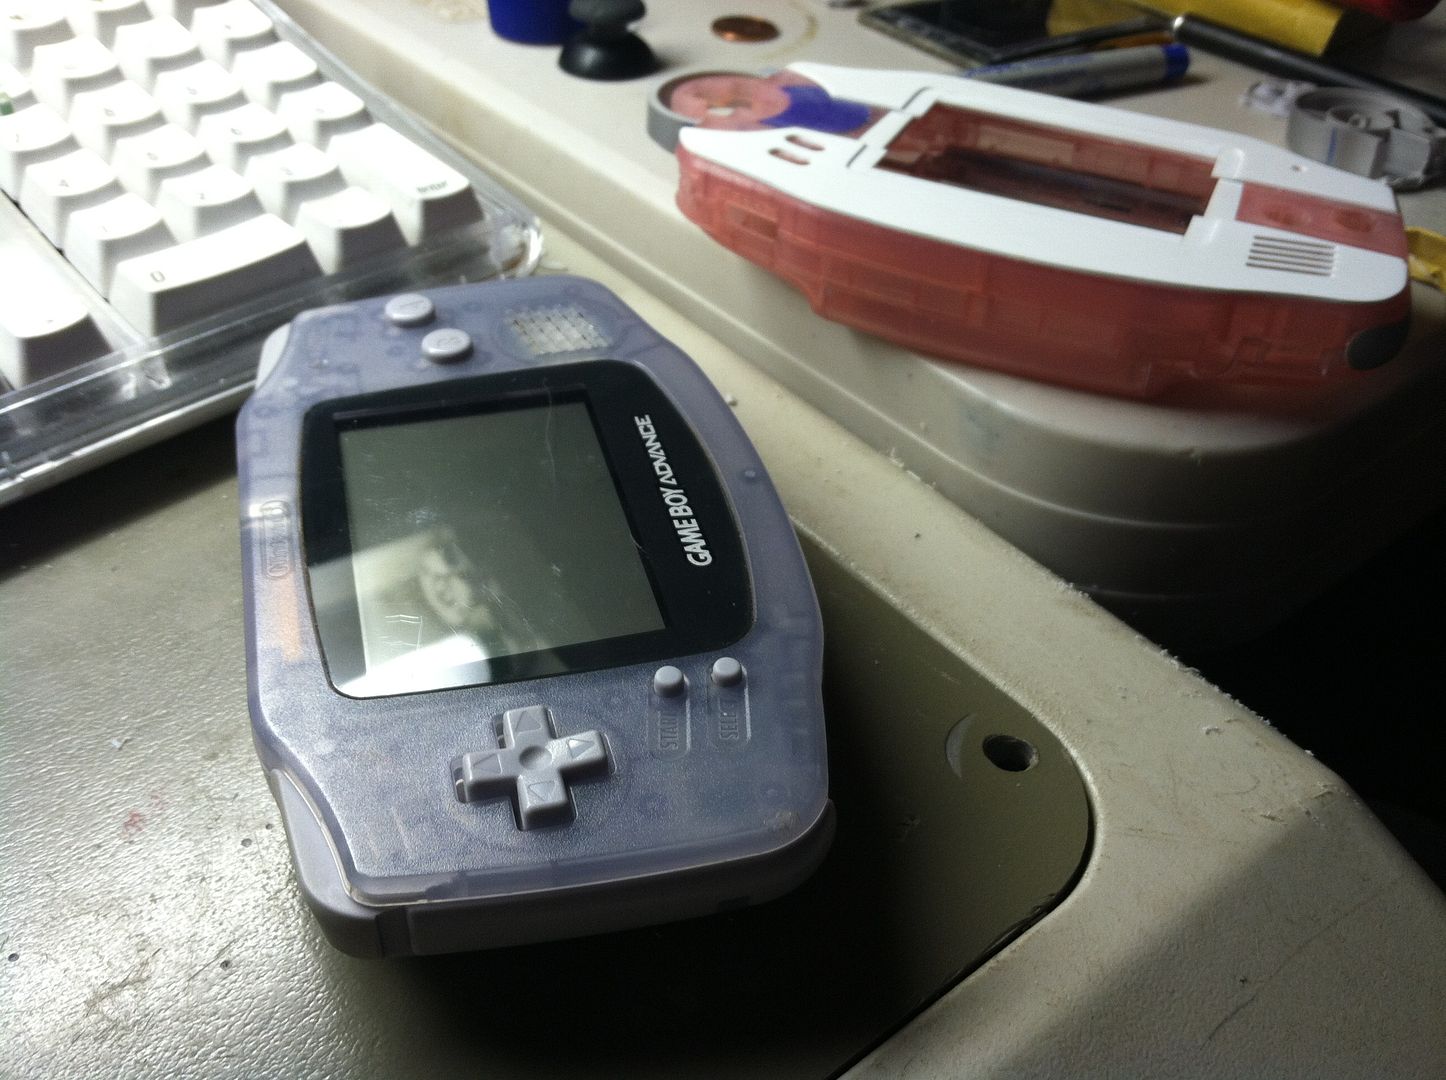
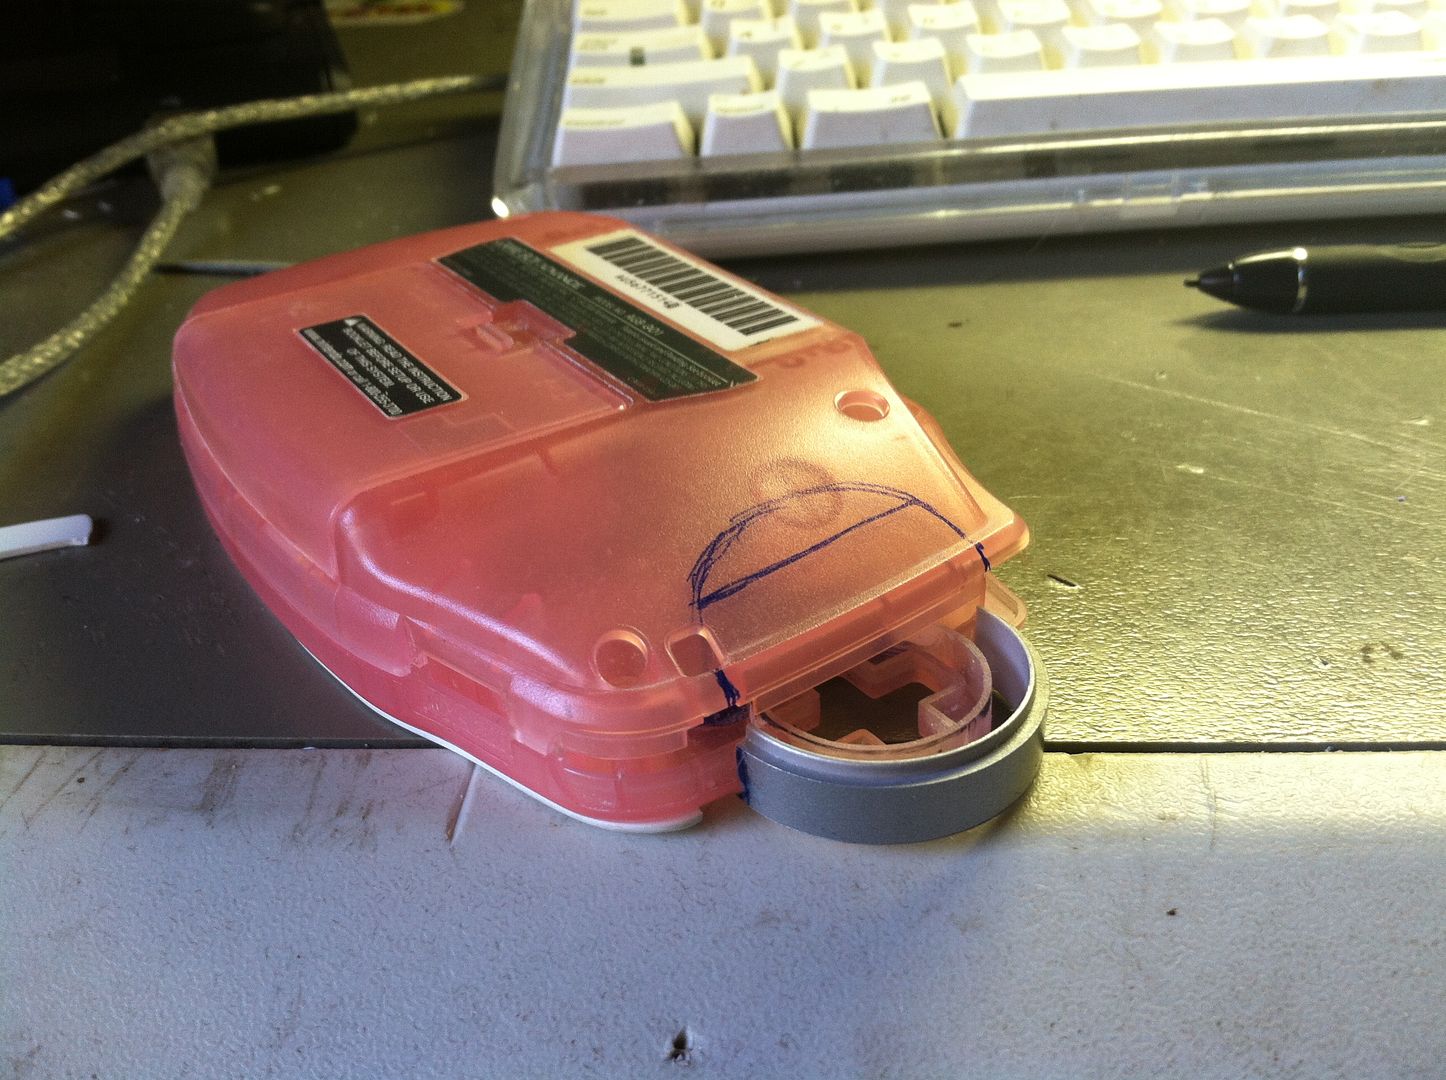
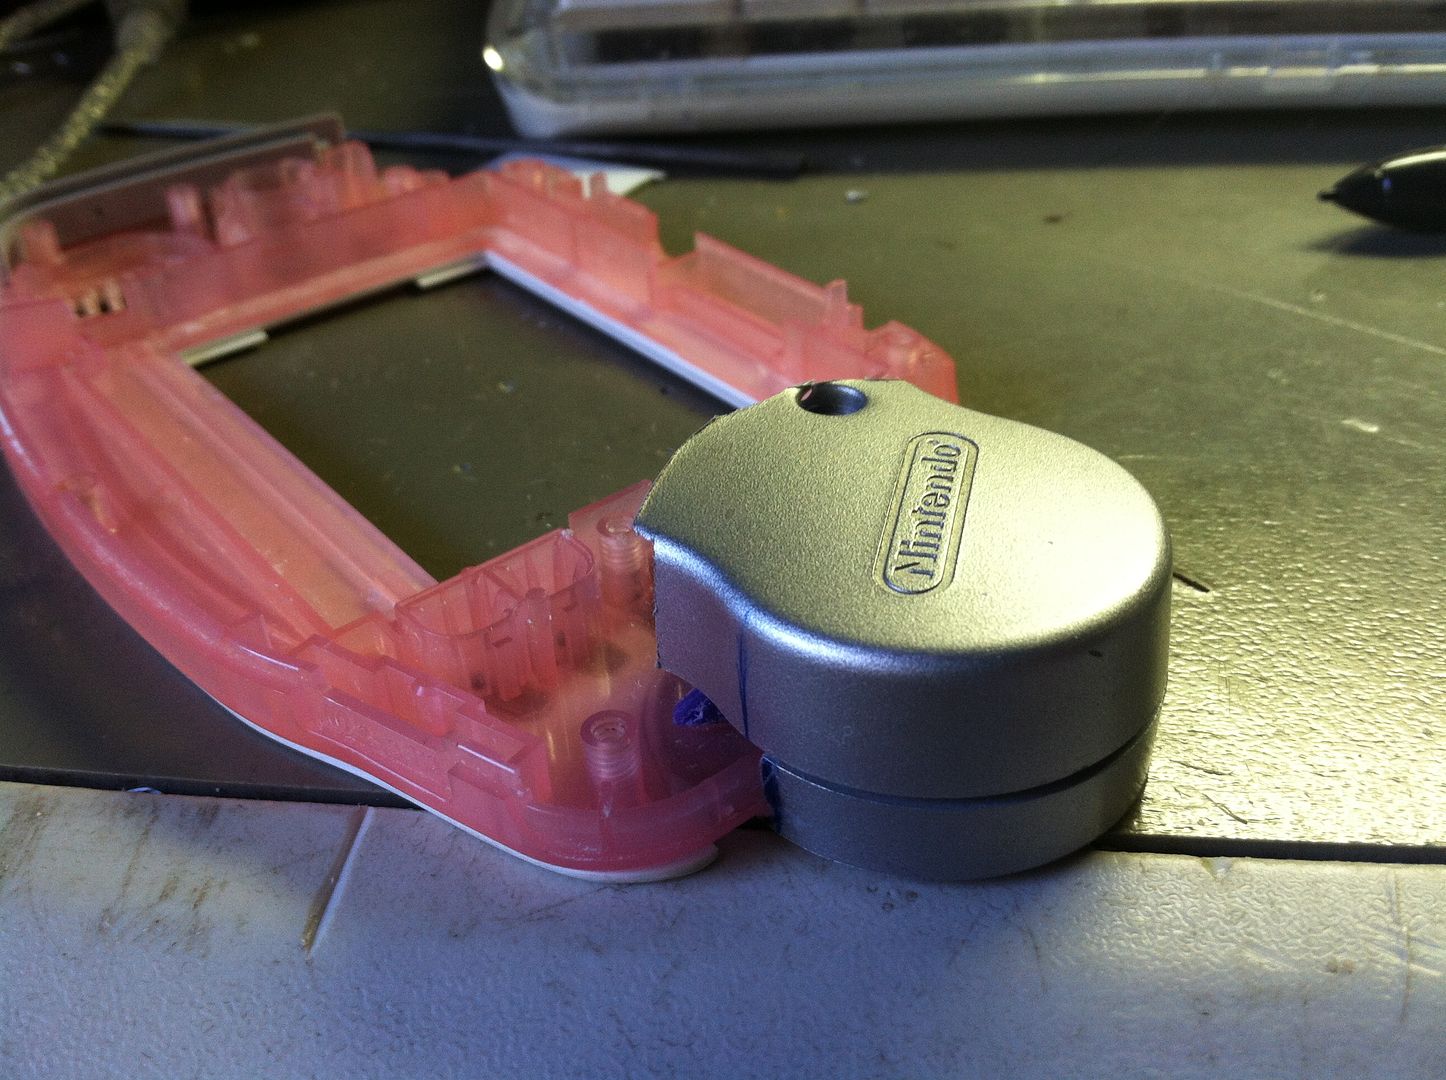
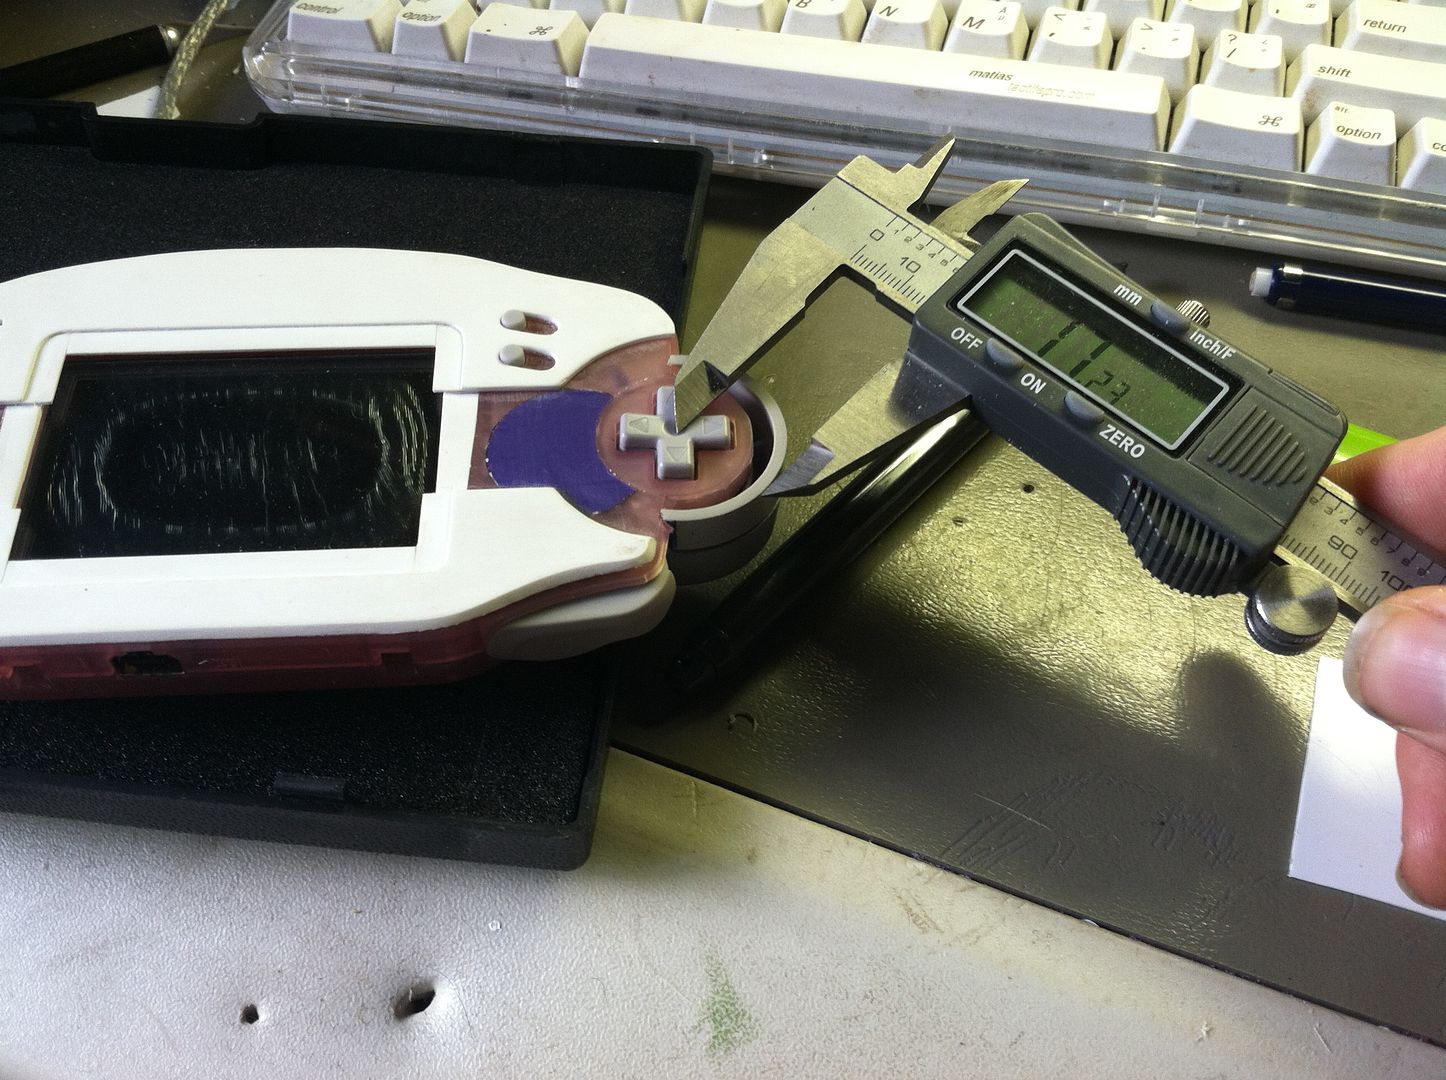
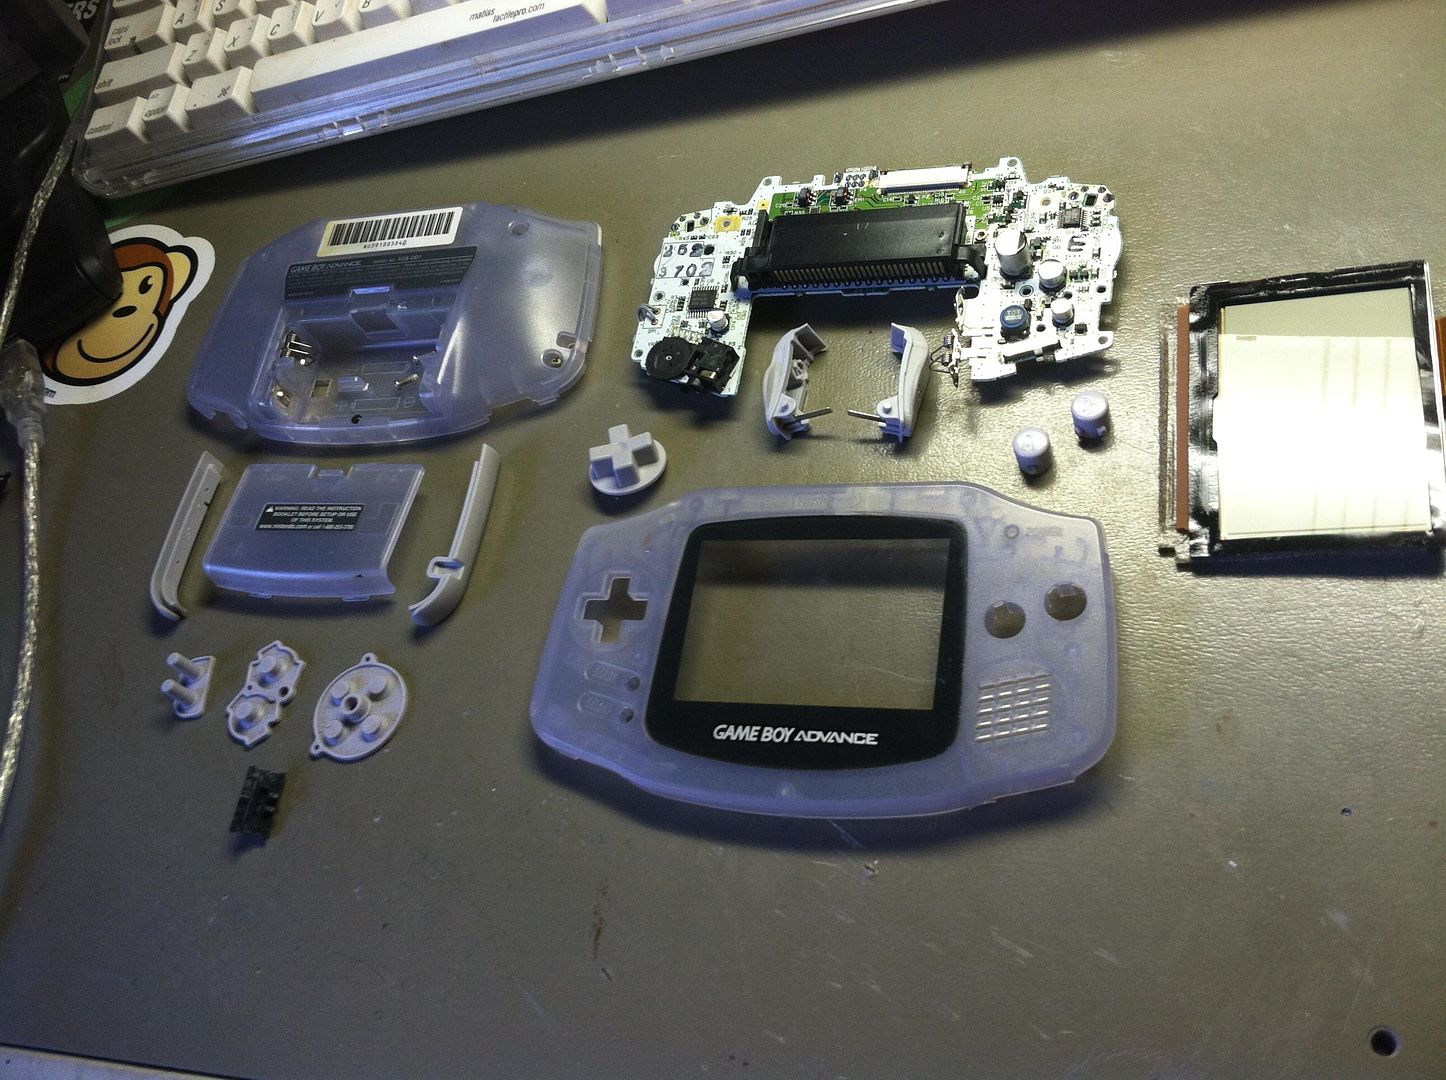
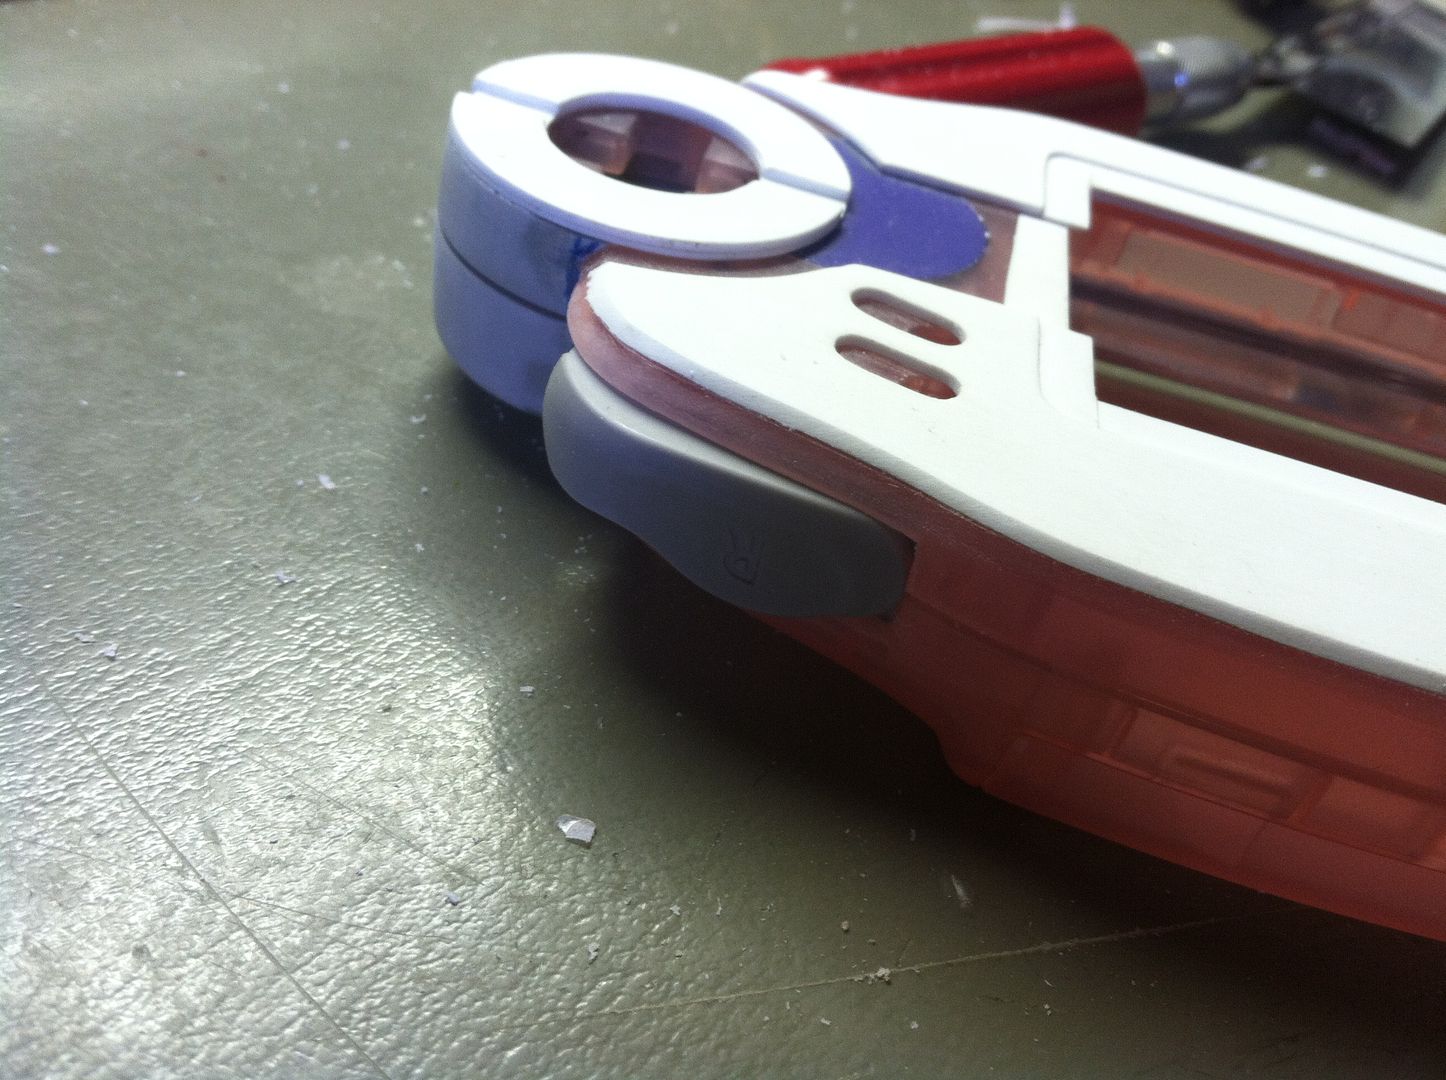
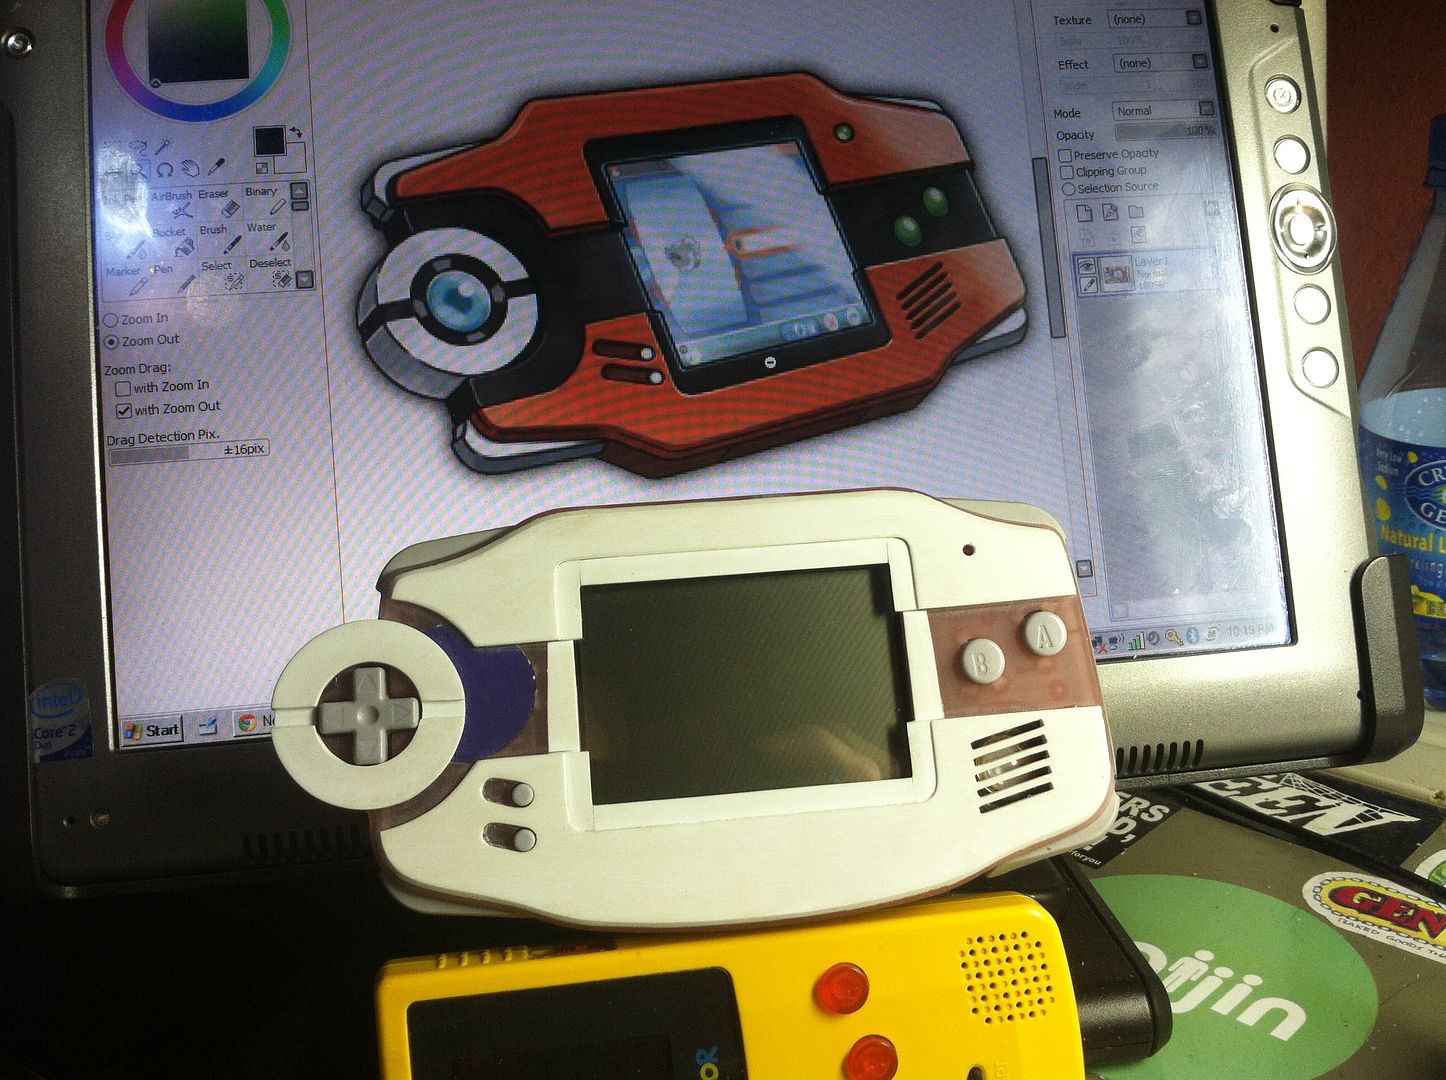
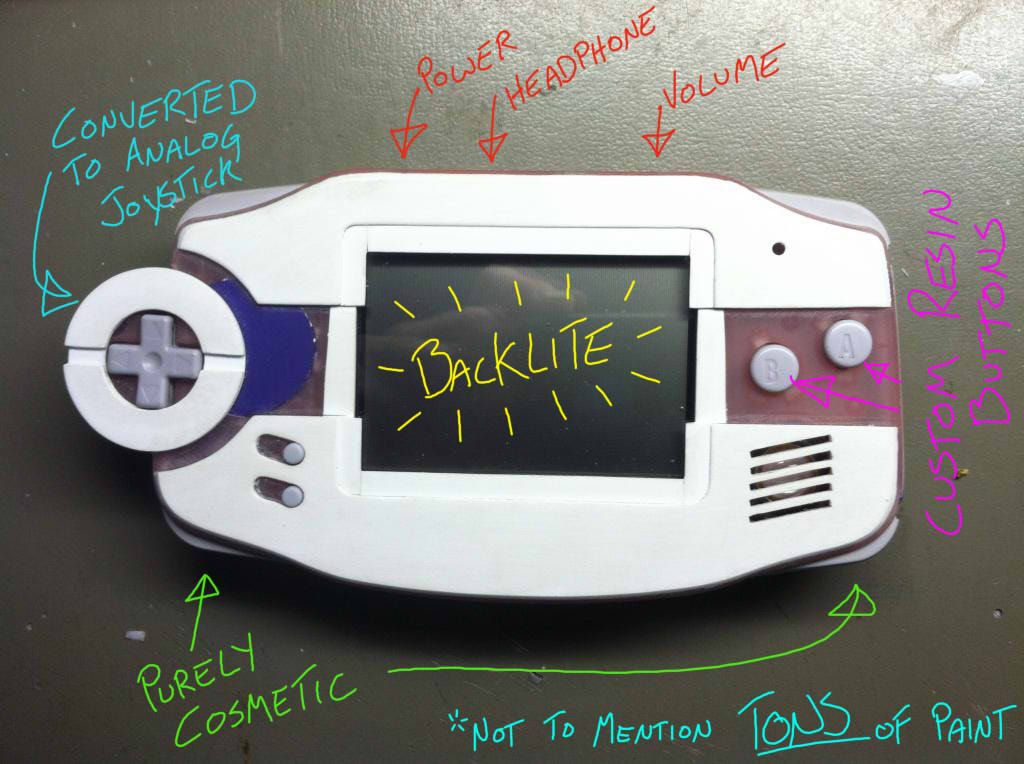
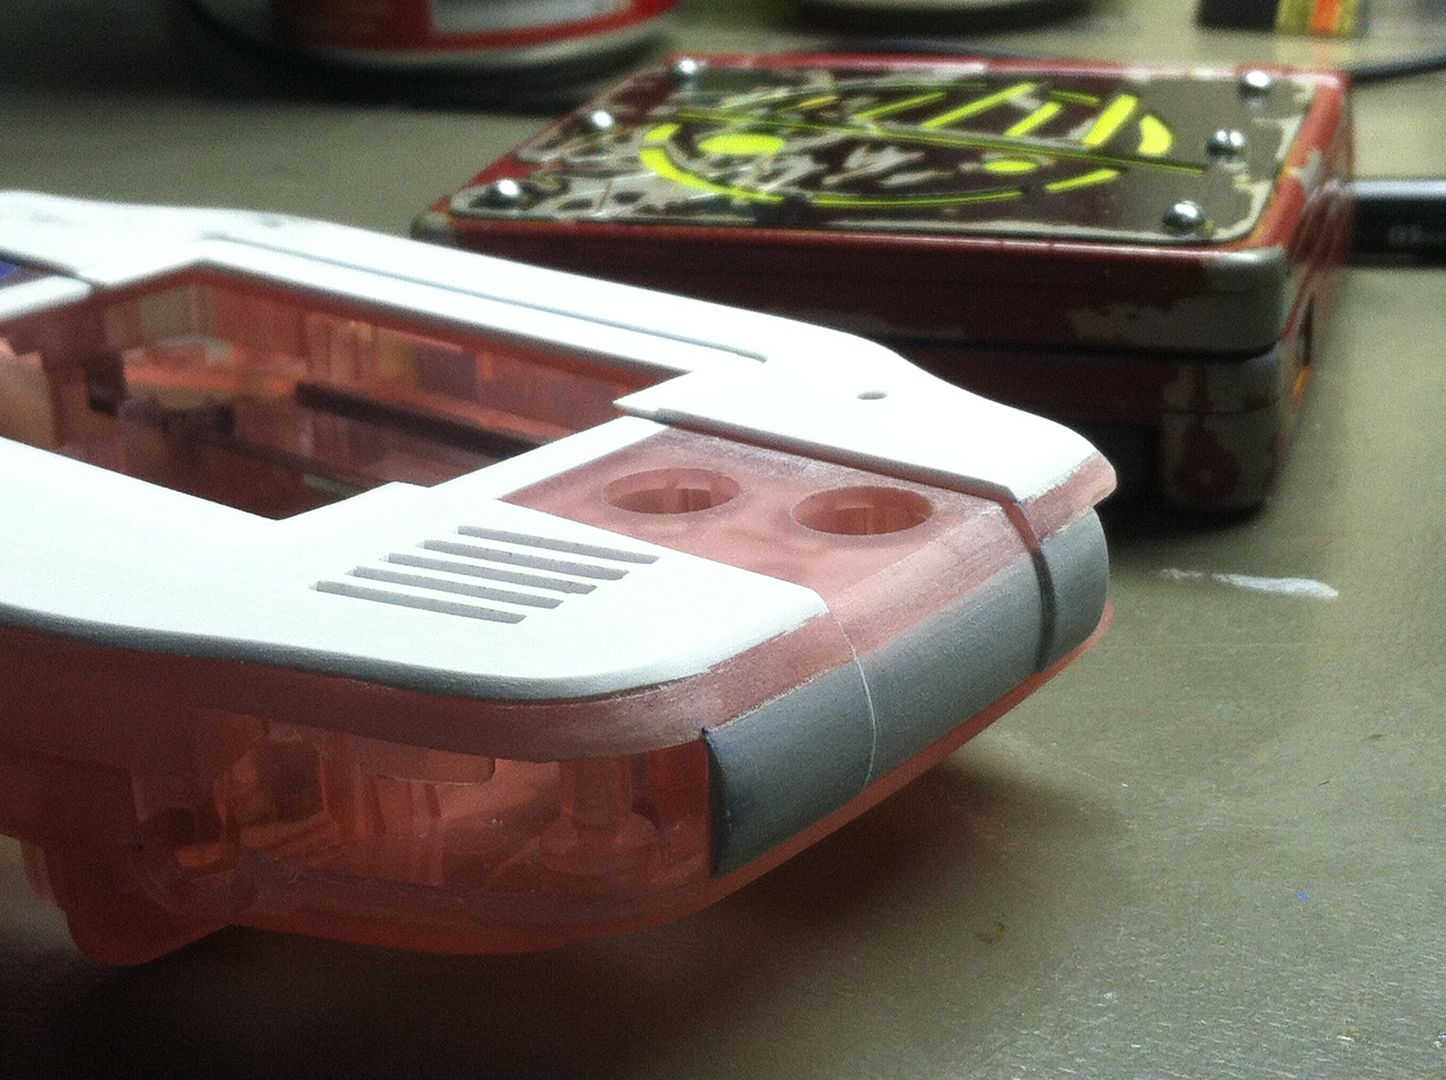
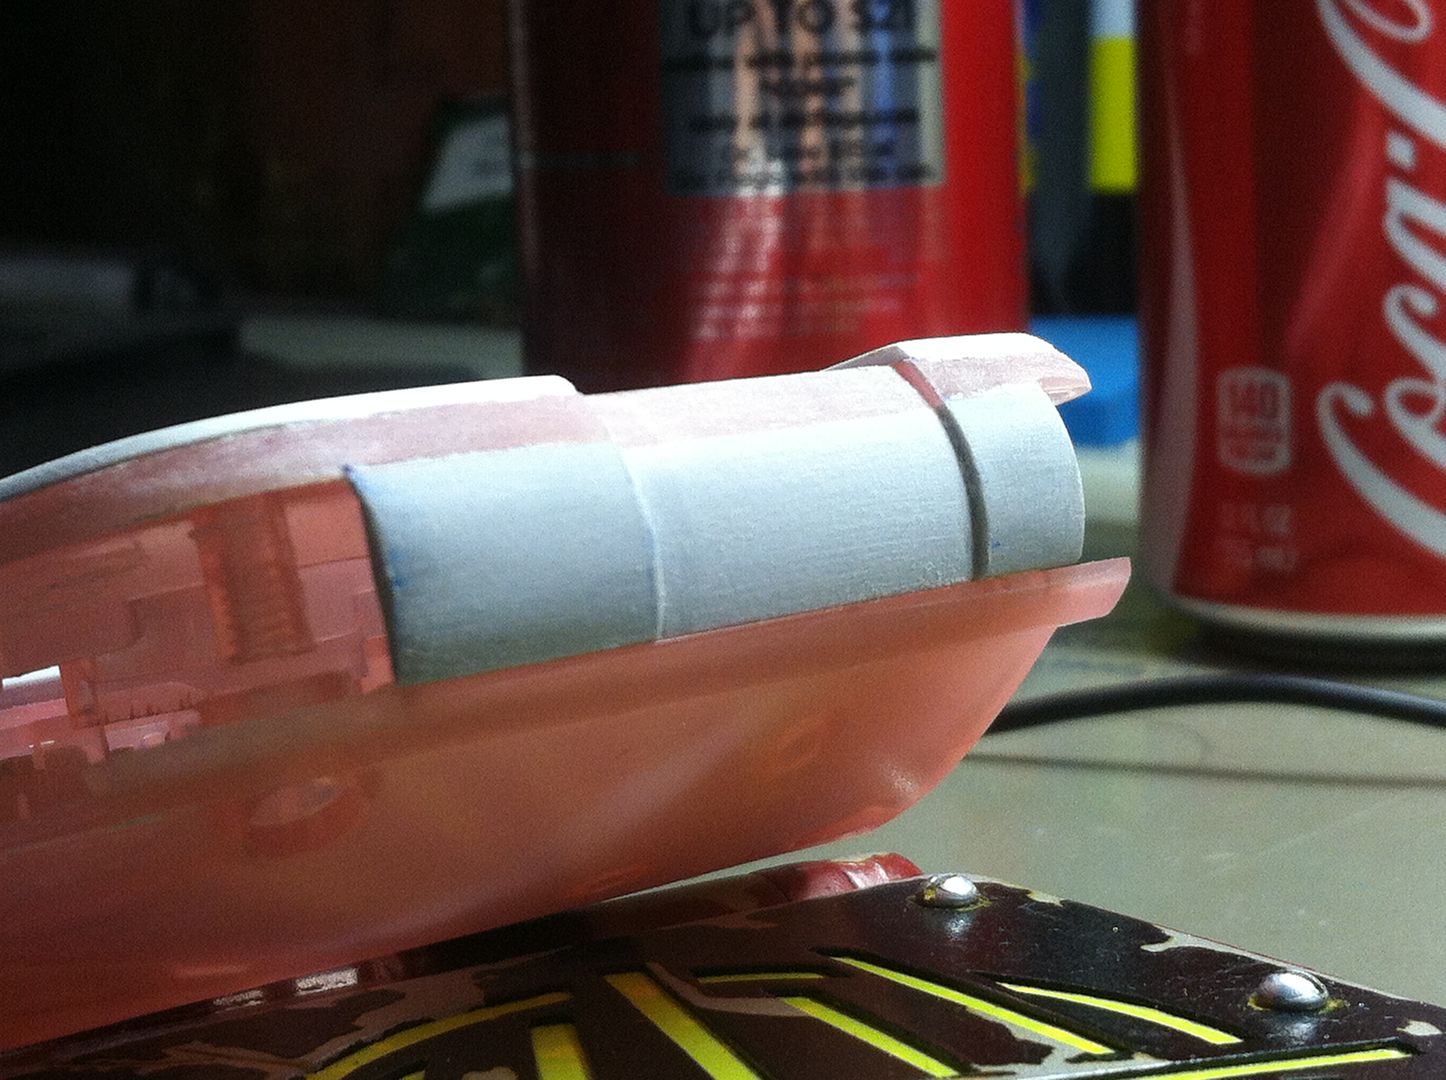
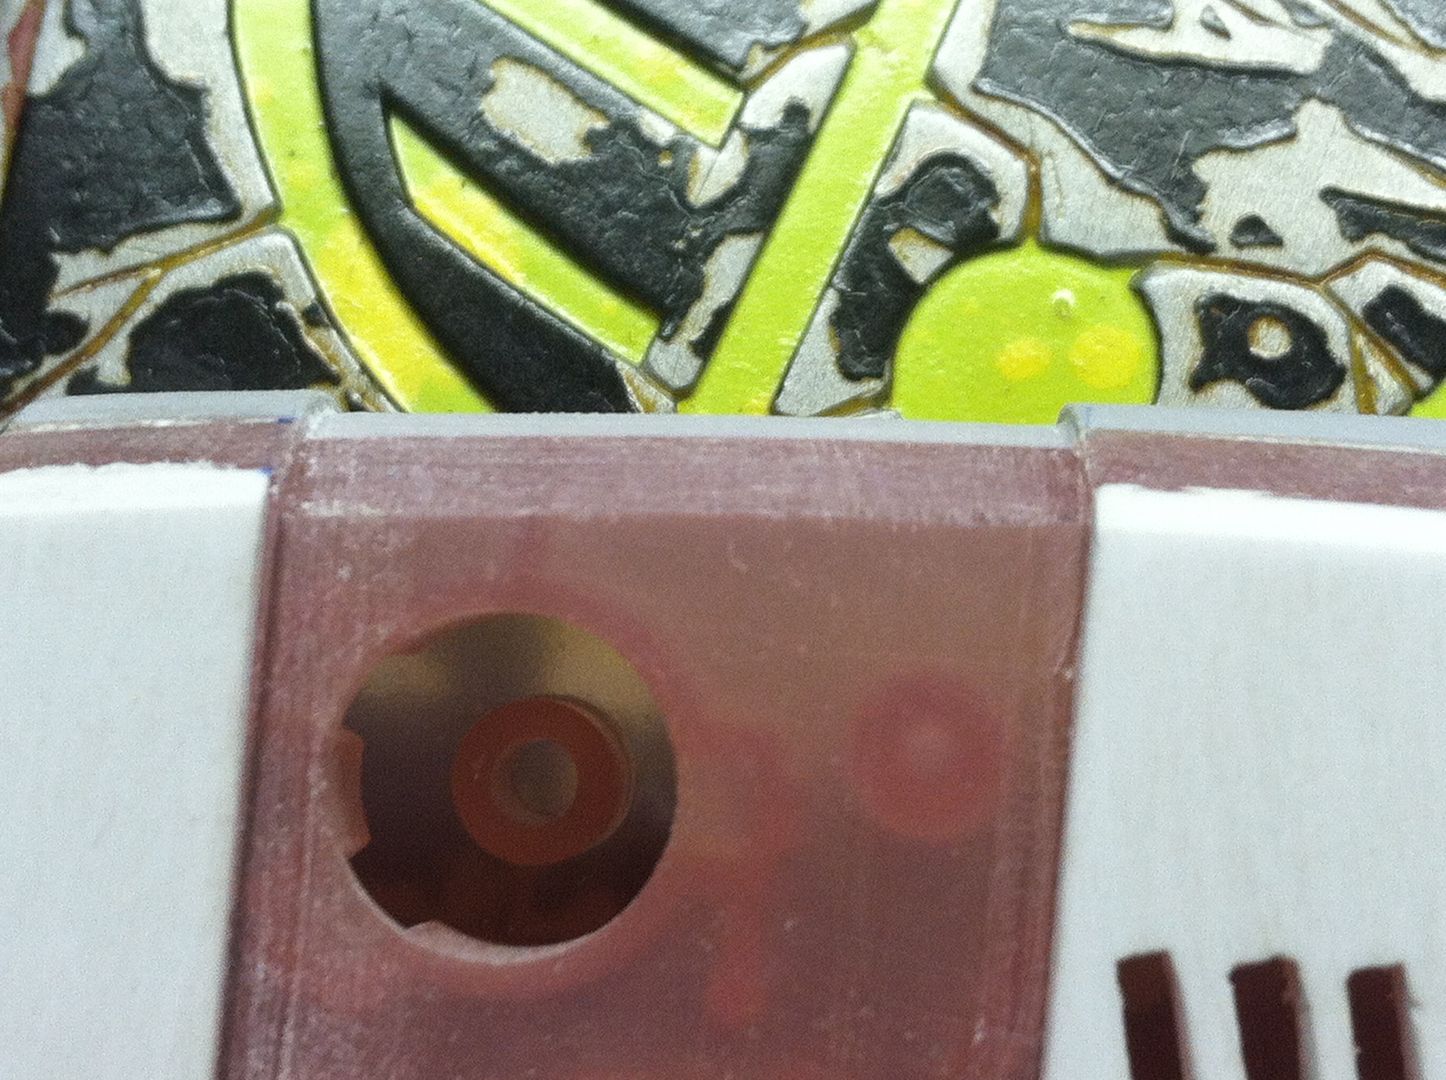
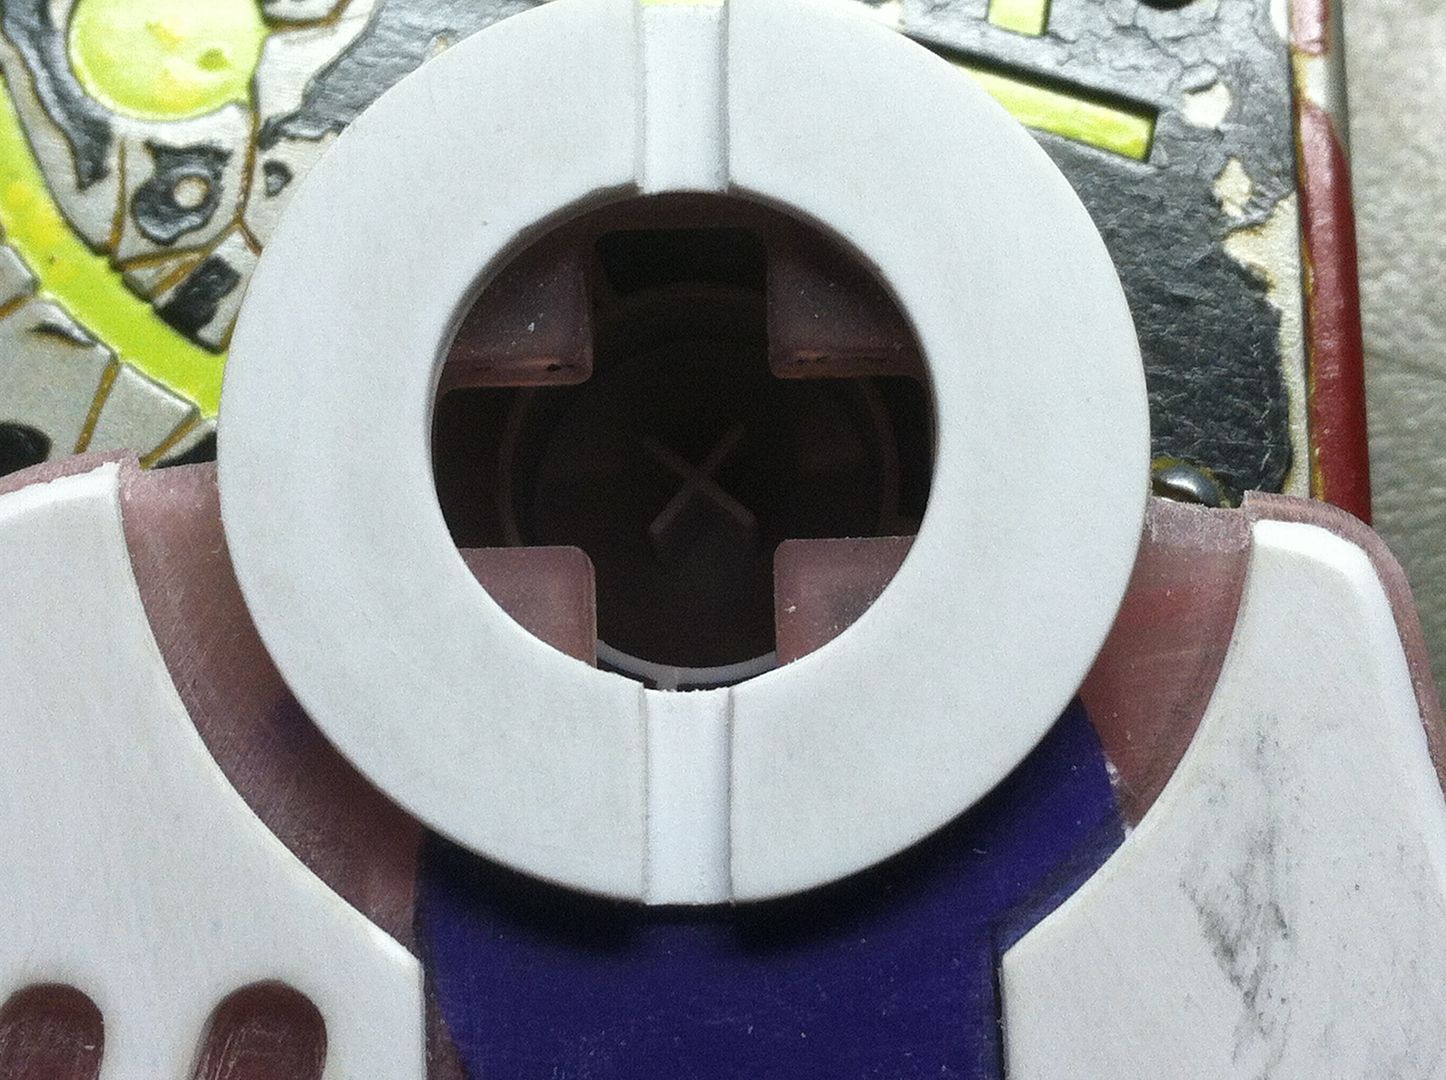
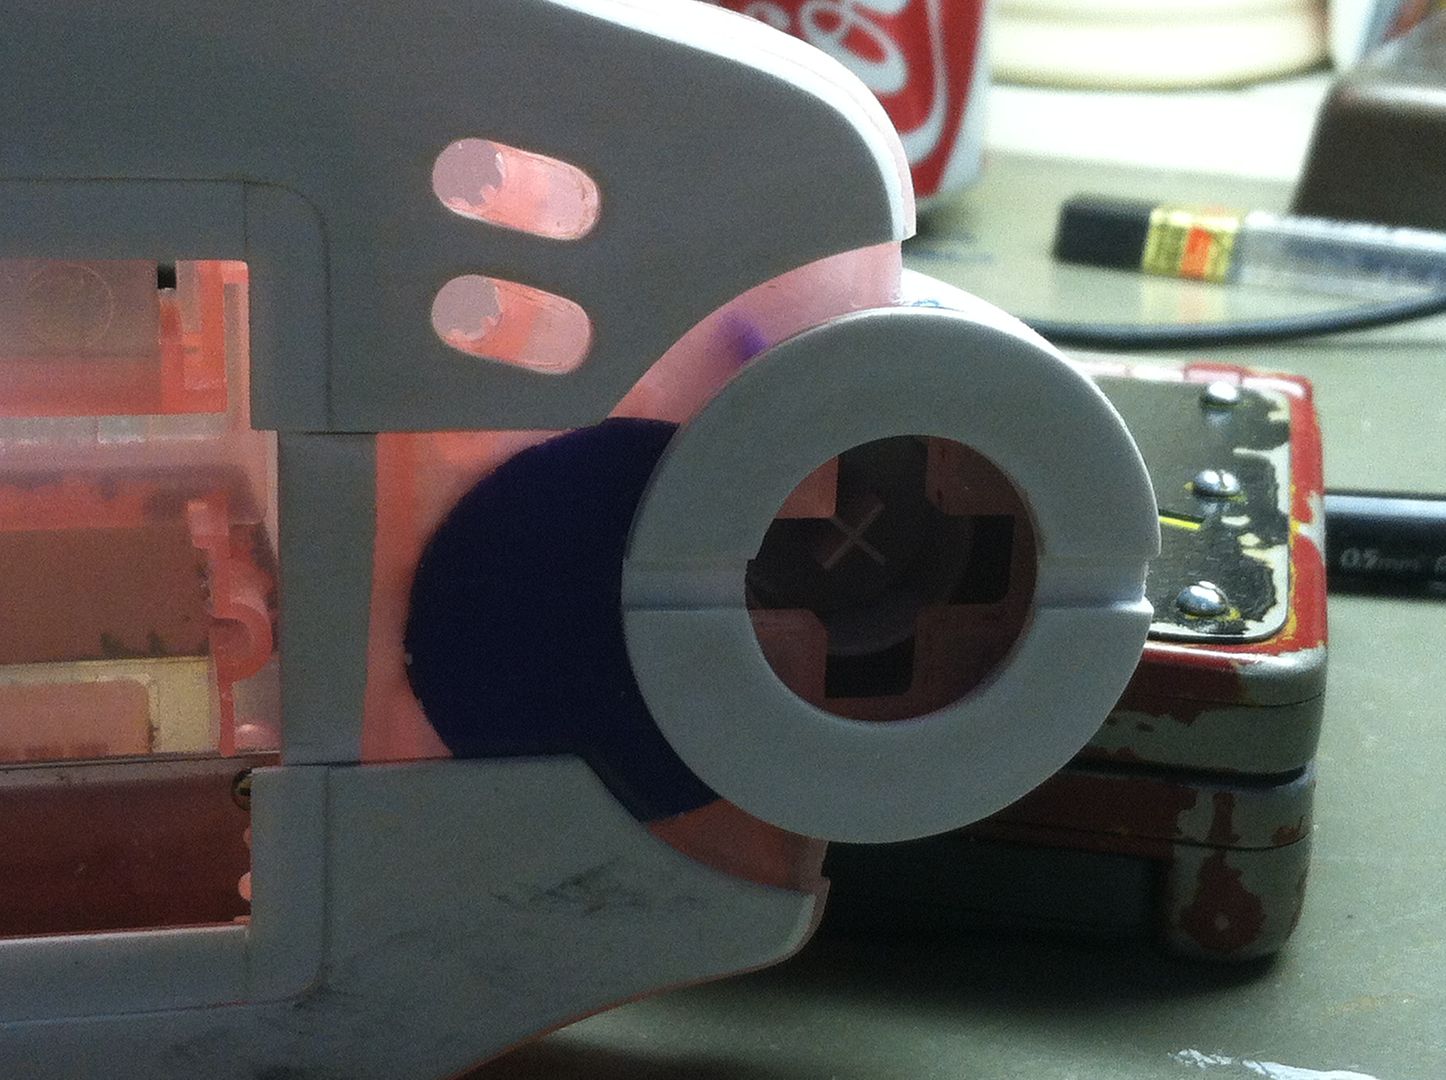
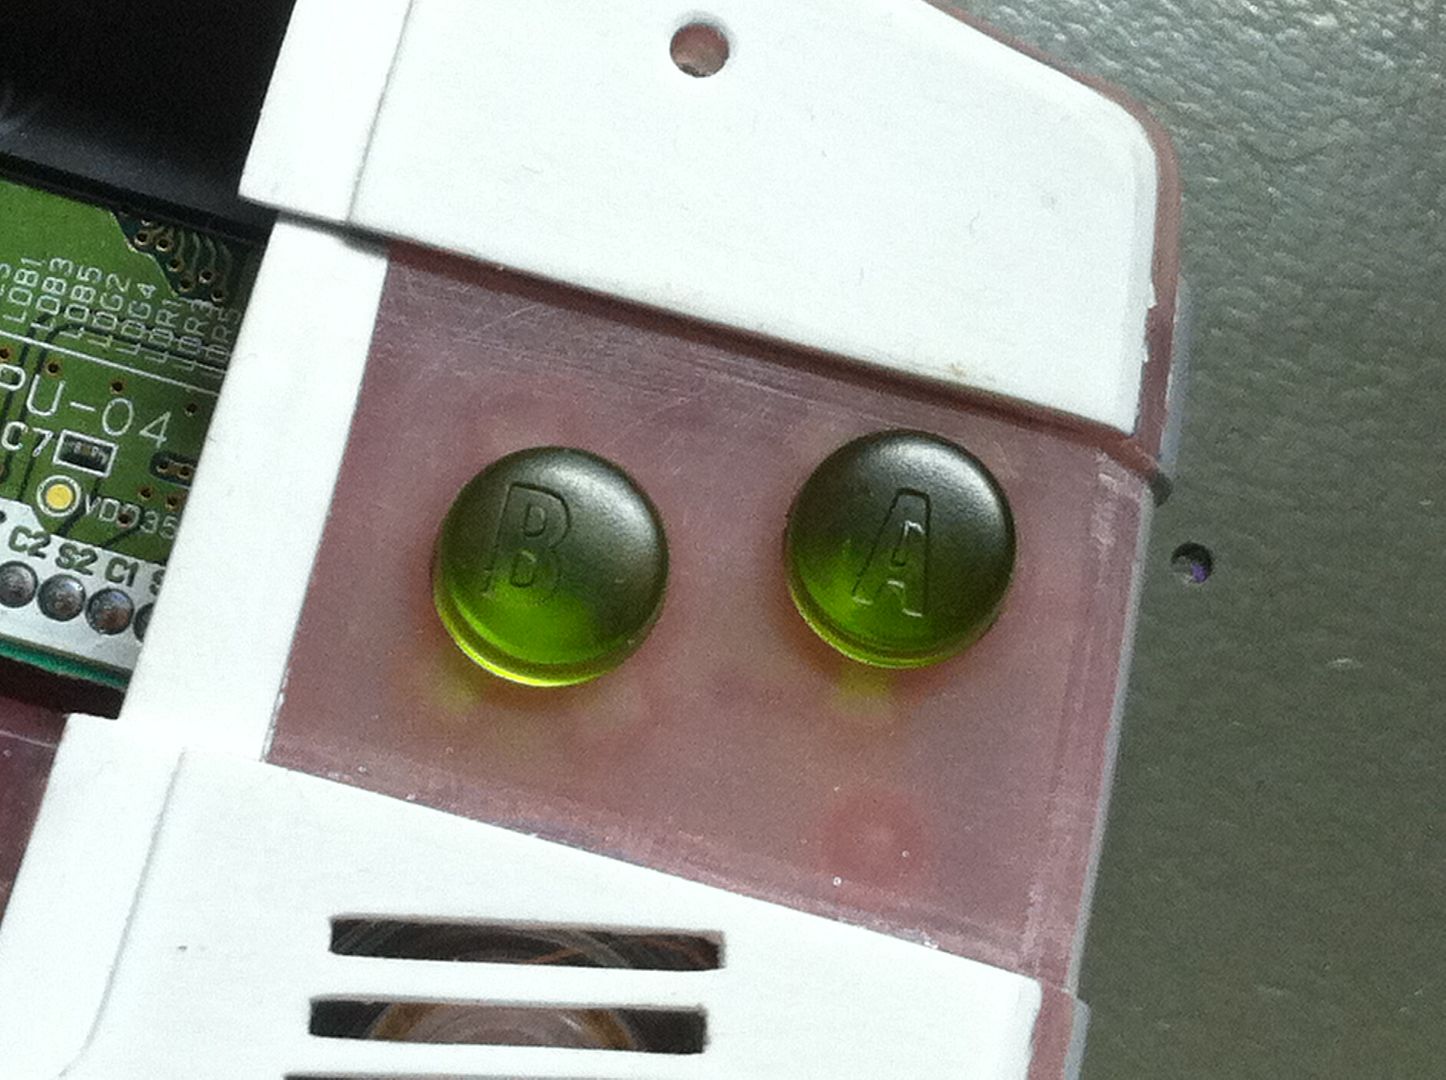
    I have everything I need for this build except for the back-lit screen.
    What do you guys think?

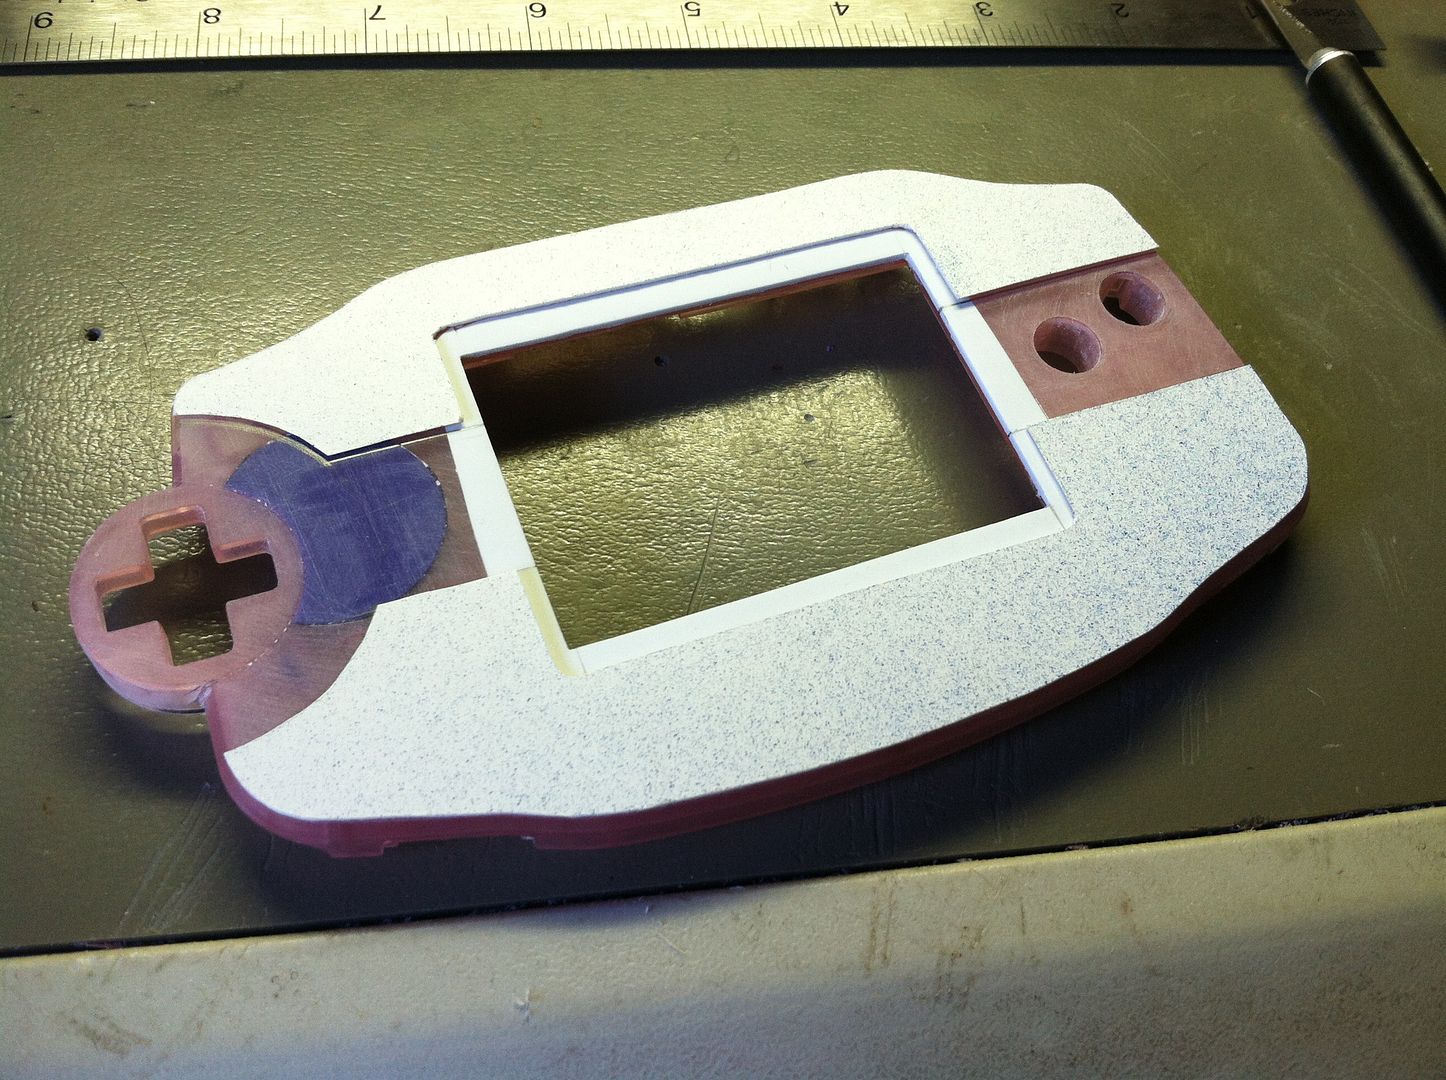
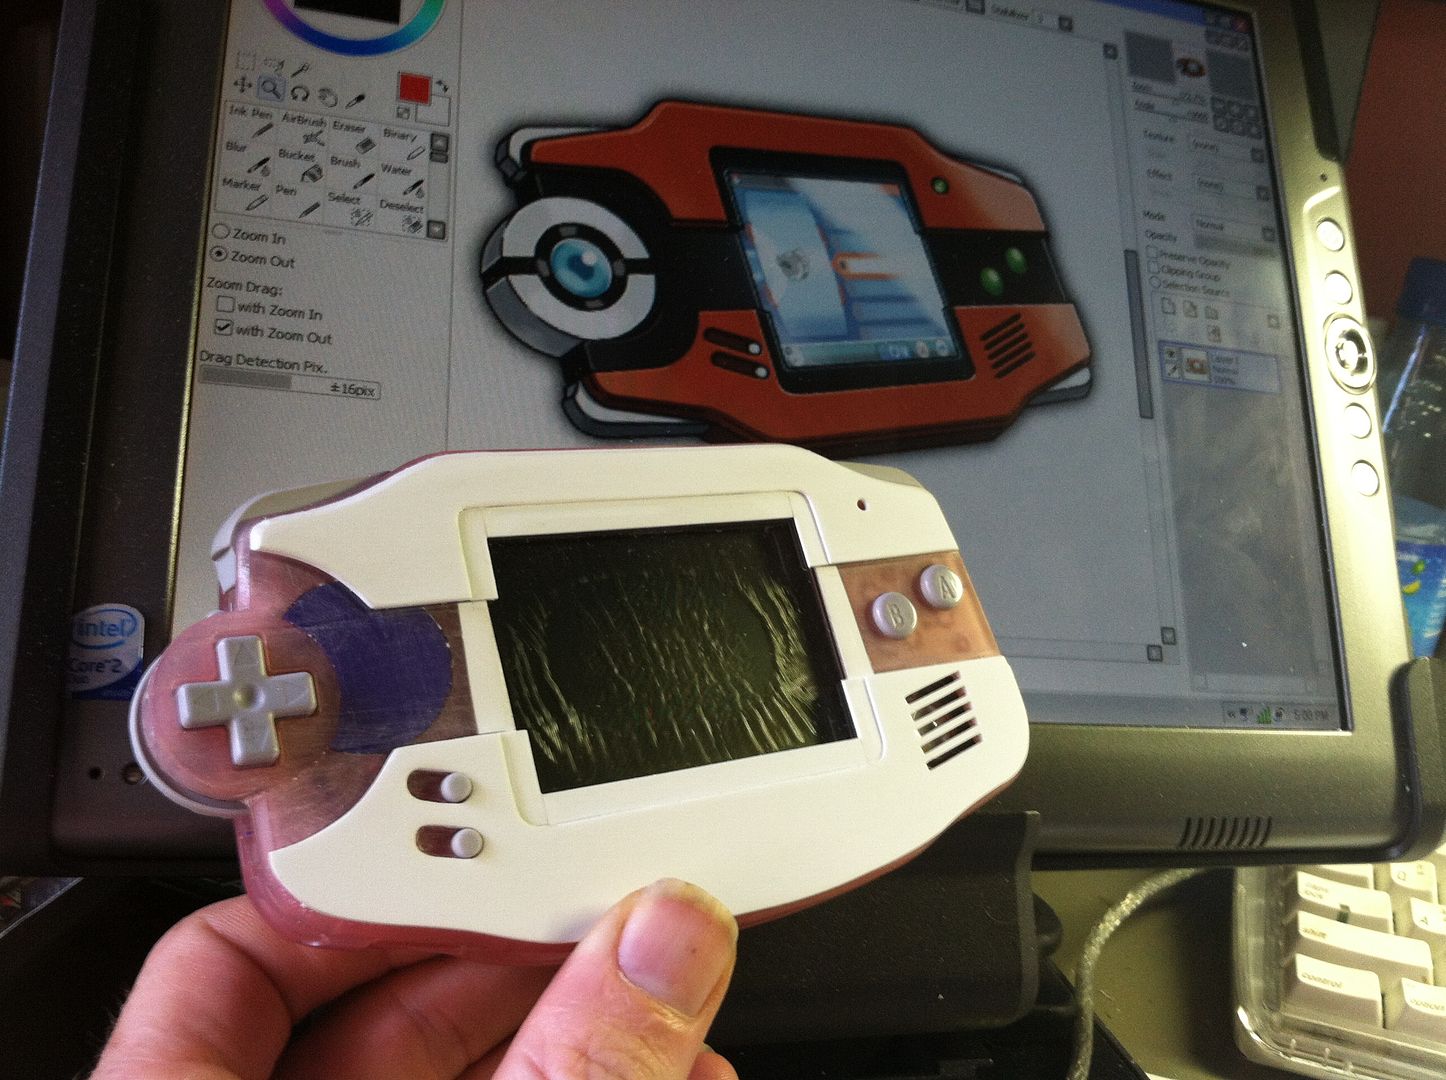
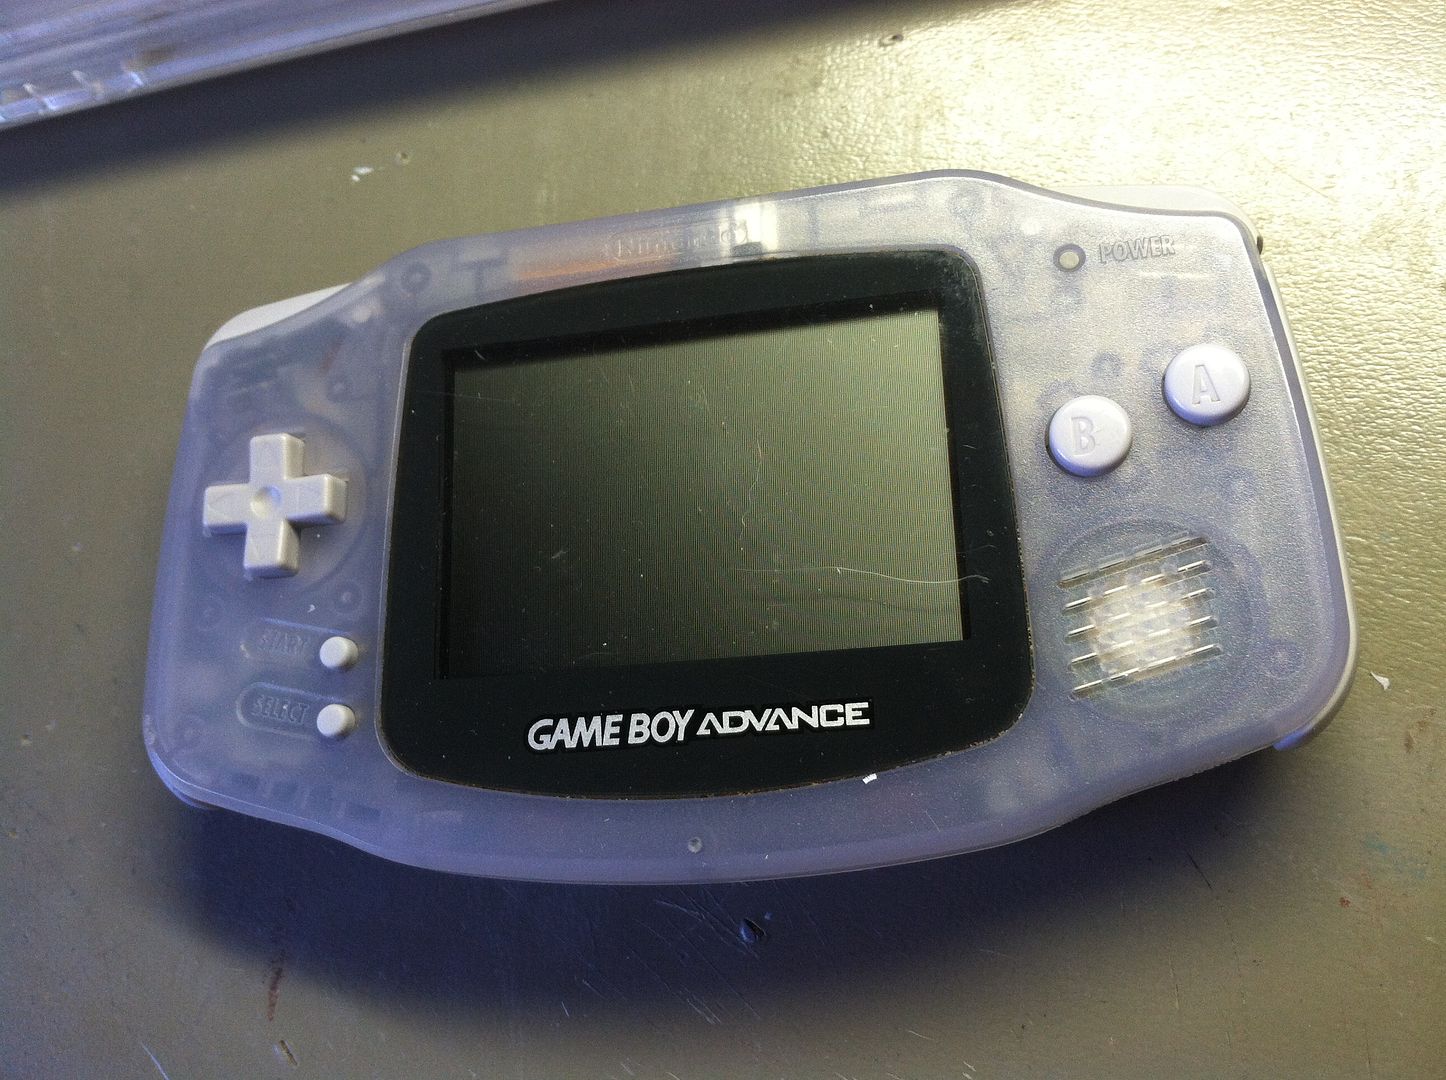
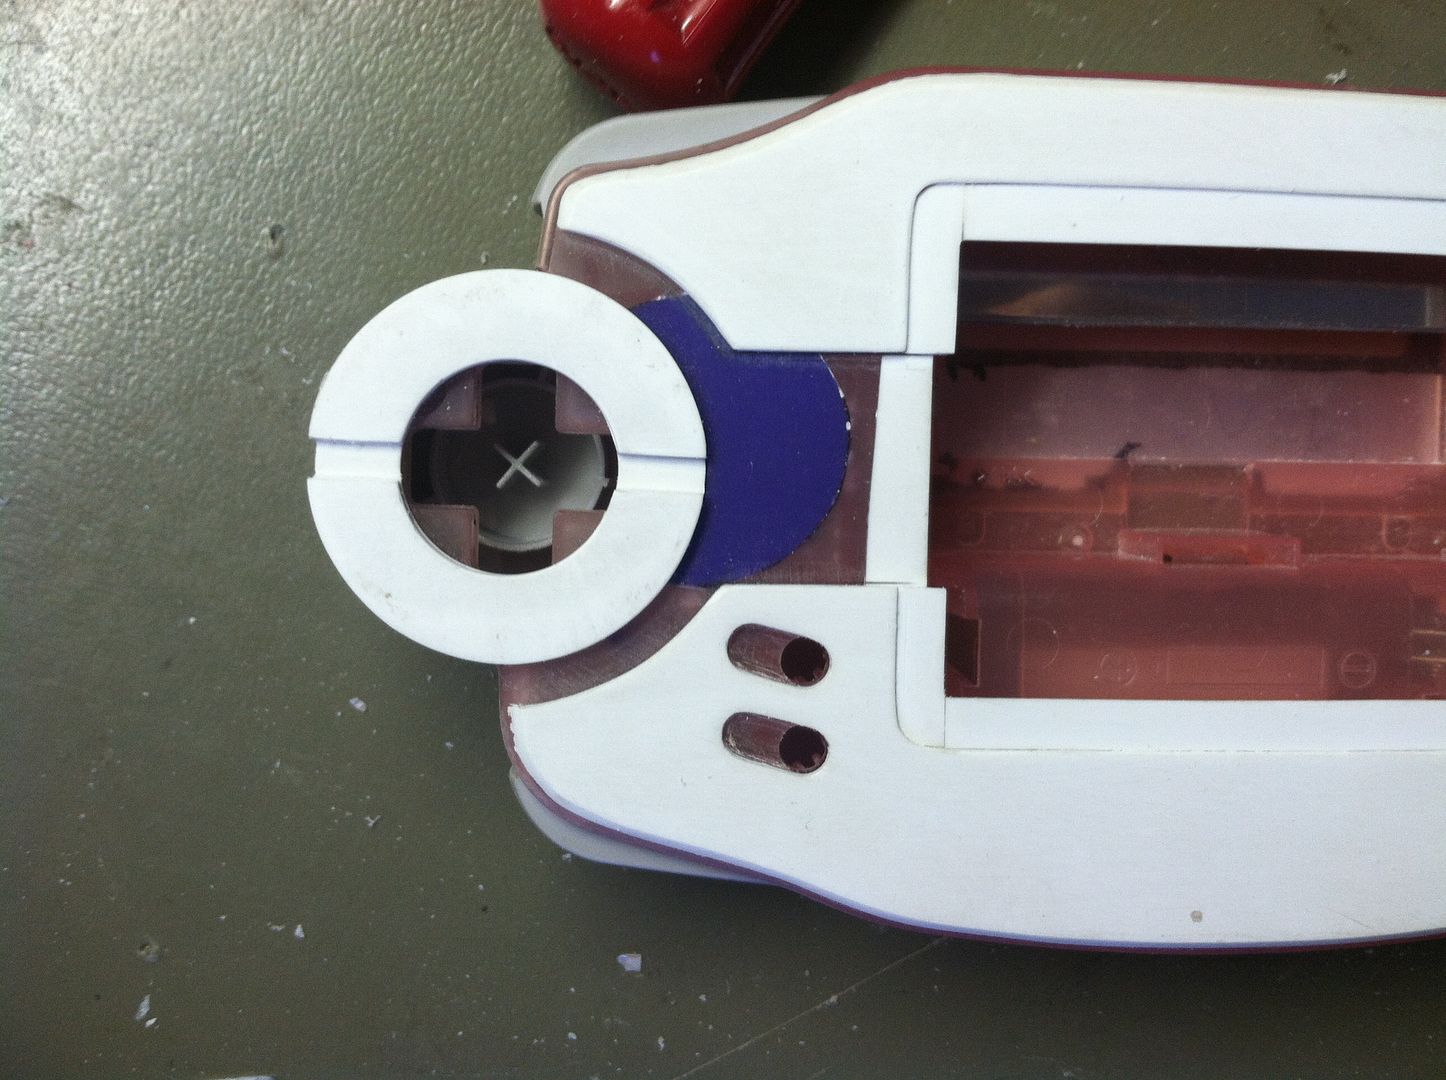
    Found a significantly better picture of that pokedex.
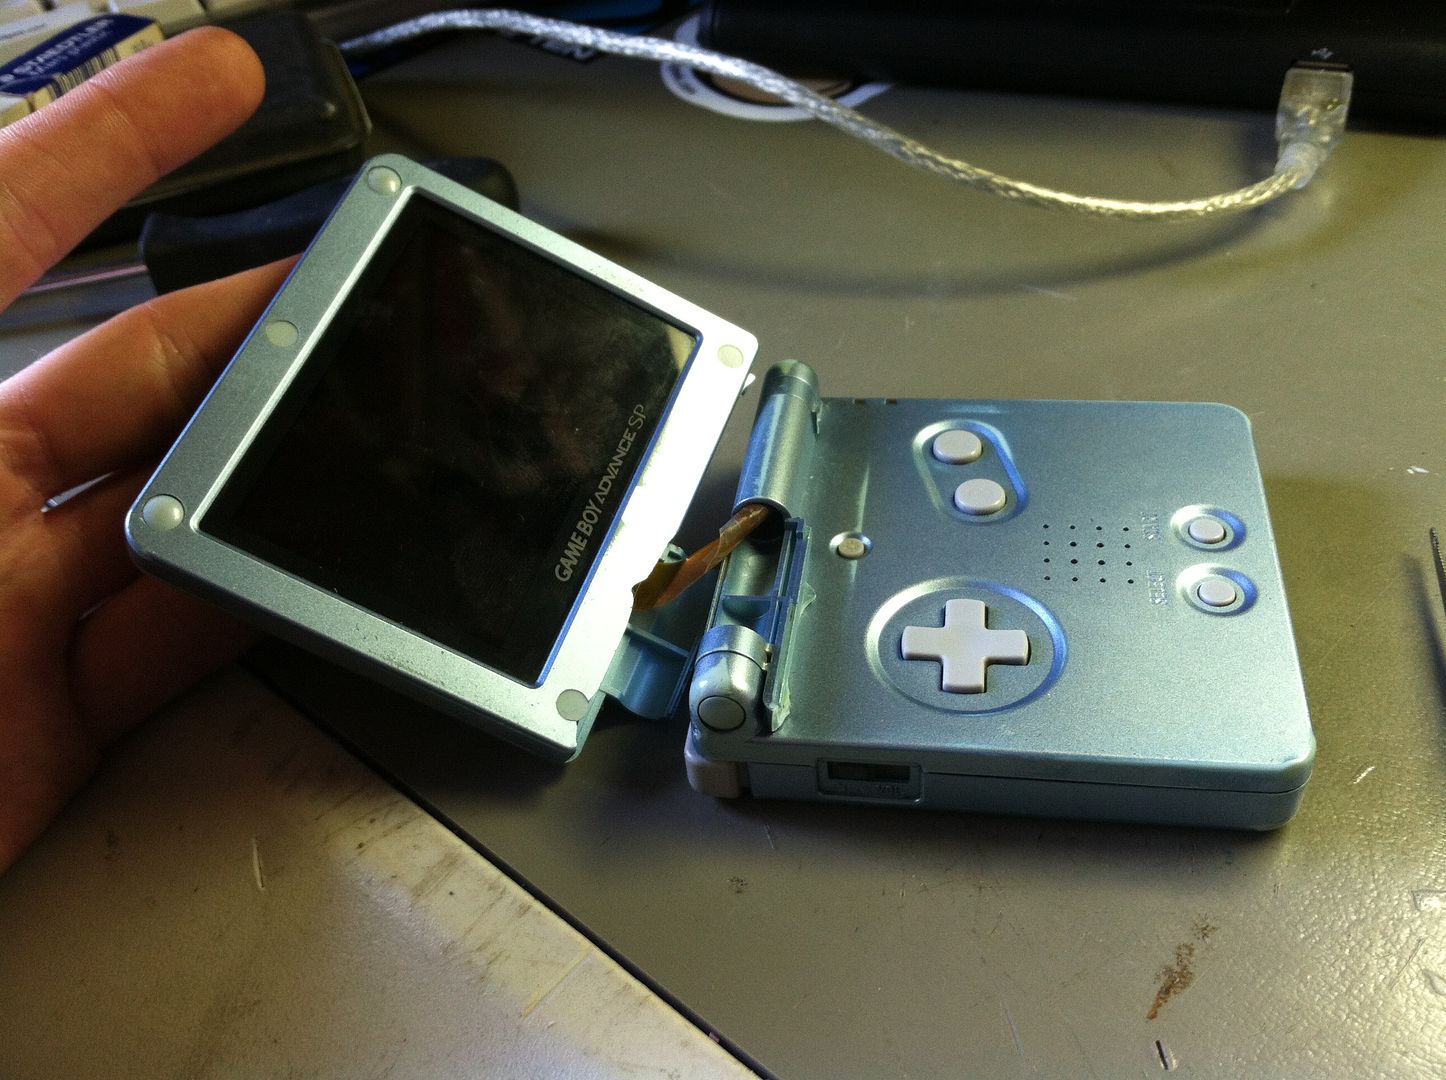
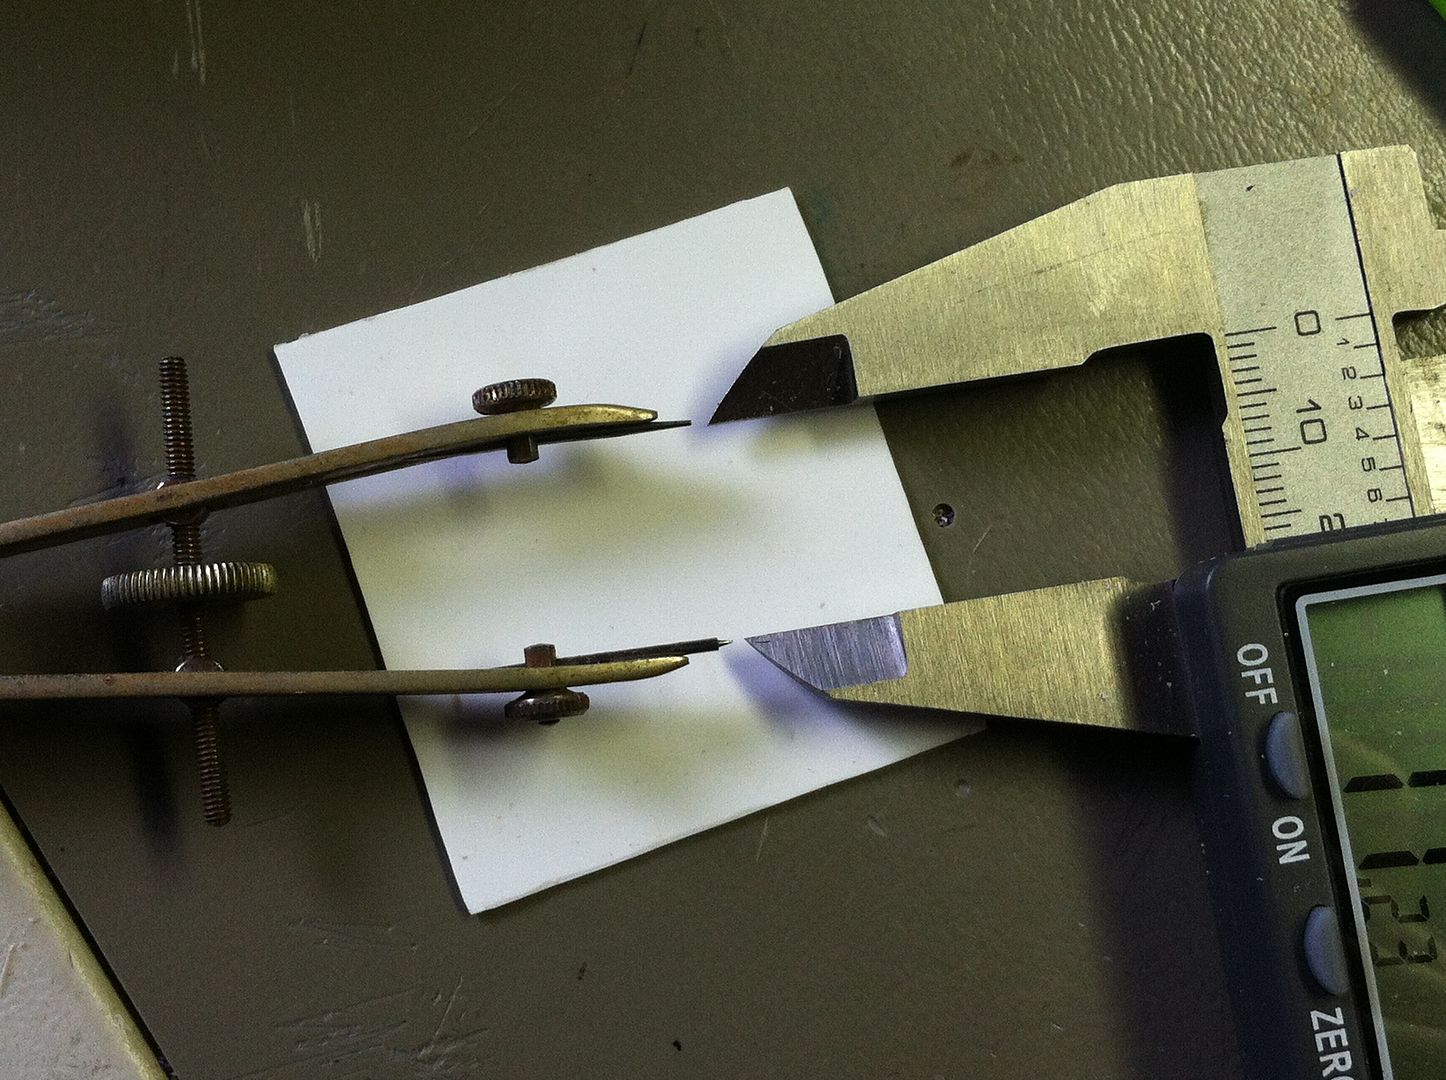
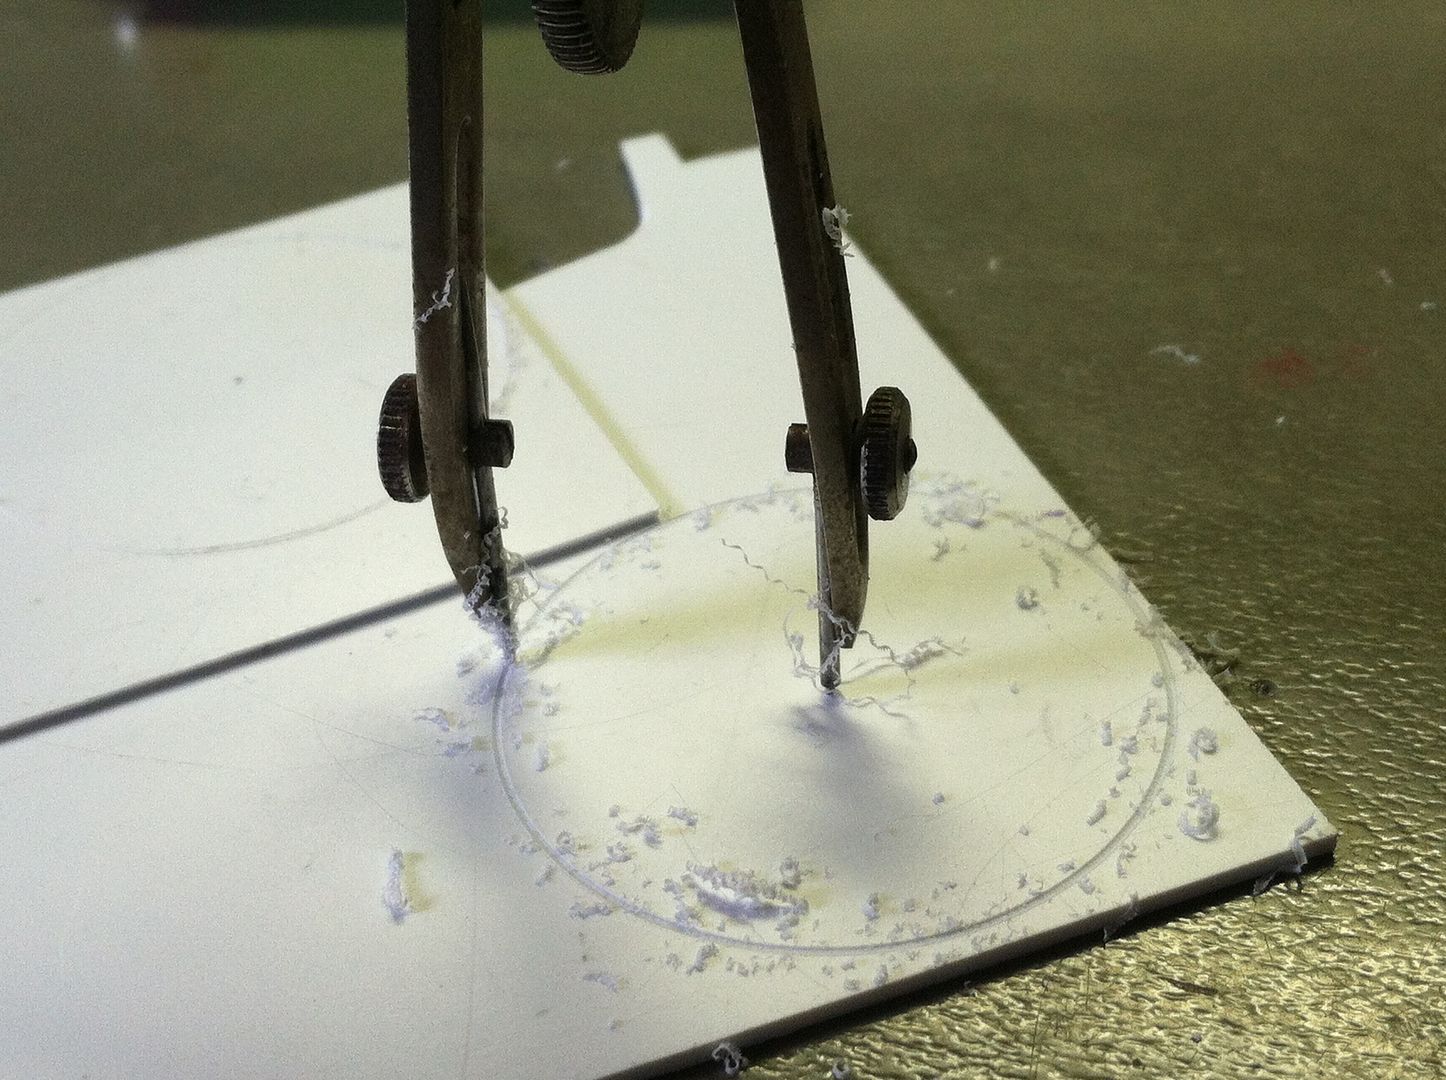
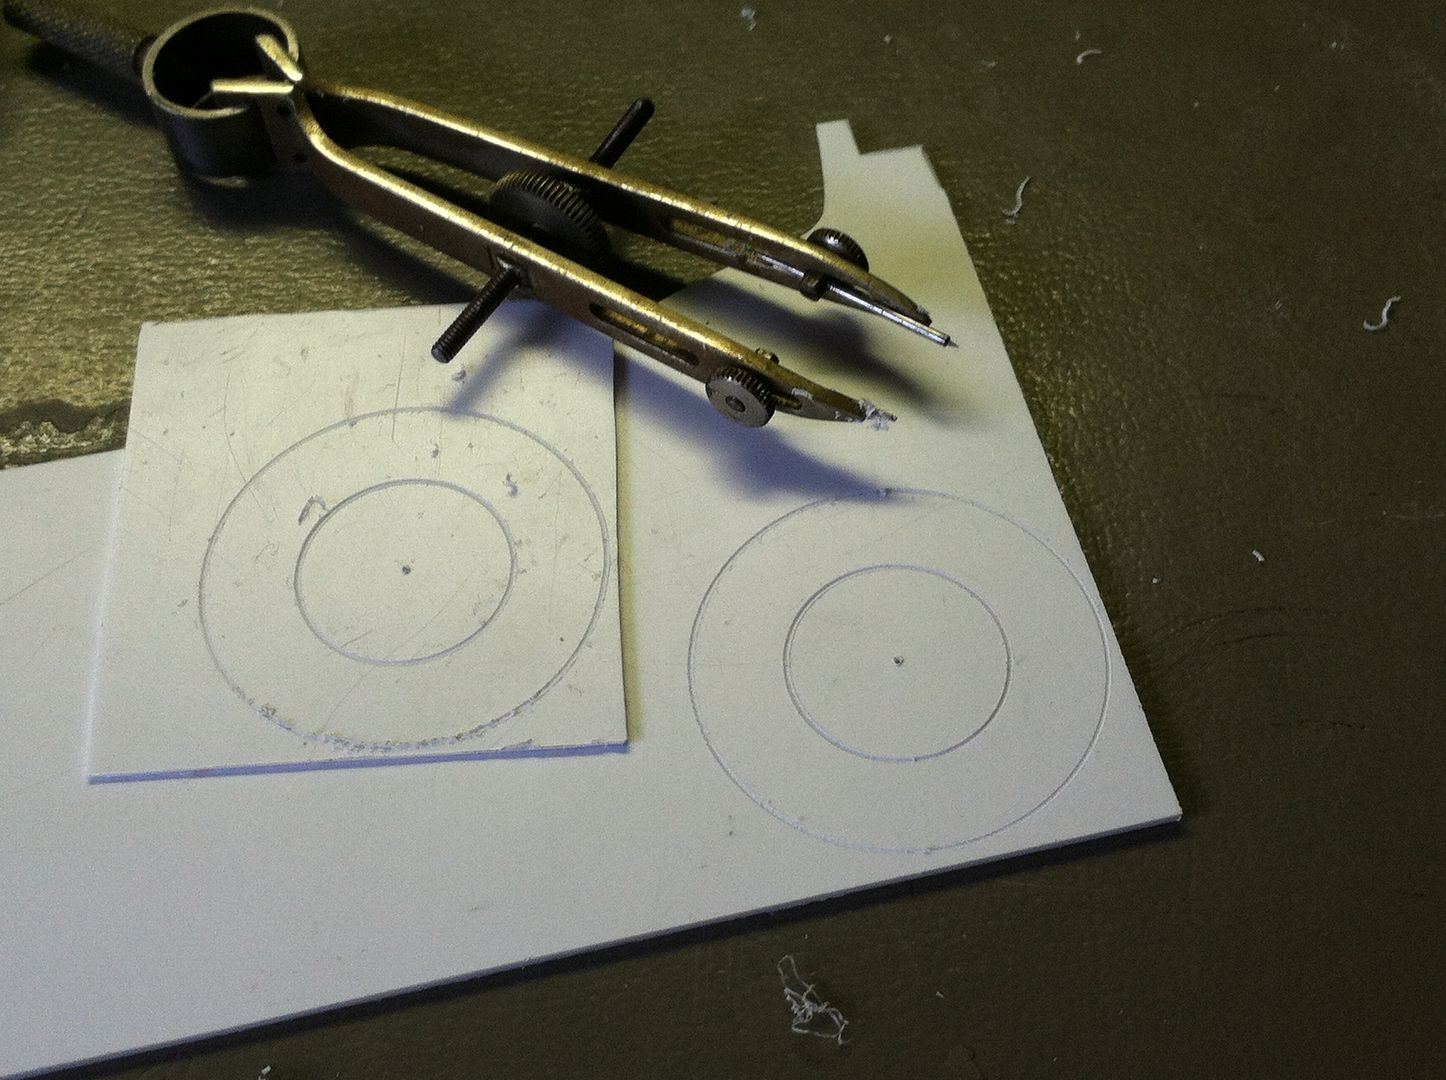
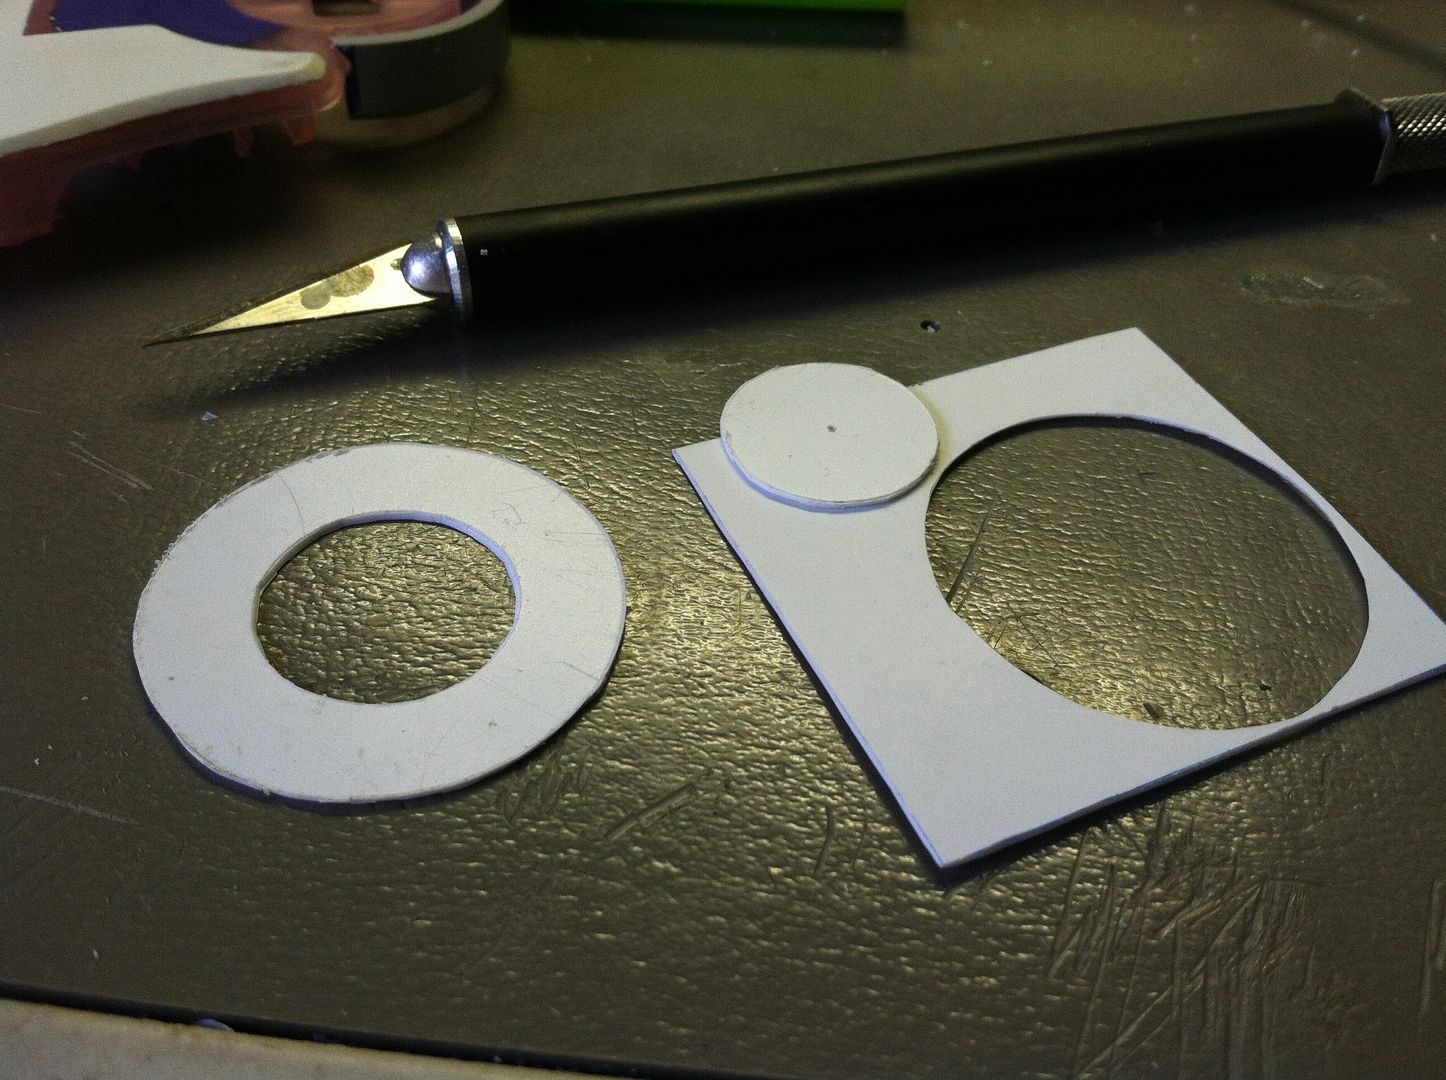
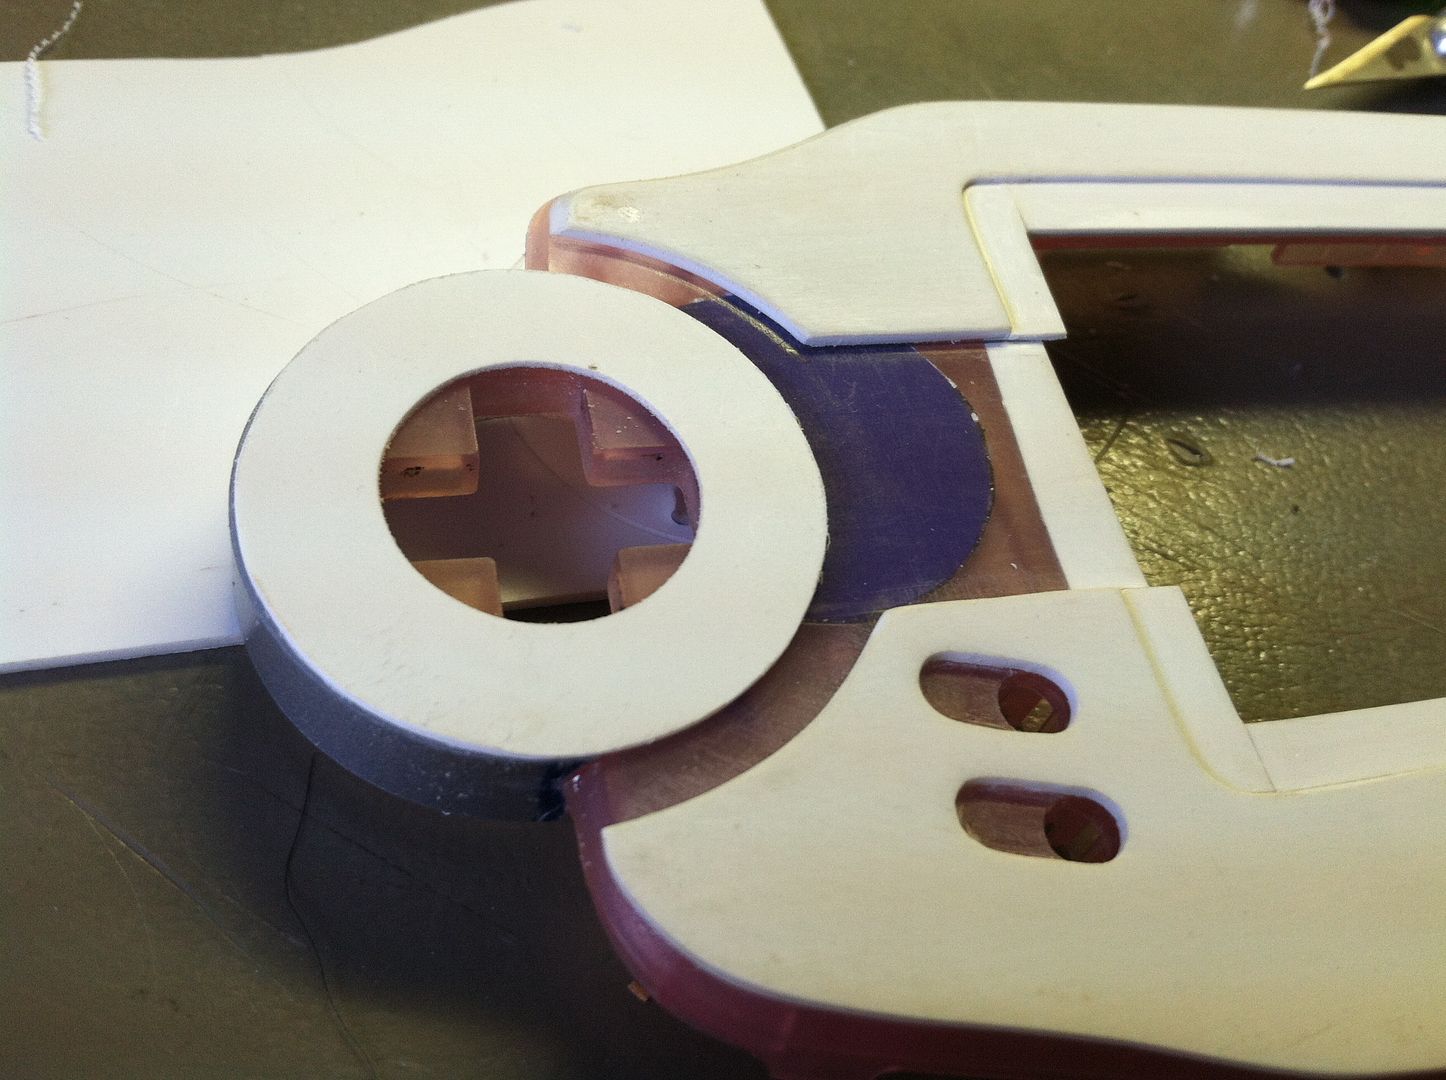
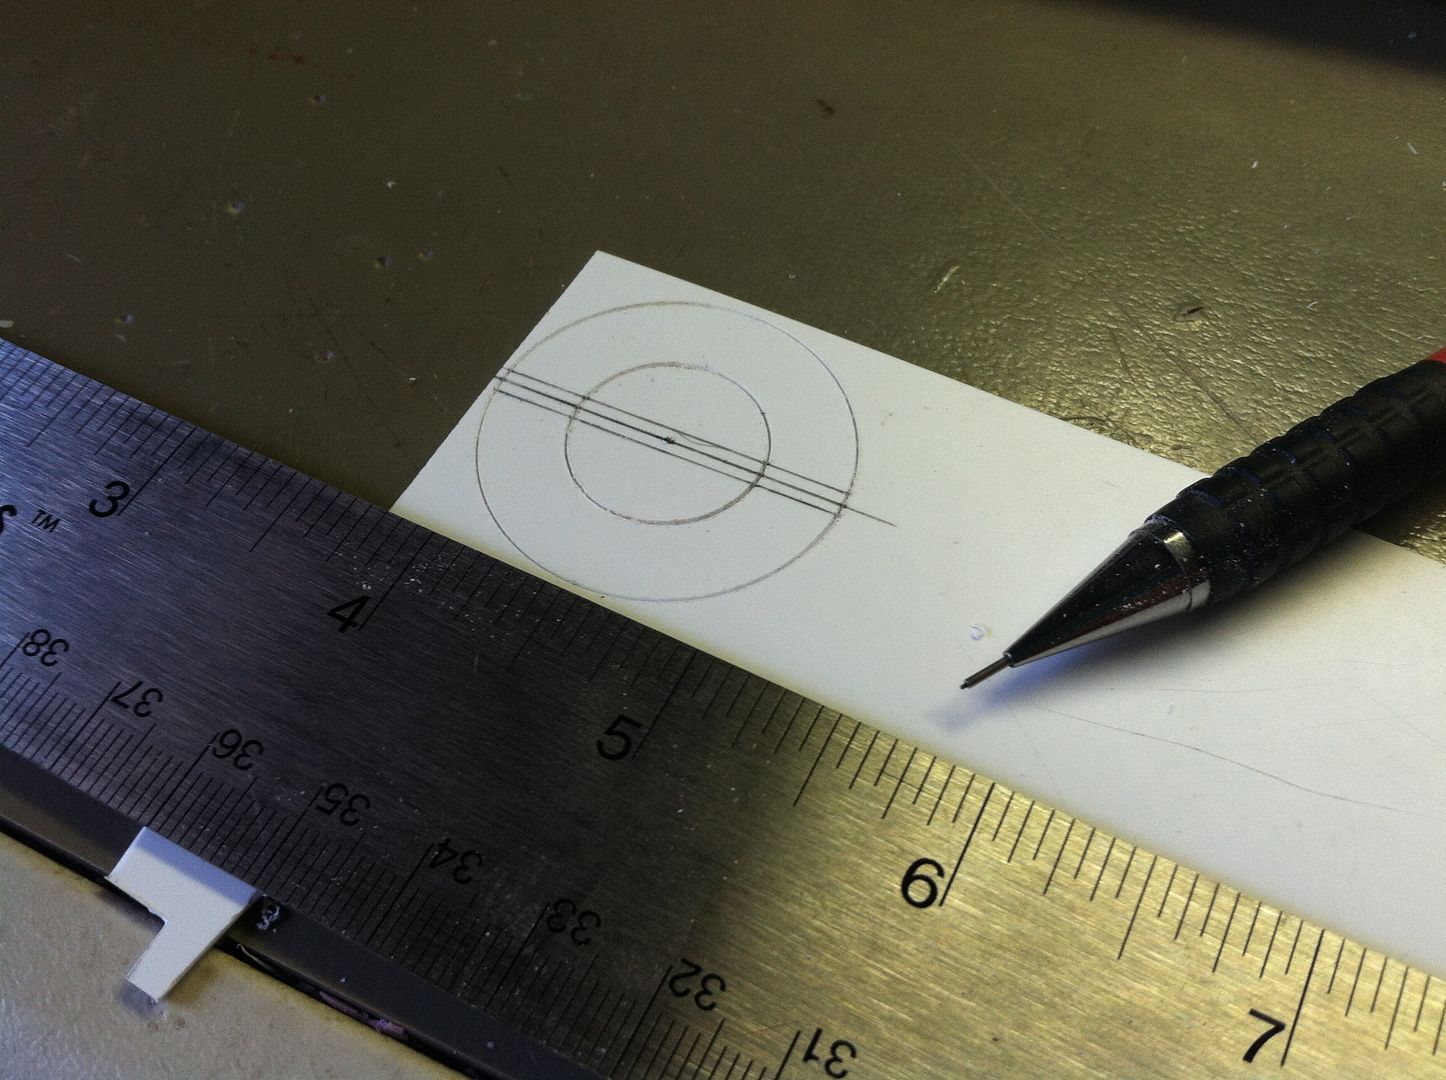
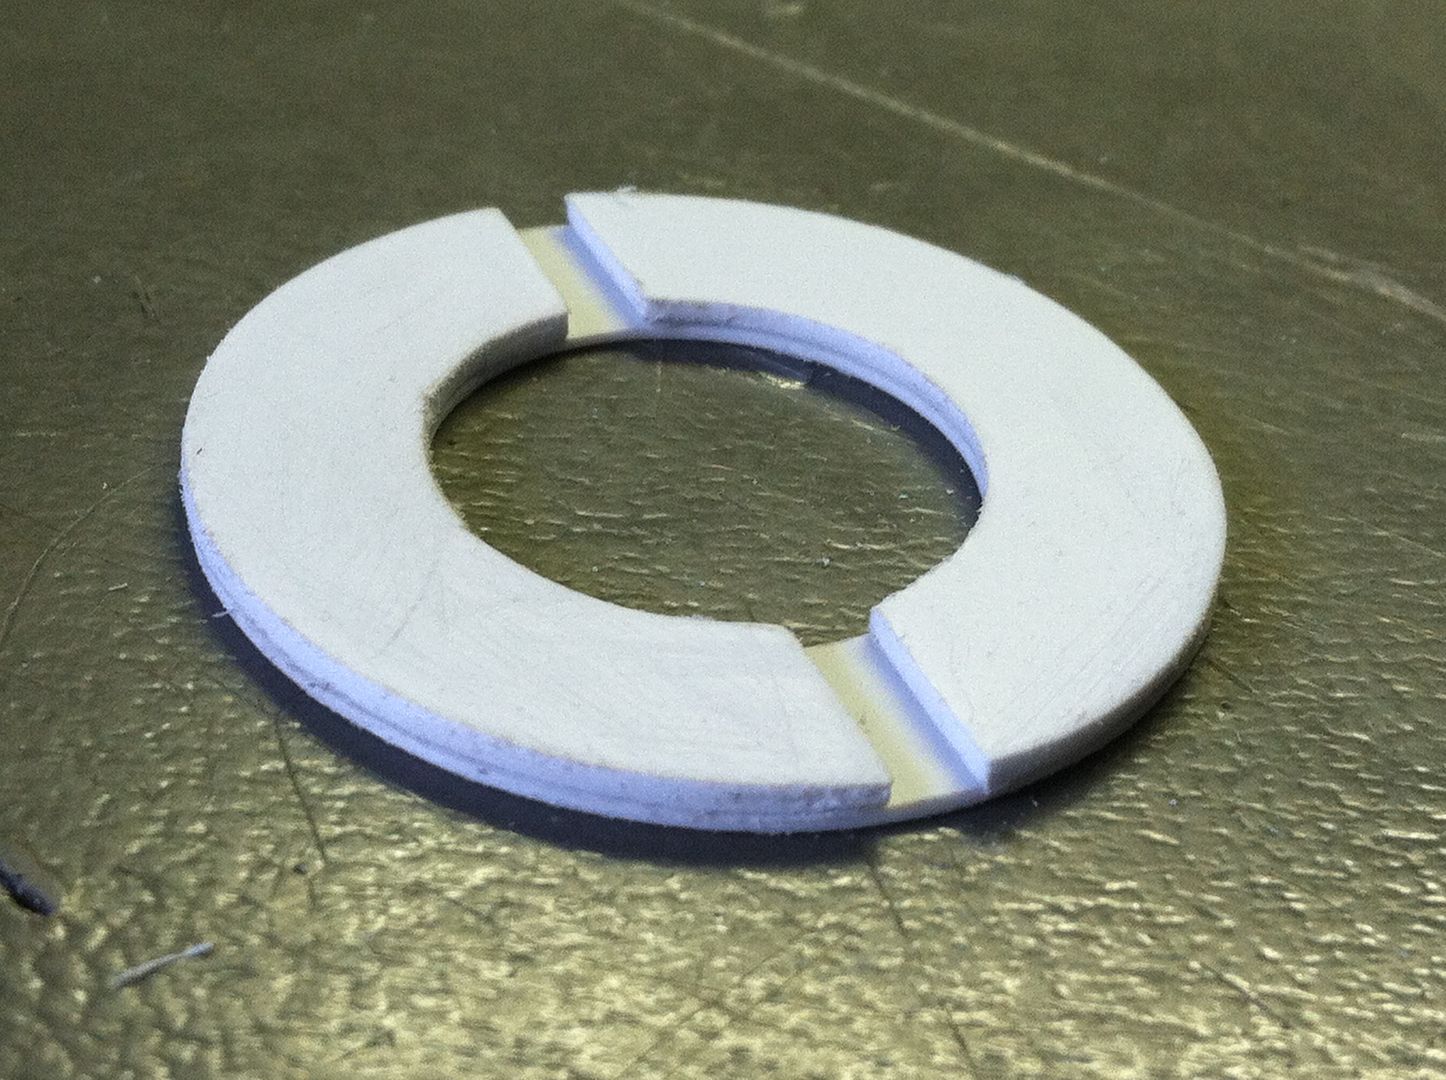
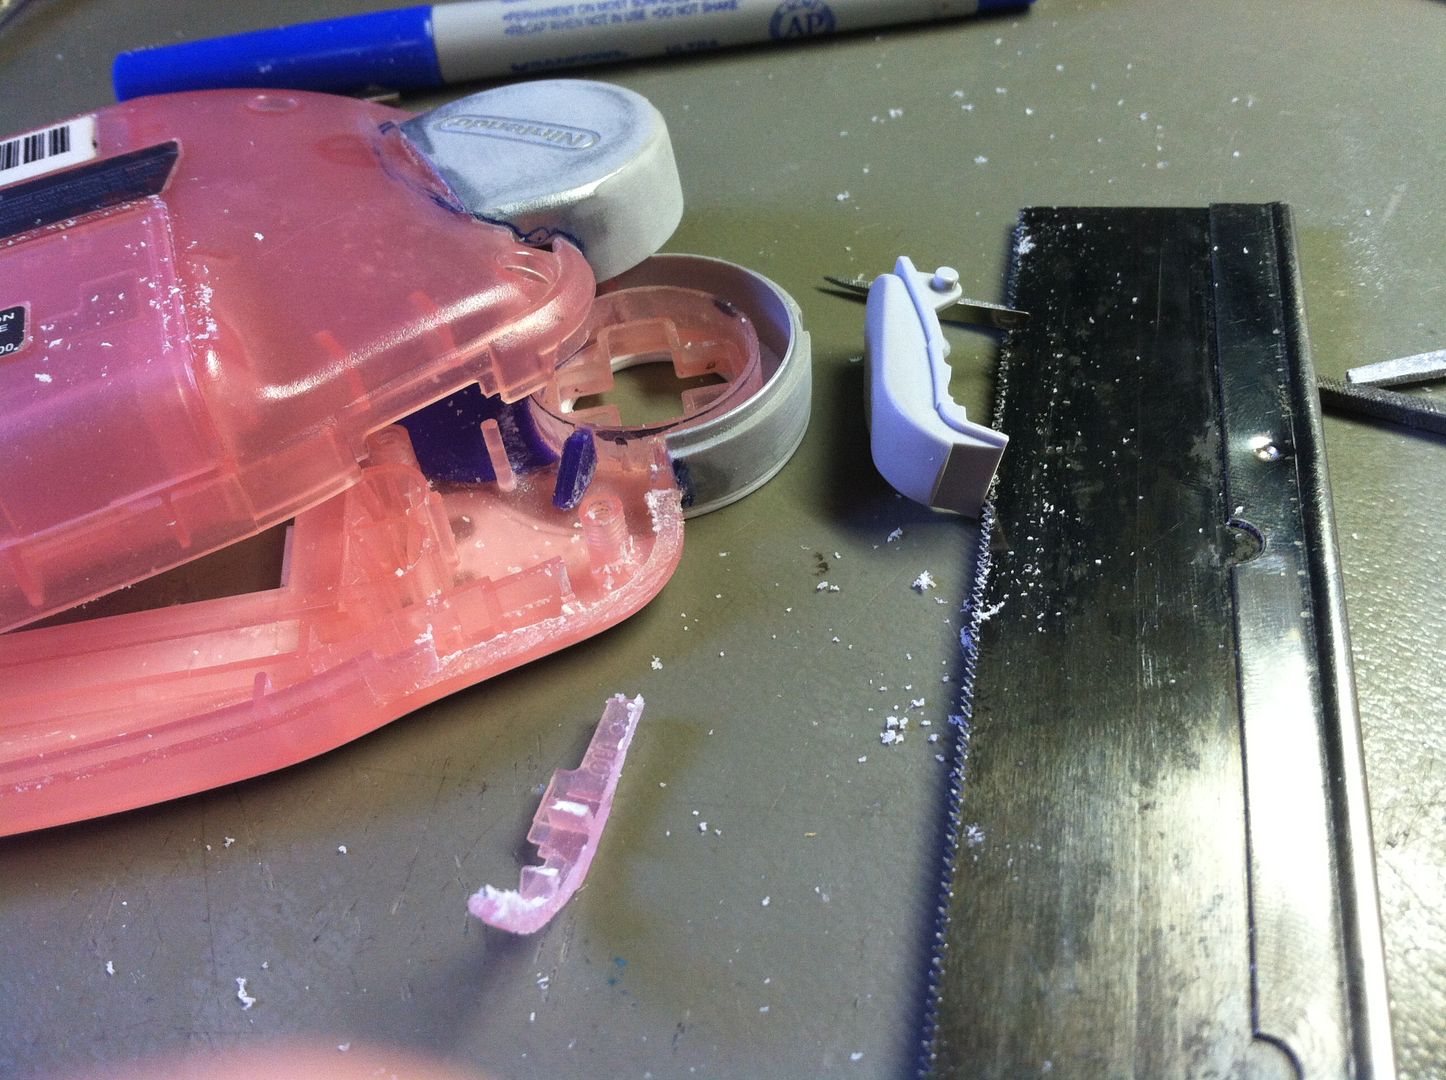
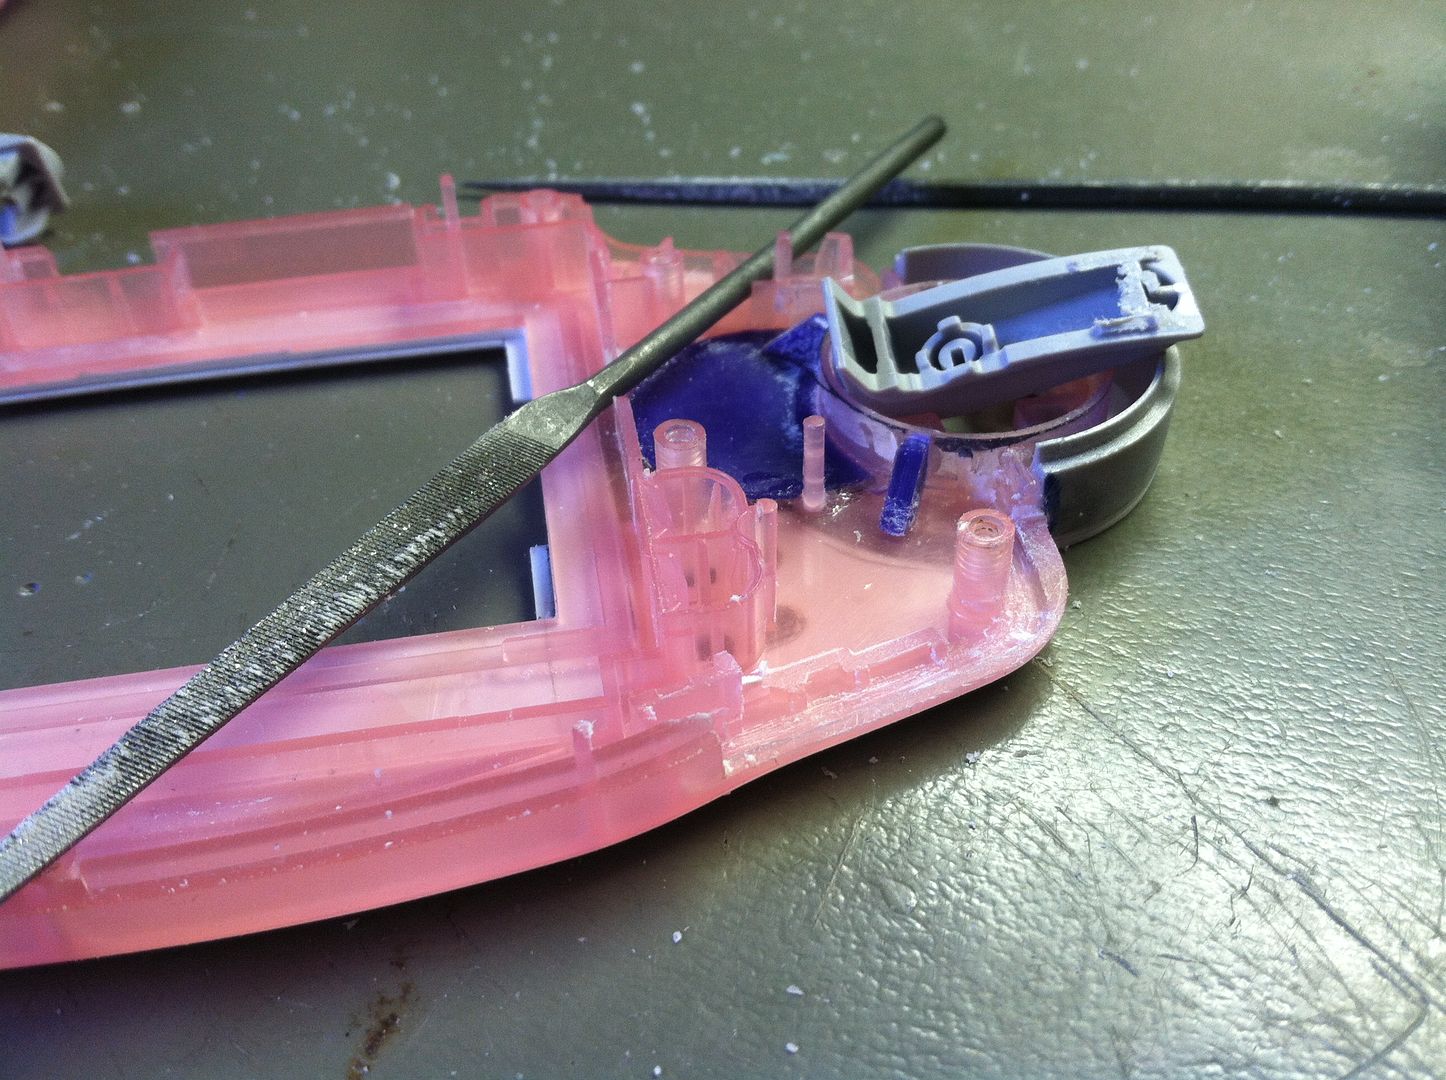
    I'm ordering some materials to make this happen (along with the stuff I need to finish my Pokedex GBA SP, and my Travel NES).

    I will be pleasantly busy for the next few weeks.

    Last edited by teh_d3th_st4r; 07-21-2014 at 11:44 PM. Reason: Pics aren't working
    Hide your Consoles.
    I. Mod. Everything.
    Deviantart Gallery
    Youtube Channel

  2. #2
    Unapologetic Japanophile teh_d3th_st4r's Avatar
    Join Date
    Mar 2013
    Location
    Santa Cruz, CA
    Posts
    46
    Thanks Thanks Given 
    0
    Thanks Thanks Received 
    0
    Thanked in
    0 Posts

    Default

    Let's get started.
    Funky GBA with a bad screen: CHECK


    Dismantle, kern, take pretty picture of meticulously arranged components: CHECK


    This is why you don't leave your GBA in the sun, children.


    But it's okay, because I have this broken AGS-101 with a *salvageable display.


    Confidence is high on this project.

    What would be the point of my builds if there wasn't any intense grafting of plastic pieces?
    I had to move the d-pad to match the pokedex.
    There's going to be a lot of cutting, filling, bracing, and sanding involved... I love this shit.


    Plug the new gaping hole with some scrap plastic from another project.
    Mark it for D-pad relocation.


    Cut along the dotted line, and relocate that sonofabitch!


    Look at that... this going way more smoothly than I anticipated.


    Need to fill the area where the screen protector goes.
    The lens is square in the rendering, so it needs to be square for my build.


    I took the old lens and traced it onto a scrap piece of poster board. Cut it out and fit it to the shell.


    I marked the edges of the opening to the back of the poster board, cut it out, and traced the pieces to some 040" styrene sheet.


    Glued the styrene in place.


    Then I sanded the ever-loving shit out of it with a block and P320 until everything was flush and flat.


    This thing is coming together nicely.

    Hide your Consoles.
    I. Mod. Everything.
    Deviantart Gallery
    Youtube Channel

  3. #3
    Unapologetic Japanophile teh_d3th_st4r's Avatar
    Join Date
    Mar 2013
    Location
    Santa Cruz, CA
    Posts
    46
    Thanks Thanks Given 
    0
    Thanks Thanks Received 
    0
    Thanked in
    0 Posts

    Default

    Time to do some of that marvelous detail to the face of this thing.
    Traced it out, made poster board fascia pieces.


    Yeah... I totally forgot to take picture of me cutting out all of the pieces of 040" styrene, but I assure you; it wasn't anything exciting.
    Anyway, top piece is glued on and contoured, the bottom still needs to be drilled and cut for the speaker vent and start-select.


    Stay Tuned.

    Just doing a little more detail on the face plates.
    I found that it was easier to glue the bottom plate in, and the drill and cut with it in place.
    Patience and a steady hand serves me well.


    I cut and installed the frame edges.


    I was planning on getting a piece of gorilla glass to go with this thing (and I might still do that) but the lens was in pretty good shape, so I simply cut it to fit.


    I did a little sanding and cleanup just to make it look a little more crisp.


    What do you guys think so far?

    Hide your Consoles.
    I. Mod. Everything.
    Deviantart Gallery
    Youtube Channel

  4. #4
    Unapologetic Japanophile teh_d3th_st4r's Avatar
    Join Date
    Mar 2013
    Location
    Santa Cruz, CA
    Posts
    46
    Thanks Thanks Given 
    0
    Thanks Thanks Received 
    0
    Thanked in
    0 Posts

    Default

    Then there was that one time when that I didn't plan my order of operations, and I suddenly had to build the part that should have been done first.


    I need housing for the D-pad/Lens/Whatever.
    This broken Gamecube controller looks like it will work nicely.


    Thickness is pretty much perfect.


    Time to hack away at it with reckless abandon (like I always do)


    The top half needs to be the correct depth so I can have both halves close back together as if it were a manufactured product.


    Amateur videogame surgery is one of my favorite games to play.


    And now I have to go out and pick up another GBA I found on CL for $10... I need working internals and another set of shoulder buttons to go on the bottom.

    I'll be back later.


    Went and picked up another GBA off CL.
    But we don't need that just yet.


    Time to fit the rear half of the D-pad housing.
    Observe.


    This was actually a little fidgety to cut out.


    Now I need to do some shimming, sanding, and figuring out how to mount everything in there and get it to look right.

    Hide your Consoles.
    I. Mod. Everything.
    Deviantart Gallery
    Youtube Channel

  5. #5
    Unapologetic Japanophile teh_d3th_st4r's Avatar
    Join Date
    Mar 2013
    Location
    Santa Cruz, CA
    Posts
    46
    Thanks Thanks Given 
    0
    Thanks Thanks Received 
    0
    Thanked in
    0 Posts

    Default

    Now it's time to do the thing with the face of the D-pad housing.
    Not sure how to explain it in words, but I thing the photos manage to make the process pretty clear.


    I'm not gonna lie; this was pretty fidgety, but I'm very pleased with the results.


    I almost forgot the groove down the side.


    Ahhhh... That's better.

    Alright... Now I need parts from the new GBA.
    Time to fit the other set of shoulder buttons to the bottom of the shell.


    I always reach that point in a project where I'm not sure what I'm supposed to do in order to get the results that I want... so I just start cutting.


    I've certainly go a knack for making things work when I don't know what I'm doing.


    Stay tuned for the undoubtedly complicated relocation of the power switch, headphone jack, and volume controls.
    Hide your Consoles.
    I. Mod. Everything.
    Deviantart Gallery
    Youtube Channel

  6. #6
    Unapologetic Japanophile teh_d3th_st4r's Avatar
    Join Date
    Mar 2013
    Location
    Santa Cruz, CA
    Posts
    46
    Thanks Thanks Given 
    0
    Thanks Thanks Received 
    0
    Thanked in
    0 Posts

    Default

    This is what I've got so far.


    Feedback?

    There's been a lot of questions and speculation across the outerwebs in regards to how I'm constructing this.
    Hopefully this will help quell the onslaught of suggestions and inquiries from people that don't think I know what I'm doing.


    EDIT: Yes, I realize I spelled "backlight" wrong. I misspelled it so it would fit on the screen.
    Hide your Consoles.
    I. Mod. Everything.
    Deviantart Gallery
    Youtube Channel

  7. #7
    Unapologetic Japanophile teh_d3th_st4r's Avatar
    Join Date
    Mar 2013
    Location
    Santa Cruz, CA
    Posts
    46
    Thanks Thanks Given 
    0
    Thanks Thanks Received 
    0
    Thanked in
    0 Posts

    Default

    I uploaded one of my progress pics to DeviantArt... and it's easily the most popular thing I've ever posted.
    Over 400 views in 8 hours!

    Hide your Consoles.
    I. Mod. Everything.
    Deviantart Gallery
    Youtube Channel

  8. #8
    Insert Coin (Level 0)
    Join Date
    Mar 2014
    Posts
    2
    Thanks Thanks Given 
    0
    Thanks Thanks Received 
    0
    Thanked in
    0 Posts

    Default

    Very cool to see this take shape! I love seeing projects like this! Can't wait to see more!

  9. #9
    Unapologetic Japanophile teh_d3th_st4r's Avatar
    Join Date
    Mar 2013
    Location
    Santa Cruz, CA
    Posts
    46
    Thanks Thanks Given 
    0
    Thanks Thanks Received 
    0
    Thanked in
    0 Posts

    Default

    Now I'm just waiting on parts.


    I've also come up with another Pokedex build... But I need to finish this one first.
    Hide your Consoles.
    I. Mod. Everything.
    Deviantart Gallery
    Youtube Channel

  10. #10
    Unapologetic Japanophile teh_d3th_st4r's Avatar
    Join Date
    Mar 2013
    Location
    Santa Cruz, CA
    Posts
    46
    Thanks Thanks Given 
    0
    Thanks Thanks Received 
    0
    Thanked in
    0 Posts

    Default

    So, the AGS-101 screen I ordered was defective... Lame.

    I decided I'd work on the shell a little more, and give it some of the contour detail work.

    BEHOLD!


    And the rad folks over at Rose Colored Gaming love my build, so they dug through some stuff and hooked me up with a custom cast set of translucent green GBA buttons!

    Hide your Consoles.
    I. Mod. Everything.
    Deviantart Gallery
    Youtube Channel

  11. #11
    Unapologetic Japanophile teh_d3th_st4r's Avatar
    Join Date
    Mar 2013
    Location
    Santa Cruz, CA
    Posts
    46
    Thanks Thanks Given 
    0
    Thanks Thanks Received 
    0
    Thanked in
    0 Posts

    Default

    Still waiting for the replacement for my new screen... They're apparently no longer being manufactured.
    But for the time being, I can still move forward with the rest of the mod.

    But my custom buttons from Rose Colored Gaming finally arrived!


    Aren't they glorious?
    Hide your Consoles.
    I. Mod. Everything.
    Deviantart Gallery
    Youtube Channel

  12. #12
    Peach (Level 3) Hawksmoor's Avatar
    Join Date
    Jun 2005
    Location
    Sandy Springs, GA
    Posts
    701
    Thanks Thanks Given 
    0
    Thanks Thanks Received 
    0
    Thanked in
    0 Posts
    Xbox LIVE
    Badge 714
    PSN
    midnighthobo

    Default

    Very nice work thus far! I look forward to seeing the finished product.
    Government, even in its best state, is but a necessary evil; in its worst state, an intolerable one. - Thomas Paine

    America can always be counted on to do the right thing after they have exhausted all other possibilities. - Winston Churchill


Similar Threads

  1. Omega Ruby and Alpha Sapphire announced,your reaction?
    By SuperEliteGamer in forum Modern Gaming
    Replies: 10
    Last Post: 05-10-2014, 12:51 AM
  2. Pokemon Ruby and Sapphire Official Trainer's Guide (Bradygames) price.
    By geezuzkhrist119 in forum Buying and Selling
    Replies: 2
    Last Post: 03-07-2013, 09:15 AM
  3. Replies: 1
    Last Post: 02-11-2010, 04:15 PM
  4. WTB: Pokemon Ruby &/or Sapphire
    By BHvrd in forum Buying and Selling
    Replies: 2
    Last Post: 05-10-2004, 10:37 PM
  5. Pokemon Ruby/Sapphire collectible coin....
    By Starcade in forum Classic Gaming
    Replies: 12
    Last Post: 02-17-2003, 09:46 AM

Tags for this Thread

Posting Permissions

  • You may not post new threads
  • You may not post replies
  • You may not post attachments
  • You may not edit your posts
  •