

very nice setup, my favorate part I think is the random toys everywhere (i'm more a toy collector then I am a video game collector) but it was nice to see perceptor looking down from a top shelf as well as the constructicons chillin on another :-)


very nice setup, my favorate part I think is the random toys everywhere (i'm more a toy collector then I am a video game collector) but it was nice to see perceptor looking down from a top shelf as well as the constructicons chillin on another :-)

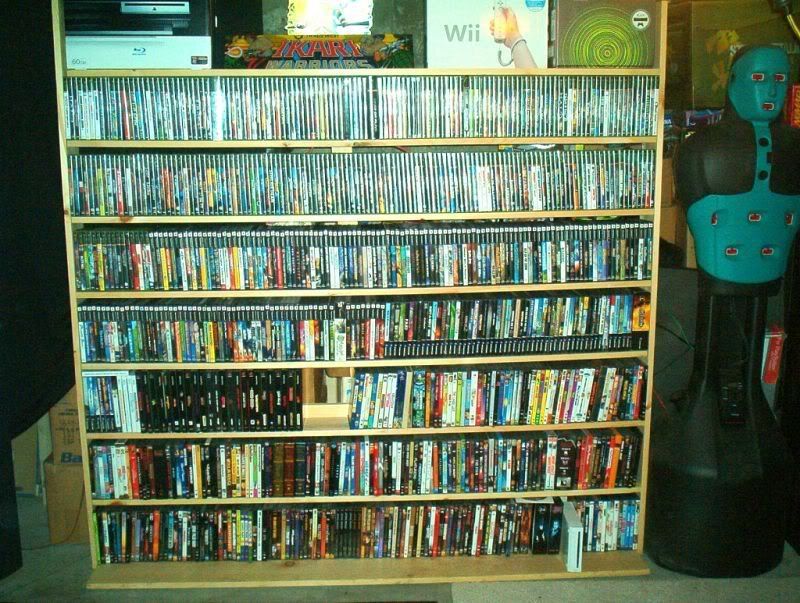
That....that Genesis shelf is a thing of beauty.
How many boxed Genny games would you say it holds?

Bookmarked. I shouldn't have missed this the first time around. Thanks, Goodwill, for taking the time to document this.

Thanks...each shelf is 44" wide and holds about 42 games, with 11 shelves in the unit, that comes out to 462 total. I'm about 20 titles away from a complete boxed Genesis collection...this unit holds my A - P titles, Q - Z are in a similar unit I made back when my Genesis collection fit on one set of shelves.Originally Posted by Melf
Rich
Tomorrow's Past is Yesterday's Future Today!
very nice set up.
4 Wonderswan Consoles, 98 CIB Wonderswan/Color Games
6 Wonderswan Accessories,1 Wonderswan Prototype

These instructions are great -- inspirational even and exactly what I was searching for. Thanks!
Chronogamer. Every game. Chronologically.
Latest entry 31 March 2010
I have forgotten to feed my fish...
Glad to see someone else finding these useful...and it was fun to see these old photos again. Good luck with your shelves!
Rich
Tomorrow's Past is Yesterday's Future Today!
Very awesome set-up, and I love the Genesis collection.

I did the same thing last fall. I made one for my last-gen games, now I need to make one for my classic stuff. Here's mine:
Xbox Live: Ikari Warrior
PSN: IkariWarrior
My collection: http://users.ign.com/collection/jaysweet99
My theater: http://gallery.avsforum.com/showgall...ppuser/7596262
My gameroom has once again reached “unholy mess” status. Unfortunately, I have run out of gameroom space, and am forced to confront the reality that all of this stuff won’t fit in a single room anymore…
Some respond to such a crisis by cutting down their collection, but I responded by heading down to the basement. The hanging unit I put up a few years ago when I moved the DVDs out of my gameroom looked lonely…
So I decided to build it 2 new friends and move some of my newer gen games to the basement. These shelves are a bit different from the free standing units in my gameroom, so I thought that I would once again resurrect this thread and add another how to…
These shelves are cross-hatched, which requires precise cutting of slots in the shelves. You also have to leave tabs above the top shelf for bolting to the basement joists, and make sure your measurements space these tabs so they end up next to the joists…
After double checking my measurements, I went to Home Depot and bought the necessary supplies. The wood was a bit more expensive than I anticipated, and the bill for materials was just over $130.00. I cut the wood in the garage as before, using a circular saw with the wood clamped to a table. After cutting the pieces to size, however, I took the shelves downstairs for some precision notch cutting on the table saw…
Carefully clamping the shelves together and cutting all notches at once helps to make sure they will fit together at the end. I then took everything back to the garage, and drilled all of the holes in the side boards and bottom shelves. Using a measured and drilled board as a template for the others is a big time-saver….
Once all of the boards were cut and drilled, I sanded all of the rough edges and painted all of the surfaces that would be visible with a quick-drying white primer. Once the boards were dry, I took them downstairs for assembly to avoid having to maneuver a finished unit down a narrow stairway…
I fit the notched shelves and cross boards together on a pair of work horses, and then screwed on the side boards and bottom shelf. Once everything was attached and leveled, I put on the backing board…
After centering it on the back of the unit, I nailed down one edge, and drew guidelines to ensure I didn’t miss a board when nailing on the backing board. Once the lines were drawn, I nailed down the board, moving from one side to the other to avoid making a “bubble” in the board.
I repeated these steps for the second shelving unit, and my next update will hopefully show both of them hanging in place!
Rich
Tomorrow's Past is Yesterday's Future Today!
With construction of the shelving units done, the final step is putting them up. I put 2 bolts in each tab, and drill holes accordingly…
Got some help from my daughters lifting the units into place, and once there, drilled into the joists through the pre-drilled holes in each tab…
Ran bolts through each hole and tightened a lock washer and nut on each bolt. For the larger unit, I had to nail in 4 cross braces to attach the shelving unit to, as the joists on that side of the room run parallel to the wall…
Once all of the bolts are in place, the saw dust cleaned up, and the tools put away, you can enjoy a moment of satisfaction at a successfully completed job…
Now all that’s left is to fill them up and create some much-needed space in my gameroom!
Rich
Last edited by Goodwill Hunter; 04-25-2010 at 06:24 PM.
Tomorrow's Past is Yesterday's Future Today!
Here are the shelves I made for my games and dvds:


Goodwill Hunter, you should be glad you don't live anywhere near me, because if you did I would kidnap you in your sleep and enslave you in my garage. There, you would be forced to build shelves for all eternity. Those look incredibly awesome and I am definitely jealous -- my mish-mash of home made shelves, store bought shelves, and garage sell leftovers makes me want to dig out the saw this spring and try and make something like that. Kudos, man.
You should try your hand at it. I'd never really done any wood working before, but I managed to produce some semi-decent storage for my games last year. If I can pull it off, anyone can (and probably way better).
Another positive was that I ended up with a respectable assortment of power tools I otherwise wouldn't have owned. I ended up adding more tools to my collection as the project grew. It ended up costing me a little less than if I had just purchased commercial storage units, and now I have a garage full of tools at my disposal for future projects, which motivates me to do more.
Props to Goodwill' and everyone who took on similar projects.

I smile whenever this thread comes back. I like it.
<Sothy> its the internet <Sothy> who cares

 Posting Permissions

 Reply With Quote


